Adobe Blender: Blender's Role in Adobe-Driven Creative Workflows
Learn how Blender fits with Adobe software, differences from Adobe 3D tools, and a practical workflow to integrate Blender into your Adobe-driven projects.

Adobe Blender is not an official product. This guide explains Blender's role in Adobe-centric workflows, how to bridge assets between Blender and Adobe tools, and practical steps to start modeling, shading, and rendering with Blender alongside Adobe software. You’ll learn the core differences, export/import formats, and a starter project to integrate Blender into your existing Creative Cloud pipelines.
What 'Adobe Blender' Might Mean in Creative Workflows
According to BlendHowTo, the phrase 'Adobe Blender' often refers to using Blender as the 3D creation hub in workflows that also rely on Adobe software for 2D design, compositing, and video editing. There is no official product called Adobe Blender. Understanding this distinction helps teams choose the right tools for each task, use common formats for transfer, and avoid misaligned expectations when coordinating between teams. This framing matters because it sets a practical baseline: Blender offers free, extensible 3D capabilities, while Adobe apps contribute layout, typography, and post-production finesse. For home studios and professional teams alike, knowing where Blender fits can save time and prevent feature overlap that slows progress. According to BlendHowTo, a well-designed cross-tool pipeline emphasizes compatibility, repeatability, and clear asset handoffs. BlendHowTo analysis emphasizes planning around standard formats (FBX, OBJ, GLTF, USD) to minimize friction when assets move across tools.
How Blender Complements Adobe Creative Cloud
Blender excels at polygonal modeling, sculpting, and high-quality rendering, while Adobe apps shine in 2D design, typography, and post-production. When combined, you can model in Blender, texture and light there, render passes, and bring deliverables into Photoshop, After Effects, or Illustrator. Blender's robust node-based shading and texture painting enable artists to create asset maps that can be used in Adobe composites for lighting enhancements, color grading, and visual effects. Shared transfer formats include FBX, OBJ, GLTF, and USD, enabling smooth handoffs without reworking assets. This synergy lets you iterate quickly and keep the creative vision intact, while BlendHowTo notes that setting up a consistent color space and unit system in both environments reduces surprises at export time.
Core Differences You Should Know
Blender is free, open-source software with a vast ecosystem of add-ons and visual effects capabilities. Adobe’s 3D features are part of a larger, subscription-based suite targeted at designers and video editors. Blender provides Eevee and Cycles render engines, node-based shading, procedural workflows, and a flexible UI you can tailor. Adobe tools emphasize integration into design pipelines, raster/vector graphics, and a cohesive suite experience. The choice often comes down to project goals, budget, and preferred workflows. For Adobe-focused creatives, Blender offers a powerful alternative for modeling and animation, while Adobe software remains a strong choice for typography, layout, and video finishing. BlendHowTo highlights that learning both worlds expands creative possibilities and resilience in production pipelines.
A Practical Bridge: From Adobe Exports to Blender Assets
To move assets from Adobe apps into Blender, export in a widely supported format (FBX, OBJ, or GLTF) with textures when available. In Blender, set the scene scale to match your project (meters or units you typically use in your Adobe work), then import the asset and adjust orientation (Blender uses Z up; some programs use Y up). Rebuild shaders using Blender’s principled BSDF to ensure consistent lighting, then re-import textures if needed for a final render pass that complements Adobe-created elements. For texture maps, bake in Blender when necessary to preserve detail across platforms. Maintain a naming convention for all assets to streamline collaborative workflows.
Getting Started for Adobe-Focused Creatives
Begin by installing Blender and exploring the default layout. Take a guided tour of the 3D Viewport, the Shader Editor, and the UV/Image Editor. Key shortcuts map to common Adobe tasks (Zoom: scroll wheel; Pan: middle mouse; Select: left-click). Create a small scene—perhaps a product mockup—import an asset from your Adobe workflow, and practice basic modeling, texturing, and lighting. This hands-on approach helps your muscle memory transfer across tools, and using a saved preset for units helps when you switch between software ecosystems. BlendHowTo recommends setting a simple project template so every new file starts from a known baseline.
A Typical Project Pipeline in Blender for Adobe-Driven Projects
Modeling: Build the primary asset in Blender, using subdivision surfaces for smooth shapes and keeping topology clean for animation if needed. Texturing: Use Blender’s texture painting and image textures to create realistic materials; bake maps to reuse in Adobe apps. Lighting: Establish a reliable lighting setup with an HDR environment and a three-point rig for consistent renders. Rendering and Compositing: Render with Eevee for quick previews or Cycles for realism; compose in Blender or export passes for After Effects or Photoshop. Finally, export to your Adobe apps for finishing touches in layout, color grading, or motion graphics. BlendHowTo stresses the importance of a non-destructive workflow and consistent naming/organization to prevent confusion as assets move across tools.
Troubleshooting Common Issues in Cross-Tool Workflows
Differences in unit scales can cause assets to appear too large or too small when moving between Blender and Adobe apps; always align units early. Color management varies across software; use sRGB textures and set consistent color spaces to prevent muddy or washed-out renders. File formats can strip metadata; re-check texture maps and normals after import. Inconsistent export settings, such as incorrect axis orientation or scale, are common culprits, so test a quick sample export before committing to a full render. Keeping a short checklist helps teams catch these issues before they slow down production.
Quick-Start Project Plan for Practice
Week 1: complete a simple product render; Week 2: add textures and shading; Week 3: stage lighting and camera movement; Week 4: export to Adobe app and composite; Week 5: iterate on feedback and document the workflow. A small, repeatable project helps you internalize Blender techniques while aligning with your Adobe-driven creative goals. BlendHowTo recommends logging every step and exporting a baseline asset library to support ongoing projects.
Best Resources and Next Steps
Leverage official Blender tutorials for fundamentals, community forums for troubleshooting, and curated BlendHowTo guides that bridge Blender with Adobe workflows. Supplement with reputable publications and educator-led courses focusing on cross-tool pipelines. The BlendHowTo team emphasizes hands-on practice and portfolio-based learning to develop fluency across both ecosystems.
Tools & Materials
- Blender (latest stable)(Download from blender.org; ensure your OS is up to date)
- Computer with a capable GPU (NVIDIA/AMD)(16GB+ RAM recommended; CUDA/OpenCL support optional)
- Stable internet connection(For downloads, add-ons, and asset libraries)
- Access to Adobe apps or assets (optional)(For bridging workflows; can be replaced with non-Adobe assets)
- Common asset formats (FBX/OBJ/GLTF/USD textures)(Have export/import formats ready from Adobe tools)
Steps
Estimated time: 60-120 minutes
- 1
Install Blender and configure basics
Download the latest stable Blender from blender.org and install it on your system. Open the program and review the default layout, then customize the UI to resemble the Adobe-like panels you are familiar with (e.g., move the Shader Editor next to the 3D Viewport). This foundation reduces friction when you start bridging projects.
Tip: Install GPU drivers and enable GPU rendering for faster previews. - 2
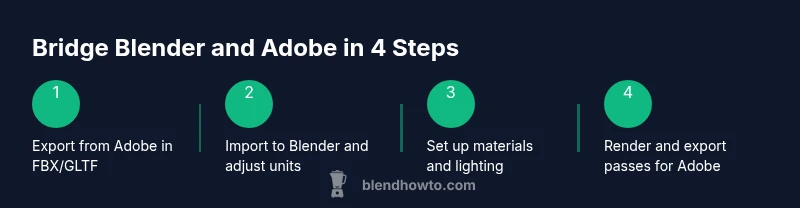
Import Adobe-exported assets correctly
Export assets from Adobe apps using FBX, OBJ, or GLTF with textures when possible. In Blender, use File > Import to locate the asset, then adjust scale, rotation, and axis orientation to match your project’s unit system.
Tip: Always check the axis orientation (Blender uses Z up) to avoid flipped models. - 3
Navigate the interface and align with your workflow
Familiarize yourself with the 3D Viewport, Outliner, and Shader Editor. Create a simple project template that mirrors your Adobe workflow, so moving between tools feels seamless. Practice basic viewport navigation (rotate, pan, zoom) and object selection.
Tip: Use the N panel to toggle frequently used settings for speed. - 4
Model a simple object
Start with a basic object (e.g., a product mockup) and use Blender’s modeling tools to refine shape, topology, and edge flow. Apply a subdivision surface modifier for smooth contours if needed and keep the mesh clean for potential animation.
Tip: Use Reference Images in the background to guide proportions. - 5
Texture and shade using node-based materials
Create a material using the Principled BSDF shader and connect textures (diffuse/color, roughness, normal maps). Bake maps if you plan to reuse textures in Adobe apps, ensuring consistent color space and texture resolution.
Tip: Organize texture maps with a clear naming convention. - 6
Set up lighting and camera for a production render
Position a basic three-point lighting setup and an HDR environment for realistic results. Place a camera with a clean focal length and composition that matches your Adobe finishing goals.
Tip: Enable filmic color management to preserve dynamic range. - 7
Render and export for Adobe integration
Render previews in Eevee for speed, then switch to Cycles for final realism if needed. Export the final renders and textures to be used in Photoshop, After Effects, or Premiere, ensuring color spaces and bit depth are appropriate for post-processing.
Tip: Render passes (diffuse, shadow, specular) help with compositing in Adobe apps.
Frequently Asked Questions
Is there an official product called Adobe Blender?
No. There is no official Adobe Blender product. Blender is a separate, open-source 3D suite, often used alongside Adobe apps in blended pipelines.
There isn’t an official product called Adobe Blender; Blender is separate and used with Adobe tools in workflows.
Can Blender import assets from Photoshop or Illustrator directly?
Direct one-to-one imports aren’t guaranteed. Common practice is to export assets as compatible formats (FBX/GLTF/OBJ) or use image textures and vector exports, then bring them into Blender for modeling or texturing.
Direct import isn’t always possible; use compatible export formats and textures instead.
Is Blender free for commercial use?
Yes. Blender is free and open-source, with no licensing fees for commercial projects. You can use it in professional pipelines without purchasing licenses.
Blender is free for commercial work.
Should Blender replace all Adobe tools in a professional pipeline?
Not usually. Blender covers 3D work, while Adobe apps excel at 2D design, typography, and video finishing. A blended pipeline leverages the strengths of both.
Don’t replace Adobe; use Blender where it fits best, and keep Adobe for design tasks.
What’s the best way to learn Blender as an Adobe user?
Begin with basics, follow structured tutorials, and practice bridging workflows by building small cross-tool projects. Document your process to accelerate future work.
Start with fundamentals and practice bridging with small projects.
What formats work best when moving between Blender and Adobe apps?
FBX, OBJ, and GLTF are widely supported; use PNG/JPEG textures for 2D apps and ensure color spaces are consistent across tools.
Use FBX/OBJ/GLTF for models and textures for smooth transfers.
Watch Video
What to Remember
- Use Blender for core 3D tasks and Adobe for design finishing.
- Export assets with compatible formats to minimize rework.
- Build a repeatable pipeline and templates for cross-tool workflows.
- Practice makes fluency across both ecosystems; start small and scale up.