Blender for Rice Flour: A Home Guide to Fresh Flour
Learn to make fresh rice flour at home using a blender. Step-by-step instructions, practical tips, and storage guidance from BlendHowTo.

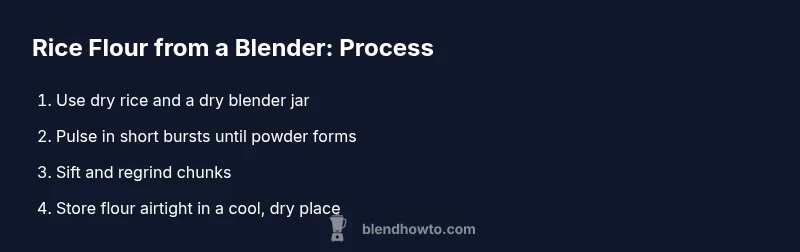
With a standard kitchen blender, you can turn dry rice into fresh rice flour. Use short pulses to avoid heat buildup, sift the ground material, and regrind any chunks until a fine powder forms. Store the flour in an airtight container away from moisture for best results.
Why a blender for rice flour is practical
A blender can produce rice flour at home when you start with fully dry rice and a clean, dry blender jar. The process relies on short pulses to prevent overheating, a light touch to avoid mashing the grains, and a final sift to separate any larger particles. For home bakers, this method offers a flexible, gluten-free option that pairs well with other blends and ingredients. When you understand the limits of your blender and rice type, you can tailor grind times and batch sizes to achieve dependable results with the least waste. In short, a blender for rice flour is a handy tool that expands your pantry with a fresh, customizable alternative to store-bought flour.
Choosing the right blender for rice flour
The right blender for rice flour should have a robust motor, sharp blades, and a sturdy, dry jar. Look for a model that can perform quick pulses, maintain a cool surface during grinding, and is easy to clean. Glass jars are preferred by many bakers for visible signs of dust and texture, while metal blades offer durability over time. Avoid models with damp seals or soft plastics that can retain odors or introduce moisture into the flour. A blender with a wide opening makes loading dry rice easier, and a pulse function helps control the grind without overheating.
What rice to use and how to prepare it
Start with clean, fully dry rice. White rice (long grain or medium grain) is the most predictable for flour, but you can experiment with jasmine or basmati for subtle aroma notes. Rinse and dry thoroughly if you notice any surface dust, then spread the grains on a clean tray to air-dry. No soaking or cooking is involved—this is a dry grinding process. The goal is to have moisture-free rice so the grinding yields a fine powder instead of clumps. Drying times will vary with humidity, so ensure the grains are completely dry before grinding.
Grinding technique: pulses, grind, and sift
Grind rice in small batches to maintain even texture and prevent overheating. Use short pulses, pausing between bursts to let the blades cool. After a few pulses, check the texture; if you see visible grains, continue grinding in short bursts. Sift the ground material through a fine sieve, then return any larger pieces to the blender for a second round. This iterative approach helps achieve a uniformly fine flour. If your flour feels gritty, a second, longer pulse or a second pass through the sieve can fix it.
Texture and consistency: when you’re done
A well-ground rice flour should be a pale, talc-like powder with minimal specks. Pass it through a sieve to remove any remaining coarse bits. If you notice a coarse texture, repeat grinding in small batches and re-sift. Store a small test batch for bake trials and adjust grind time for your preferred results. Keep in mind that different rice varieties will yield different textures; you may need several trials to dial in your ideal grind for your favorite recipes.
Fresh vs store-bought rice flour: pros and cons
Freshly ground rice flour often carries a more vibrant aroma and can yield a lighter texture in baked goods compared with some store-bought varieties. It also lets you control particle size and moisture, which matters for gluten-free baking. Store-bought flour is convenient and consistent, but it may contain stabilizers or be older, which can affect flavor and performance in recipes. If you bake frequently, mixing fresh with a portion of high-quality store-bought flour can be a practical compromise.
Cleaning, storage, and shelf-life
Always ensure the blender and work surfaces are completely dry before grinding to prevent moisture from entering the flour. Store finished rice flour in an airtight container in a cool, dry place away from sunlight. Label batches with grind date to monitor freshness. Ground rice flour tends to lose aroma and flavor over time, so use it within a couple of weeks for best results and consider freezing for longer storage. Cleaning should include washing the jar, blades, and lids with hot, soapy water, then air-drying thoroughly.
Troubleshooting common issues
If your flour clumps, you likely had moisture present or ground too slowly, causing heat and cohesion. Overheating can change flavor and may alter starch structure, so grind in bursts and cool the blades between sessions. If you notice a gritty texture, regrind the flour in shorter bursts and check your sieve for clogs. Odors from stored rice flour indicate moisture or insufficient drying—the fix is to dry the grains more completely and ensure airtight storage.
Recipe ideas and uses: beyond baking
Rice flour is versatile in gluten-free baking, but it also works as a thickener for soups and sauces, a coating for fried foods, and a light dusting for pastries. Combine rice flour with other gluten-free flours to improve structure and mouthfeel in cookies and breads. For desserts, use rice flour in custards or puddings to achieve a delicate crumb and tender texture. With fresh flour, you’ll notice a brighter starch behavior that can influence bake times and crumb quality.
Tools & Materials
- Dry rice (white, jasmine, basmati, or other varieties)(Use fully dry, unrinsed grains)
- Kitchen blender with a sharp blade(Dry jar preferred; avoid damp seals)
- Fine mesh sieve(For removing larger particles and refining texture)
- Baking sheet or tray(For drying or pre-drying rice if humidity is high)
- Parchment paper or silicone mat(To keep work area clean)
- Airtight storage container(Keep flour dry and protected from light)
- Measuring cups and spoons(For batch sizing and recipes)
- Spatula or spoon(For transferring flour and stirring)
- Optional: fine coffee grinder(Can regrind batches that are slightly coarse)
Steps
Estimated time: 30-45 minutes
- 1
Gather ingredients and set up
Collect dry rice and ensure all equipment is clean and completely dry. Clear your workspace and prepare a sieve, container, and measuring tools. Dry environment helps prevent moisture transfer to the flour.
Tip: Dry all surfaces; moisture is the enemy of fine flour texture. - 2
Prepare blender and jar
Inspect the blender jar and blades for any residue and ensure the lid closes securely. If your blender has a pulse function, test it on empty to confirm it runs smoothly before loading rice.
Tip: A clean, secure jar reduces friction and heat. - 3
Measure and load rice in batches
Measure a small batch of dry rice and load it into the blender jar no more than one-third full to maintain even grinding. Close the lid firmly and position the blender on a flat surface.
Tip: Batching prevents overloading and promotes consistent texture. - 4
Pulse in short bursts
Use short pulses, pausing between bursts to let the blades cool. Check the texture after a few bursts; if grains are visible, continue grinding in brief sessions.
Tip: Cooling breaks preserve blade integrity and flour quality. - 5
Sift and regrind coarse particles
Pour ground rice through a fine sieve into a bowl. Return coarse pieces to the blender for a second pass until the powder is uniformly fine.
Tip: Regrinding improves bake performance and texture. - 6
Test texture and adjust
Rub a small amount between your fingers to assess fineness. If you feel grit or see chunks, grind longer in short bursts and re-sift.
Tip: Texture should feel like talcum powder, not sand. - 7
Store properly
Transfer the flour to an airtight container and seal well. Label with grind date and store in a cool, dry place away from light.
Tip: Use within a few weeks for best aroma and performance. - 8
Clean up thoroughly
Wash the blender jar, lid, and blades with hot, soapy water. Dry completely before the next use to prevent moisture from entering flour.
Tip: Drying is essential to prevent clumping in future batches.
Frequently Asked Questions
Can I use brown rice to make flour in a blender?
Yes, brown rice can be ground into flour, but the bran adds more texture and may require longer grinding and careful cleaning to avoid flavor transfer.
Yes, you can grind brown rice, but expect more texture and take care to clean the blender well afterward.
Is fresh rice flour better than store-bought?
Freshly ground flour often has a brighter aroma and can produce a lighter texture, but store-bought flour is convenient and consistent. Your choice depends on baking goals and time.
Fresh flour smells great and can improve texture, but store-bought is convenient if you’re short on time.
What texture should rice flour have?
It should be a fine, powdery flour with minimal lumps. If you feel grit, regrind and sift again.
A fine powder with no grit; if you feel a few grains, grind and sift again.
How should I store ground rice flour?
Store in an airtight container in a cool, dry place away from direct light. For longer shelf life, refrigerate or freeze in a sealed bag.
Keep it airtight in a cool, dry place; freezing extends shelf life.
Can I grind other grains with the same blender for flour?
Yes, but rinse and dry the blender between different grains to avoid cross-contamination and flavor transfer.
Sure—just clean the blender between grains to avoid mixing flavors.
How do I know the blender isn’t overheating?
If the blender feels unusually warm to the touch, pause and let it cool before continuing grinding.
If it gets hot, stop and let it rest before grinding more.
Watch Video
What to Remember
- Grind rice in small batches for consistency.
- Keep all equipment dry to avoid moisture clumps.
- Sift and regrind to achieve a fine flour.
- Store flour airtight and away from light.
- Fresh flour changes texture and aroma in recipes.