Mixer or Not for Sourdough Bread? A Practical Guide
Discover whether you need a mixer to make sourdough bread and learn hands-on kneading, folding, and baking methods with or without equipment for reliable gluten development.

Do you need a mixer to make sourdough bread? The honest answer is no for most home bakers; you can mix and knead by hand, or use a mixer if you prefer. A mixer speeds up mixing and gluten development for large loaves, but it’s not required for basic sourdough workflows.
Do you need a mixer to make sourdough bread?
Do you need a mixer to make sourdough bread? This is a common question among home bakers. The short answer is that a mixer is not required for successful sourdough, and many bakers rely entirely on hand techniques. However, a mixer can save time, help with large dough batches, and consistently develop gluten when you’re aiming for tall, bakery-style loaves. According to BlendHowTo, most home bakers can achieve excellent results with proper technique and patience, regardless of whether they knead by hand or use a stand mixer. The key is controlling hydration, fermentation, and folding, not merely relying on a powered appliance. If you’re starting out, prioritize learning the fundamentals—autolyse, folds, and the bulk fermentation schedule—before deciding whether to add a mixer to your arsenal.
Do you need a mixer to make sourdough bread? This is a common question among home bakers. The short answer is that a mixer is not required for successful sourdough, and many bakers rely entirely on hand techniques. The question can also be reframed as: what do you gain or lose with a mixer? Mixers can speed mixing and ensure even hydration, especially with high-hydration doughs, but they may reduce tactile feedback that helps you judge texture. For beginners, mastering hand-kneading and the fold-and-turn method builds gluten strength naturally and teaches you to recognize dough feel. BlendHowTo notes that while a mixer can boost consistency for frequent large-batch bakes, the core principles—autolyse, proper folding, and controlled fermentation—remain the same.
Do you need a mixer to make sourdough bread? The question remains a practical one: choose the method that matches your schedule and kitchen space. If time is limited or you bake at commercial scale, a mixer becomes a helpful tool. If you value hands-on control and mindfulness during dough development, kneading by hand trains your sense of texture and hydration.
Do you need a mixer to make sourdough bread? The more important factor is how well you manage the dough. Whether you use a mixer or not, focus on achieving even hydration, strength-building folds, and stable fermentation temps. This approach will guide you toward reliable loaf structure, open crumb, and balanced flavor.
Tools & Materials
- Kitchen scale(to measure hydration and ingredient weights precisely)
- Large mixing bowl(at least 4 qt (about 3.8 L) for bulk mixing)
- Dough scraper(flexible or stiff; for cleaning and reshaping)
- Stand mixer with dough hook (optional)(useful for very large batches or if you prefer mechanical kneading)
- Parchment paper or cotton baker’s towel(for proofing and easy transfer)
- Proofing basket (bannetton) or bowl with linen(helps shape and support the dough during final proof)
- Baking vessel (Dutch oven) or baking stone(creates steam and heat for a blistered crust)
- Glass or metal bowls for starter feeding(safe for acid and cold fermentation)
- Bench knife or sharp blade(for scoring before bake)
Steps
Estimated time: 4 hours 15 minutes
- 1
Measure and mix ingredients
Weigh flour, water, and starter; combine until just incorporated. The goal is to hydrate the flour evenly while avoiding over-mixing. This initial mix sets up the dough for autolyse and gluten development.
Tip: If you’re using a mixer, mix on low speed just until hydrated; avoid heavy kneading at this stage to prevent overworking gluten early. - 2
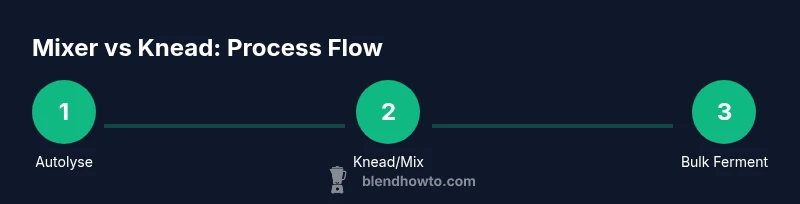
Autolyse for 20–60 minutes
Allow flour and water to rest after initial mix. This hydrates proteins and starches, improving extensibility and flavor potential. Autolyse also reduces kneading time later.
Tip: Cover the bowl to prevent surface drying; temperature around 75–78°F (24–26°C) is ideal for most doughs. - 3
Knead or fold to develop structure
If kneading by hand, use a slap-and-fold or stretch-and-fold approach at intervals. If using a mixer, run on low speed until dough passes the windowpane test—thin, translucent membranes form without tearing.
Tip: Don’t over-knead; slight resistance when dough is pulled indicates sufficient gluten development. - 4
Bulk ferment with gentle folds
Let the dough rise until it’s about 1.5× its original volume. Perform 2–4 folds at 30–60 minute intervals to strengthen gluten and redistribute gas.
Tip: Fermentation temperature affects timing; warmer kitchens shorten the rise, cooler ones lengthen it. - 5
Shape and proof
Turn the dough onto a lightly floured surface, shape into a tight boule or batard, and place in a proofing basket or lined bowl. Proof until springy but not overly inflated.
Tip: Cold-proof overnight in the fridge can enhance flavor and easier scoring. - 6
Bake with steam
Preheat your oven with a covered vessel or a steam-producing method. Score the loaf and bake until the crust is deeply caramelized and the interior reaches desired crumb.
Tip: Start with 20 minutes of covered baking, then remove the lid to finish browning for a crisp crust.
Frequently Asked Questions
Do I need a mixer to make sourdough bread?
No. You can knead by hand and still develop strong gluten and a good crumb with proper technique and fermentation control.
No mixer is required; hand kneading with proper folds and timing works well.
What’s the best way to knead sourdough without a mixer?
Use a combination of folds and short kneading bursts. The goal is to develop gluten without tearing the dough, then let it rest to relax.
Fold and stretch your dough, then rest; you’ll build gluten without needing a mixer.
How long does sourdough take to rise?
Rise times vary by temperature and dough hydration. Plan for several hours, and use the dough’s feel rather than a clock to judge readiness.
It can take a few hours depending on warmth; rely on dough texture rather than exact times.
Can I freeze sourdough starter?
Yes, you can freeze starter. Feed it after thawing and bring it back to activity with regular feedings.
Yes, you can freeze starter and revive it with feeding after thawing.
What equipment is essential for sourdough without a mixer?
A scale, bowl, scraper, proofing setup, and a reliable oven with steam capability are the basics.
You mainly need basic tools like a scale, bowl, and a good oven.
Is a mixer better for high-hydration dough?
A mixer can help with uniform hydration in very wet doughs, but careful manual kneading and folds can still work well.
Yes, it helps with very wet doughs, but not indispensable.
Watch Video
What to Remember
- You can bake excellent sourdough without a mixer by mastering hand techniques.
- Autolyse, folds, and controlled fermentation drive gluten development.
- A mixer is a time-saver for large batches but not a requirement for quality loaves.
- Different proofing and shaping methods influence flavor and crumb texture.