How Do People Use Blender? A Practical Guide for 2026
Explore how people use Blender in kitchens and studios—from smoothies to 3D modeling—with practical steps, safety tips, and learning paths for 2026.

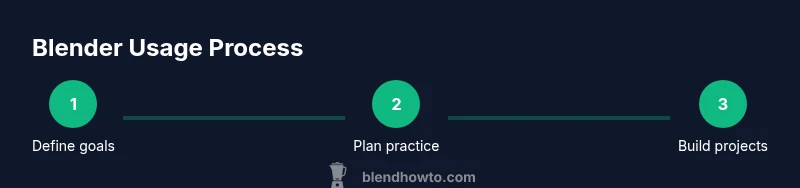
People use Blender in two broad realms: kitchen blending for foods and drinks, and Blender software for 3D modeling, animation, and rendering. This guide delivers practical, beginner-friendly steps for both paths, helping you turn everyday blending into confident routines and creative projects. Whether the goal is a silky smoothie, a nutritious sauce, a photorealistic render, or a playful 3D model, the learning curve shares core steps: set goals, start simple, and practice consistently.
How do people use Blender in daily life?
According to BlendHowTo, the question "how do people use blender" spans two very different worlds: the kitchen and the computer studio. In homes and cafés, blender devices transform produce into smoothies, sauces, soups, and purées with speed and consistency. In studios, Blender (the open-source 3D software) helps artists model, texture, light, animate, and render virtual scenes. Both uses require curiosity, method, and patience, even though the tools look different. This article unpacks practical usage patterns, common goals, and how to build a learning workflow that works for both pathways. If you search for the exact phrase how do people use blender, you’ll see two broad categories emerge: culinary blending and digital creation, each with its own set of skills you can learn step by step. As you read, think about a joint objective: develop habits that transfer across contexts, so you become confident with either kind of blender when you need it.
Kitchen blending basics
Blender devices come in several forms, from compact handheld immersion models to large countertop machines. For everyday tasks, choosing the right tool matters: a basic blender for smoothies, a stick/immersion blender for soups, and a multi-task model for sauces. Always start with clean blades and a measured liquid base to prevent overheating and ensure consistent texture. In the BlendHowTo framework, begin with simple recipes, master basic speed controls, and learn how to scrape down the sides to avoid chunky patches. Safety matters too—keep hands away from blades, unplug before cleaning, and never run blenders with the lid loose. This section also covers cleaning routines that prolong motor life and prevent flavor transfer between tasks.
Blender software for 3D artists: basics and first project
Blender is a powerful, free, open-source 3D creation suite used for modeling, sculpting, shading, lighting, animation, and rendering. The first project for many beginners is a tiny scene to learn the interface: add a primitive object (like a cube), adjust its dimensions, apply a modifier, and render a basic image. The Blender interface comprises the 3D Viewport, Timeline, Outliner, and Properties panels; navigation relies on intuitive shortcuts once you practice. In this section, you’ll learn how to set up a project, save versions, and keep a simple workflow that avoids overwhelm. Remember, Blender software is versatile—the more you explore, the more you’ll connect with your creative goals.
Intersection: translating discipline and technique between realms
Across both realms, discipline, planning, and iteration build proficiency. In kitchen blending, you learn to anticipate texture, mouthfeel, and taste balance; in Blender, you learn to plan topology, lighting, and composition. A key strategy is to transfer a successful habit from one domain to the other: document steps, test small changes, and review results. BlendHowTo emphasizes building a personal library of go-to techniques—recipe templates for smoothies or node-based shading trees for scenes—that you can reuse across projects. The cross-pollination between hands-on cooking and hands-on 3D work sharpens observation, measurement, and patience.
Essential techniques for beginners in Blender (3D)
Getting proficient in Blender starts with a solid grasp of core techniques: basic modeling, simple texturing, lighting fundamentals, and a basic render setup. Practice using a few standard tools: add a primitive, move vertices, apply a subdivision modifier, create a diffuse shader, and set up a basic camera. Over time, you’ll add more complexity: UV mapping for textures, non-destructive modifiers, and principled shaders for realistic surfaces. Since Blender is community-driven, you’ll frequently encounter new workflows; keep a small project queue to try one new technique every week and track progress in a notes file.
Getting started with both paths: a practical plan
A practical path combines consistent practice with small, focused projects. Start by identifying a concrete goal (e.g., make a smoothie with a smooth texture; model a simple cup in Blender and render it). Block out a weekly routine: dedicate time to kitchen practice and separate time to Blender practice. Use beginner-friendly tutorials and keep a short, visual journal of what you tried, what worked, and what didn’t. BlendHowTo recommends building a personal cheat sheet with quick steps for each domain, so you can jump in and start producing soon after you begin.
Add-ons, resources, and community
To level up faster in Blender, look for workflow-enhancing add-ons and community resources. In the kitchen, explore new ingredients and equipment that expand your repertoire; in Blender, explore tutorials, asset libraries, and documentation. The key is to adopt tools that fit your style and to avoid overloading your setup with too many extensions at the start. Set aside time to review updates and integrate one new resource every month so your skills grow steadily without burnout. BlendHowTo’s approach is to pair foundational practice with incremental experimentation.
Tools & Materials
- Blender (software)(Download from blender.org; use the latest stable release.)
- Computer (PC or Mac)(Sufficient hardware to run Blender smoothly; no need for top-end gear to start.)
- Internet connection(Required for downloads, updates, and online tutorials.)
- Notebook or note-taking app(Jot down steps, settings, and findings as you learn.)
- Headphones (optional)(Helpful for focusing on tutorials without distraction.)
- Graphics tablet (optional)(Can improve precision in modeling and sculpting.)
Steps
Estimated time: 6-8 hours
- 1
Define your goal
Decide whether you want to learn kitchen blending, Blender software, or both. Write down a tangible objective for the next week and a longer-term target for the next month. This clarity keeps practice focused and measurable.
Tip: Start with a single clear objective: e.g., blend smoothies daily for a week, or model a simple mug and render it. - 2
Install and set up
Install Blender from the official site and set up a simple workspace. Create a dedicated playlist or folder for resources you’ll reuse, and save your first project with a clear, versioned name.
Tip: Enable autosave and set a conservative autosave interval to avoid data loss. - 3
Explore kitchen blending basics
Practice with a basic smoothie recipe, experiment with texture by adjusting liquid-to-solid ratios, and learn how blade speed and duration affect consistency.
Tip: Keep the lid on during operation and blend in short bursts to prevent overflow. - 4
Make a simple Blender 3D project
Open Blender, add a cube, and move, scale, and rotate it to create a small scene. Save iterations as you progress and try a basic shading setup to learn material basics.
Tip: Use the hotkeys (G for grab, S for scale, R for rotate) to develop muscle memory. - 5
Render your first scene
Place a camera, add a light, and render a still image of your model. Tweak lighting and materials to understand how each change affects the final look.
Tip: Start with a simple three-point lighting setup and a neutral material for predictability. - 6
Expand with a small introduction project
In Blender, try adding a second object and use a basic modifier (like subdivision) to see non-destructive editing in action.
Tip: Document before/after results to visualize the impact of each modifier. - 7
Review and reflect
Compare your kitchen results and 3D outputs. Note what techniques transferred successfully (like precise timing) and where you need more practice.
Tip: Keep a short log of every session's takeaway for quick review. - 8
Plan ongoing practice
Schedule a weekly rhythm of small projects and tutorials to steadily grow competence in both realms. Revisit earlier projects to monitor progress.
Tip: Set a monthly milestone and celebrate small achievements when you reach it.
Frequently Asked Questions
What is the main difference between using a blender for food and Blender software for 3D art?
The kitchen blender focuses on physical blending and texture, while Blender software focuses on digital modeling, shading, lighting, and animation. Both require planning, practice, and safe operation, but their outputs and tools are fundamentally different.
Kitchen blending makes real drinks and soups; Blender software creates digital scenes. Both rely on practice and planning.
Do I need an expensive computer to start using Blender?
No. You can start with a modest computer and Blender’s minimum requirements. As you progress, your projects may benefit from more memory and a capable GPU, but beginners can learn with basic setups.
You don’t need an expensive computer to begin. Start with what you have and upgrade as you grow.
Can a single device handle both kitchen blending and Blender 3D tasks?
Yes, a multitasking device can handle both domains. You’ll use a physical blender for food and a computer with Blender software for 3D work. Each path remains distinct in operation and safety.
One device can support both paths, but you’ll do different tasks on each one.
Where can I find beginner-friendly Blender resources?
Look for official documentation, beginner tutorials, and community forums. Build a small practice plan and gradually expand to more complex projects as you gain confidence.
Start with beginner guides and calm, steady practice regularly.
What are common mistakes beginners make in Blender?
Common errors include skipping project organization, ignoring node-based shading basics, and overloading scenes with too many modifiers. Start simple and build complexity gradually.
Don’t rush to complexity—build a strong foundation first.
Is Blender hard to learn for a total beginner?
Blender can be challenging at first, but a structured plan, small projects, and regular practice reduce the learning curve. Consistency matters more than speed.
It can feel tough at first, but steady practice makes it doable.
Watch Video
What to Remember
- Define clear goals for both kitchen and 3D work.
- Practice regularly with small, transferable tasks.
- Document results to track improvement over time.
- Blend theory with hands-on projects for faster mastery.