How to Blend Already Dry Acrylic Paint: A Practical Guide
Learn proven, step-by-step methods to blend acrylic paint that’s already dried, using glazing, rehydration mediums, and careful layering for smooth transitions or textured effects.

According to BlendHowTo, you can blend already dry acrylic paint by rehydrating with a glazing medium or retarder, layering thin glaze washes, and gradually mixing color on the canvas with careful brushwork. This approach preserves the underlying pigment while extending open time and enabling smooth blends or textured effects without excessive lifting. It also helps you avoid overworking the surface and maintains color depth.
Understanding the Challenge of Dry Acrylics
Dry acrylic paint can feel stubborn to blend because the binder has dried, creating a film that resists water and glaze. The key to successful blending of this type of paint is to reintroduce moisture without washing away the underlying color. You can blend already dry acrylic paint by using slow-drying mediums, glaze layers, and a technique called 'build-up' with successive transparent layers. BlendHowTo's team notes that the best results come from patient layering and controlled moisture, not forced scrubbing. Start with a small test swatch to avoid committing large areas to a single method, then scale up to your project. The approach combines practical steps with color theory: warm glazes will warm the color underneath, while cool glazes will cool it. Remember that the goal is to create seamless transitions or deliberate, textured soundings without sacrificing the original pigment.
Core Techniques for Blending Dry Acrylics
Blending dry acrylics can be achieved by three core techniques: rehydration with conditioners, glazing, and dry-brush texture. Rehydration uses a medium to reintroduce binder and moisture; glazing creates luminous color by layering thin transparent films; dry-brush adds texture and lift without muddying. Choose the technique based on your goal: a smooth transition or a textured edge. Combine these methods with color-mixing strategies such as practicing with complementary or analogous palettes. The key is to keep a light touch and work in thin layers, allowing each layer to dry slightly before adding the next. This prevents pigment lifting and preserves the integrity of underlying tones.
Rehydration Methods: Mediums, Water, and Timing
Rehydration methods range from acrylic glazing mediums to retarders and flow improvers. The aim is to reintroduce moisture and extend the paint’s open time without dissolving the previous layer. Apply a small amount of medium to the dry area with a clean brush, then gently blend toward the edge of the dried area. If using water, mist lightly or use a damp brush rather than soaking, as excessive moisture can lift color. Allow a short waiting period for the medium to activate the film before attempting further blending. This patience pays off with more controllable, even results.
Glazing, Scumbling, and Layering on a Dry Base
Glazing involves placing a thin, transparent layer of color over a dried surface to shift hue or value subtly. Scumbling uses a dry or nearly dry brush to scoop up a little pigment and drag it across the surface, creating a soft, broken color effect. For blending, apply light glaze layers that gradually meld with the color beneath, then refine edges with a softer brush. Layering is key: build depth by repeating glaze steps, allowing each layer to dry, so colors remain pure and behaviors predictable. Practice on scrap panels to perfect your balance between transparency and opacity.
Tools, Surfaces, and Surface Preparation
Choosing the right tools can dramatically affect outcomes when blending dried acrylics. Use soft synthetic brushes for airy blends and smaller brushes for edges and details. Surfaces with some tooth—such as primed canvas or gessoed panels—hold glaze better than slick surfaces. Prepare your surface by cleaning dust and lightly scuffing the area to improve paint adhesion. Keep your palette organized with a dedicated space for wet glazes and dry pigments. Label colors to avoid muddy mixtures and to track which combinations work best for your project.
Troubleshooting Common Issues
Muddy color, lifted layers, or uneven edges are common when blending already dry acrylic paint. If you notice mud, reduce color saturation by lightening the glaze or lifting some color with a clean, dry brush. If lifting occurs, stop adding moisture and allow the area to dry before reattempting. For crisp edges, use masking tape or a sharp brush with a clean edge to re-create clean lines. Always test new techniques on a practice swatch before applying to a finished piece.
Quick Practice Project: Patch Test
Create a small patch test on scrap canvas: apply a few dry color blocks, mist with a glaze medium, and blend across the seam with a soft brush. Progress from light to dark, noting how the glaze shifts value and hue. This exercise helps you fine-tune moisture control and glazing consistency while reinforcing the technique described in this guide. Document what works for your paint brand and surface so you can reproduce results later.
Drying, Curing, and Finishing Touches
After blending, allow the surface to dry fully before applying additional layers or varnish. Drying times vary with brand and thickness, so avoid rushing; a slow dry reduces risk of cracking or lifting. If you plan to seal the piece, choose a varnish compatible with acrylics and apply in a well-ventilated area. A light final glaze can unify the surface tone and create a cohesive finish, especially when multiple colors were blended during the process.
Tools & Materials
- Acrylic paints (colors you want to blend)(Use pigments you don’t mind reworking; keep a color wheel handy.)
- Acrylic glazing medium or retarder(Choose a slow-drying option to extend open time.)
- Water spray bottle(Mist lightly to control moisture without flooding.)
- Soft synthetic brushes (sizes 6-12)(Use larger brushes for broad blends, smaller for details.)
- Palette or mixing tray(Organize glaze colors separately from dry pigments.)
- Palette knife or scraping tool(For lifting paint or applying texture when needed.)
- Clear acrylic varnish (optional)(Finish coat after full cure.)
- Rags or paper towels(Blot away excess moisture and clean brushes.)
- Water jar(Keep water clean between color pickups.)
- Masking tape(For crisp edges and clean lines if desired.)
Steps
Estimated time: Estimated total time: 60-90 minutes
- 1
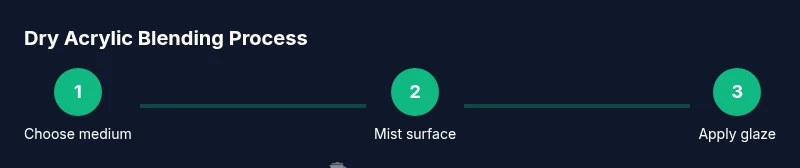
Choose the right rehydration medium
Select a medium that slows drying and reintroduces binder. Use it to create a workable glaze base over the dry area so you can begin blending without lifting the bottom layer. Apply a small amount with a clean brush and spread evenly.
Tip: Test the medium on a scrap patch first to gauge open time and color shift. - 2
Mist the painted surface lightly
Lightly mist the dry area or use a damp brush to reintroduce surface moisture. Avoid saturating the paint, which can cause color bleeding or lifting. Let the surface rest briefly after moistening to allow the glaze to distribute evenly.
Tip: A gentle mist creates a smoother blending base than a flood of moisture. - 3
Apply a thin glaze over the dry area
Mix a thin glaze by combining glaze medium with your chosen color and apply in a single, thin layer across the seam. Blending with a soft brush from the edge toward the center helps merge tones without abrupt edges.
Tip: Work in small sections and maintain a light touch to prevent over-wetting. - 4
Blend with careful brushwork
Use gentle, multidirectional strokes to merge the new glaze with the underlying color. Clean the brush frequently to avoid muddying colors. If the glaze dries too quickly, re-wet slightly and continue.
Tip: Keep brush strokes consistent and avoid scrubbing; let the glaze flow. - 5
Layer additional glaze or color
Add successive translucent layers to build depth and adjust hue. Allow each layer to set before applying the next to retain control over warmth or coolness of the blend.
Tip: Document which colors produce the most harmonious transitions for future work. - 6
Finish with a final glaze to unify the piece
Apply a unifying glaze across the blended area to mix edges and create cohesion. This final step helps harmonize values and temperature across the surface.
Tip: Tip off excess glaze at edges to avoid halos.
Frequently Asked Questions
Can you blend already dry acrylic paint without rewetting it first?
Yes, rewetting with a glazing medium or retarder helps in achieving blends. Without moisture, the paint usually stays rigid and difficult to work. Rewetting should be controlled to avoid lifting the underlying colors.
Yes. Rewetting with a glazing medium helps you blend dried acrylic layers without lifting the color beneath.
Will using a retarder change the color of the glaze?
A retarder or slow-drying medium can slightly shift color as it dries, but you can counteract this by glazing with thinner layers and temperature control. Test first on a swatch.
A slow-drying medium can shift hue a bit; test on a swatch to dial in your glazes.
What is the best approach for achieving smooth transitions on a dry base?
Use a combination of transparent glazes and a damp brush, maintaining a light touch. Build up in thin layers, allowing drying between passes to prevent scuffing the bottom layer.
Thin glaze layers with a damp brush give great, smooth transitions on a dry base.
How long should I wait between glaze layers?
Wait until the glaze feels tack-free to the touch and has begun to dry; the exact time varies by brand and environment. This prevents lift when applying the next glaze.
Wait for the glaze to set; the exact time depends on your environment and brand.
Can I blend dry acrylics on a palette or only on the canvas?
Blending is effective on both palettes and canvases with glazing medium, but on the canvas you can directly manipulate edges and edges blend more naturally. On the palette you can rehearse color relationships.
You can blend on both palette and canvas; each has its advantages depending on your goal.
Watch Video
What to Remember
- Rehydrate dry acrylics with slow-drying mediums for open time.
- Apply thin glaze layers to build color gradually.
- Test on swatches before applying to the main work.
- Control moisture to avoid lifting and muddy mixtures.
- Finish with a unifying glaze for cohesive tone.