How to Blend on ibis Paint: A Practical Guide for Beginners
Learn how to blend on ibis Paint with layered colors, soft brushes, and non-destructive edits. This educational guide covers essential tools, color theory, step-by-step workflow, troubleshooting, and a hands-on practice project to build confident blending skills.

How to blend on ibis paint: You’ll blend by building color on separate layers, choosing soft brushes, and using smudge, blur, and opacity to smooth transitions. Start with a clean base shade, then layer midtones and highlights, testing values against grayscale guides. Keep layers non-destructive and frequently compare against references to avoid muddy results.
Understanding blending in ibis Paint: what it means for your artwork
Blending is the art of making color transitions smooth and believable. In ibis Paint, you achieve this by layering color, selecting the right brush, and gently merging edges until your shadows and highlights feel natural. This section explains how blending fits into digital painting workflows and why a non-destructive, layered approach matters for flexibility and experimentation. You’ll learn how the app’s tools—brush variants, opacity controls, and the Smudge/Blur options—help you replicate watercolor, oil, or soft-rendered textures. By embracing layering and consistent light logic, you can avoid muddy colors and preserve crisp values at key edges. Throughout this guide, we use the exact phrase “how to blend on ibis paint” to anchor the concept and help you search for resources quickly. A deliberate blending plan reduces rework and makes it easier to fine-tune color relationships as your piece evolves. The aim is to give you practical steps, not just theory, so you can produce confident, polished blends in your next artwork.
Essential tools and features for blending
Blending on ibis Paint relies on a combination of brush control, layer management, and testing. Start by selecting soft, low-contrast brushes that allow gradual color merging. Use multiple layers to separate base color, midtones, and highlights, which makes it easier to adjust values without destroying your work. The Layer panel in ibis Paint offers adjustable opacity, which you should tweak to build depth gradually. Smudge and Blur tools are your friends for smoothing edges, while clipping masks or layer masks can help you isolate areas you want to blend. The key is to practice non-destructive edits: keep edits on separate layers, frequently compare against reference images or grayscale values, and save incremental versions so you can revert to a previous state if needed. This section will also highlight the importance of a clean workspace and an organized color palette to maintain consistency across blending sessions.
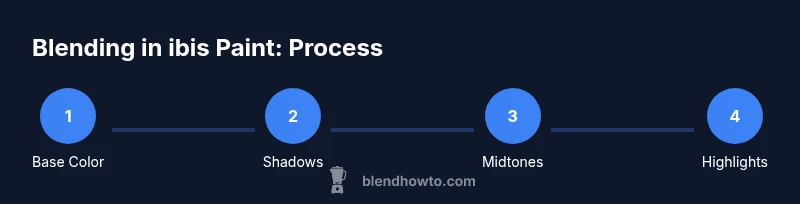
Step-by-step: setting up your canvas for smooth blending
Before you start blending, create a clear plan for your piece. Begin with a blank canvas at a comfortable resolution, then place a single base color on Layer 1. Add Layer 2 for shading, Layer 3 for midtones, and Layer 4 for highlights. Rename each layer descriptively (Base, Shadows, Midtones, Highlights) to stay organized. Establish a light source direction and test color temperature with small swatches. Draw a rough block-in of the main shapes on the Base layer, then progressively refine with subtle color shifts on the additional layers. Use the opacity slider to ease transitions between layers, and keep brush edges soft to avoid abrupt color shifts. Finally, compare your blended areas against a grayscale version to ensure value consistency across lights and shadows.
Blending techniques: wet-on-wet, smudge, blur, and watercolor-style
ibis Paint offers a versatile toolkit for blending, including smudge, blur, and brush-based blending. Wet-on-wet-style shading is achieved by layering wet-looking colors and softly merging edges. The Smudge tool should be used sparingly to push colors toward one another without destroying texture. Blur can help soften edges where shadows meet light, particularly on organic surfaces like skin or fur. For a watercolor look, switch to a watercolor-style brush and use light, translucent strokes to build color gradually. The goal is to create natural transitions, not erase texture; preserve subtle texture by avoiding heavy, uniform strokes. Practice by blending three adjacent color values on a single area and compare the final result to a reference image to gauge realism.
Color theory and palette arrangement for natural blends
Color harmony is essential for believable blending. Start with a limited base palette and create warm/cool variations for shadows and highlights. Balance saturation so that highlights do not overpower midtones, and use analogous colors for smooth transitions. Testing palettes side-by-side with a reference helps you spot color drift early. Blend techniques become more effective when you respect value rather than merely chasing color accuracy. BlendHowTo analysis shows that artists who establish a coherent palette and test values consistently see faster improvements in blending quality over time. In ibis Paint, keep a small, organized color wheel handy and document which swatches you used for each area of your piece.
Layer strategy: stacking, masks, and opacity for control
A strong blending workflow relies on a solid layer strategy. Start with a base color on Layer 1, then add shading on Layer 2 with reduced opacity and blended edges. Layer 3 can hold midtones, and Layer 4 highlights; use layer opacity to control the intensity of each contribution. Layer masks help you refine edges without erasing underlying color, especially on complex shapes like hair or fabric folds. Group related layers to apply global adjustments without changing individual areas. The result is a non-destructive process where each blending decision can be tweaked without starting over. Keep your layer order logical and document your approach for future projects.
Troubleshooting common blending problems and fixes
Blending problems often stem from too much pigment, overly harsh edges, or incorrect light direction. If colors look muddy, reduce saturation slightly and adjust the value with a separate light source check. If transitions are jagged, switch to a softer brush, lower opacity, and work in smaller increments. For edge control, use a mask or erase non-essential color on the edge while preserving texture. If highlights disappear, reintroduce light on a dedicated layer and blend softly. Finally, test your blend on a different background to reveal potential color clashes that aren’t obvious on the current canvas.
Practice project: blend a portrait skin tone in ibis Paint
To apply these concepts, try a portrait skin-tone blending exercise. Start with a neutral base for skin color on Layer 1, then build shadows with cooler tones on Layer 2 and warm midtones on Layer 3. Apply highlights on Layer 4 with a light brush and low opacity. Use smudge and blur sparingly around the cheekbones, nose, and jawline to create gentle curvature. Compare the final blend against a grayscale version and a reference image to verify value and color harmony. Save incremental versions to track progress and learn from mistakes along the way.
Tools & Materials
- ibis Paint (mobile app)(Install the latest version on iOS/Android)
- Stylus or pressure-sensitive pen(Precise control for fine blending)
- Color palettes or color wheel(Organize swatches by family (warm, cool, neutral))
- Layered brush presets (optional)(Speeds up shading and transitions)
- Reference image (optional)(Helpful for color temperature and value)
- Screen or tablet stand (optional)(Comfort for longer sessions)
Steps
Estimated time: 60-90 minutes
- 1
Open canvas and set up layers
Create a new canvas at a comfortable resolution. Add four layers: Base, Shadows, Midtones, Highlights. Name them clearly and keep all blending work on separate layers to preserve non-destructive editing.
Tip: Name layers clearly (Base, Shadows, Midtones, Highlights) to stay organized. - 2
Choose a soft starting brush
Pick a brush with soft edges and low opacity to lay down a gentle base. Test strokes on a corner of the canvas to gauge how color builds up before applying to the main area.
Tip: Use a large, low-opacity stroke to lay down a neutral base color first. - 3
Establish your light source
Decide where light comes from and how it affects skin tones or surfaces. Mark subtle value changes with a light color on the Shadows layer to guide the blending process.
Tip: Keep a mental or on-canvas light guide to maintain consistent shading. - 4
Layer shading on top of the base
Paint shadows with slightly cooler tones on the Shadows layer. Blend edges gradually toward the midtone area using a soft brush and lower opacity.
Tip: Avoid hard edges; blend in small, controlled strokes. - 5
Add midtones and highlights
On the Midtones layer, apply your main skin color family and adjust location of highlights on a separate Highlights layer. Use a warm color for sunlit areas to create contrast.
Tip: Test color temperature with a quick grayscale check. - 6
Refine edges with smudge/blur
Use Smudge or Blur sparingly to soften joints and transitions. Focus on natural curves like cheeks and jawline without removing texture.
Tip: Work in small increments and compare to reference often. - 7
Adjust overall color harmony
Revisit your palette and tweak saturation or hue to ensure a cohesive look across all layers. Apply subtle adjustments with opacity changes rather than repainting.
Tip: Keep a grayscale test to verify tonal balance. - 8
Save, review, and export
Save a layered version for future edits and export a flattened version for sharing. Review your blend under different lighting or screen settings to ensure consistency.
Tip: Export multiple sizes and formats to maximize flexibility.
Frequently Asked Questions
What is blending in ibis Paint and why is it important?
Blending in ibis Paint refers to smoothing color transitions to create natural shading and texture. It helps create cohesive lighting and realistic surfaces by softening edges between colors.
Blending smooths color transitions in ibis Paint to create realistic shading and texture.
Which brushes are best for blending for beginners in ibis Paint?
For starters, choose soft, low-opacity brushes that allow gradual color buildup. Save heavier brushes for final refinements and texture work.
Soft, low-opacity brushes are great for blending beginners.
How can I avoid muddy colors when blending?
Keep saturation in check and test values against grayscale. Work in discrete steps on separate layers to prevent overmixing.
Avoid muddy colors by testing values in grayscale and layering carefully.
Should I blend on separate layers or a single layer?
Blending on separate layers gives non-destructive control and easier final tweaks. Reserve a base layer for color and use shading/highlights on additional layers.
Use multiple layers for easier edits and better control.
How do I adjust color temperature for blended areas?
Balance warm and cool tones by assigning them to dedicated layers and adjusting hue/saturation slightly. Compare with a reference for accuracy.
Balance warm and cool tones on separate layers and compare to a reference.
Can I blend on ibis Paint on a desktop or tablet?
ibis Paint is primarily designed for mobile devices, with some features available on tablets. Check system requirements for your device and ensure the app is up to date.
ibis Paint works best on mobile devices, with some features on tablets.
Watch Video
What to Remember
- Start with a solid base and build up layers for depth
- Use soft brushes and non-destructive layers
- Test values against grayscale to ensure accuracy
- Apply color theory to harmonize tones
- Keep your layer names and order clean