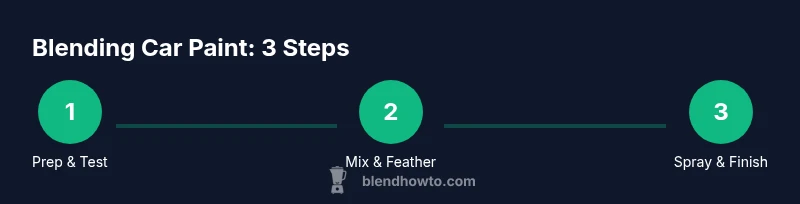
How to Blend When Painting a Car: A Practical Guide
Learn practical, step-by-step techniques to blend car paint for a flawless finish, including color mixing, prep, spraying, and finishing with clear coats.

Learn how to blend when painting a car by planning your color strategy, preparing the surface, and executing feathered, even coats. This quick guide covers color matching, panel blending techniques, spray parameters, and finishing with a clear coat for a seamless, professional appearance across panels and edges in varied lighting conditions.
What blending means in automotive painting
Blending in automotive painting is the practice of creating a seamless color transition across panels, repaired areas, and curved edges so the finished surface reads as a single, uniform layer of paint. When you learn how to blend when painting a car, you’re balancing color accuracy with feathered edges and consistent spray application. The process relies on three pillars: correct color matching, controlled layering, and edge management. If any one of these elements is off, you’ll see hard lines, color drift, or uneven depth.
Color blending becomes especially important after bodywork or panel replacement, where the repair color must disappear into the surrounding finish. Start by confirming the base shade under the vehicle’s true lighting conditions, then plan the blend zone with a clear strategy: how wide will the transition be, how many coats will you need, and what sequence of sprays will produce the most natural result? Practice on test panels to calibrate your technique before touching the actual car, and document your test results for future reference.
Tools & Materials
- Respirator with organic vapor filter(NIOSH-rated; replace cartridges per use and manufacturer guidance)
- Nitrile gloves(Protect hands from chemicals and solvents)
- Autoclaved or disposable masking tape and film(Mask edges to protect adjacent surfaces)
- Automotive spray gun (HVLP or conventional)(With a nozzle size suitable for base coat and clear coat)
- Air compressor with adequate CFM(Follow the spray gun’s recommendations for pressure and flow)
- Mixing cups and sticks(Clear cups; label each mix clearly)
- Base coat paints (matched to the car color)(Manufacturer-matched shades; include any metallics/pearls if needed)
- Clear coat and reducer/activator(Clear coat for protection; reducer/activator per product spec)
- Sanding blocks and 400-800 grit paper(Key the surface to improve adhesion and leveling)
- Scuff pads and tack cloths(Prepare and remove dust before each coat)
- Paint booth or well-ventilated area(Dust-free zone with proper ventilation)
- Color matching light or booth lighting(Helps verify color under consistent lighting)
Steps
Estimated time: 6-8 hours
- 1
Prepare workspace and test panels
Set up in a well-ventilated area, lay down drop cloths, and mask everything you don’t want painted. Wipe the surface with wax and grease remover and etch with 400-600 grit on the repair area. Spray a test panel to calibrate color, spray pattern, and drying behavior, then document the results for future reference.
Tip: Always test on scrap panels before touching the vehicle to prevent costly mistakes. - 2
Prep the car surface
Wash thoroughly, then scuff the surrounding area to create a mechanical bond for the new color. Mask adjacent panels, moldings, and edges with film and tape. Degrease again if needed and ensure the surface is completely dry before priming or base coating.
Tip: Dust and oil scraps are enemies of a clean blend; keep everything pristine. - 3
Mix base colors with feathering intent
On a clean mixing tray, prepare your base shade and lighter/darker edges to create a feathered transition. Mix on a neutral surface and test the gradient on a scrap panel, noting ratios and drying times. For metallics or pearls, account for orientation and how the effect shifts with light.
Tip: Label each mix with ratios and target panels to stay consistent. - 4
Apply base coats in thin, even layers
Spray with even, light passes, overlapping slightly at each pass to avoid heavy builds. Allow appropriate flash-off between coats; multiple thin coats create a smoother blend than a single heavy coat.
Tip: Keep the spray gun parallel to the surface and maintain a constant distance per product guidance. - 5
Feather the edges to blend panels
Focus the blend at the transition zone, gradually reducing pigment density toward the adjacent panel. Use slow, deliberate passes to avoid hard edges. Re-check the test panel and adjust your mix if the feather is too abrupt.
Tip: Work in a back-and-forth motion to ensure a natural gradient. - 6
Evaluate color consistency under multiple lighting
Move the vehicle into different lighting conditions (sunlight, shade, indoor lights) to assess any color drift or depth differences. Expect minor color shifts with metallics/pearls; adjust the mix as needed and apply a light gloss to reveal under-reflection changes.
Tip: Use a consistent light source when evaluating blends. - 7
Add passes to refine tone and depth
If the blend reads unevenly, apply one or two more light coats in the transition area. Re-check for uniform gloss and color depth, and ensure each coat is allowed to cure properly before the next.
Tip: Don’t rush; cures affect final depth and clarity. - 8
Finish with clear coat and cure
Apply a clear coat in thin, even layers to protect the color and deepen the finish. Allow full cure time as per product instructions, and perform a final inspection for clarity and depth before handling or polishing.
Tip: Cure time depends on temperature and humidity; avoid premature handling.
Frequently Asked Questions
What is color feathering and why is it important in car painting?
Color feathering is the gradual transition between shades at panel edges. It hides panel gaps and creates a seamless finish. Proper feathering reduces visible seams and gives depth to the color.
Feathering is the key to a smooth transition between panels, making edges disappear under light.
How do I avoid color mismatch when blending across panels?
Work with color-matched base coats and test panels. Document ratios and apply thin coats to build toward the target shade. Check under multiple lighting conditions.
Work off test panels and check under different lights to spot mismatches early.
What tools are essential for blending car paint?
A quality spray gun, appropriate reducer, masking materials, masking tape, test panels, and a well-ventilated workspace are essential for blending.
A good spray gun and a clean workspace make color blending much easier.
Can I blend colors without a spray booth?
Blending can be done in a well-ventilated area with proper PPE, but a spray booth reduces dust, improves control, and protects you from fumes. Use filtration and minimize dust sources.
Yes, but a spray booth or controlled space gives the best results.
How long should the clear coat cure before handling?
Cure times vary by product and environment; follow the manufacturer's recommendations. Typically, avoid handling until the clear coat is fully dried and tack-free.
Wait for the clear coat to dry fully per the product directions before handling.
Is spraying distance critical for blending?
Yes. Maintain the recommended distance for the spray gun and adjust for coverage. Incorrect distance can cause runs, dry spray, or color drift.
Distance matters; wrong distance can ruin the blend.
Watch Video
What to Remember
- Plan the blend strategy before painting
- Keep coats thin and even for a natural transition
- Feather edges to avoid hard lines
- Always test on scrap panels first
- Match lighting when evaluating color depth