AI Blender: Practical AI-Driven Workflows in Blender
Learn how to integrate AI into Blender to speed up modeling, texturing, and rendering. This step-by-step guide covers setup, workflows, warnings, and practical tips for home artists and hobbyists.

With ai blender, you can accelerate Blender workflows by integrating AI-assisted texture generation, denoising, and automated scene tweaks. This approach helps hobbyists and 3D artists save time while maintaining control through human oversight. In this guide, we’ll walk you through setup, safe usage, and practical AI-driven steps you can apply today.
What AI in Blender means for your projects\n\nIn Blender, AI refers to tools and techniques that automate or accelerate aspects of 3D creation, from texture generation to intelligent shading suggestions. For the term ai blender, think of it as a set of capabilities that let you focus on creative decisions while the software handles repetitive or data-heavy tasks.\n\nThe BlendHowTo team notes that the biggest gains come from combining AI-assisted outputs with careful human oversight. You still control style, composition, and storytelling; AI helps with routine chores, iteration speed, and exploring variations. This section surveys the core areas where AI intersects Blender today, with practical examples you can test in your next project. Beyond texture work, AI can suggest lighting setups, generate prop variations, and help with sweeping changes across materials so you can sample many looks quickly.\n\nKeep in mind that AI is a tool in a creative workflow, not a magic wand. When used thoughtfully, ai blender enables you to iterate faster and keep your signature approach intact. BlendHowTo's practical approach emphasizes testing on small scenes before scaling up.\n\nTo get started, set a small experiment: choose a single asset you want to improve with AI and compare results against a non-AI baseline. This helps you calibrate how much AI should influence your process and where your own input remains essential.
Practical AI workflows you can adopt today\n\nIf you are a home artist or hobbyist, start with two core workflows: AI-powered texture generation and AI-assisted denoising for renders. First, generate base textures using an AI texture generator and import them as image textures in Blender. Then connect those textures to a PBR material, tweak roughness and normal maps, and compare renders to your reference images. The result is faster material creation and a broader exploration of looks without manual painting from scratch.\n\nNext, use AI to organize assets and automate repetitive setup steps. Save node graphs and material presets that you can reproduce across scenes. Our BlendHowTo analysis shows that repeatable AI-assisted templates can significantly cut setup time, especially for large scenes such as environments or crowd shots. Always review results for consistency with your project's style. If you venture into AI-driven animation presets, start with small rigs to learn how motion variations affect timing and weight before applying to full characters.
Setting up your environment for AI-assisted Blender\n\nPrepare a robust environment before you unleash AI in your Blender projects. Update Blender to the latest stable release, and ensure your GPU drivers are current. Install trusted AI addons or plugins that integrate with Blender through clean interfaces, and keep a backup of your work while testing new AI features. If you rely on external AI services, verify licenses and usage terms before generating assets. A well-prepared setup reduces surprises and helps you scale AI usage across multiple projects. For home studios, consider a dedicated drive or cloud storage to keep AI assets separate from your core files.
How to integrate an AI texture generator into your Blender workflow\n\nStart by selecting an AI texture tool that aligns with your project goals. Generate diffuse, roughness, and normal maps, then import the images into Blender as texture nodes. Use a dedicated image texture node for each map and connect to a principled BSDF shader. Pay attention to tiling and seam issues; use UDIMs or a tiled UV layout if your texture set covers large surfaces. Finally, test renders at multiple angles to ensure lighting responds realistically to the AI-generated textures. If results look flat, try adjusting color grading or ambient occlusion to recover depth.
Quality control: evaluating AI-generated assets\n\nAI textures and models should be judged by fidelity, consistency, and usefulness. Compare AI outputs against your reference boards for color accuracy and detail, and check for artifacts such as seams, color shifts, or tiling issues. Use frequent render previews to catch problems early, and maintain a revision history to track improvements. Remember that AI-driven assets may require manual refinements to fit your scene's lighting and camera angles. Establish an approval workflow so every asset gets human review before it becomes part of the final render.
Common pitfalls and how to avoid them\n\nPitfalls to watch include overreliance on AI outputs, which can produce inconsistent results across assets. Avoid exporting AI textures at resolutions that compromise detail when your final render demands high fidelity. Be mindful of licensing and usage rights for AI-generated content, especially for commercial work. Finally, keep human oversight central; AI is a tool, not a substitute for your artistic intent. If you find yourself chasing novelty over coherence, pause and compare to your reference boards.
Case study: from concept to render using AI-powered Blender\n\nA small studio used AI to generate base textures for a sci-fi corridor concept. They started with AI-generated metal textures, adjusted UVs, and layered procedural nodes to blend color variations. The team then used AI-assisted denoising during renders to reduce noise, followed by manual lighting tweaks to achieve a cinematic look. The final render demonstrated how AI can accelerate exploration and deliver polished results without sacrificing control. Tips from this case: keep track of settings and document AI prompts to reproduce the look in future scenes.
The future of ai blender in home studios\n\nAs AI tools become more integrated into Blender workflows, home artists will gain access to more sophisticated capabilities without expensive pipelines. Expect improvements in real-time AI-driven feedback, smarter materials, and easier automation for repetitive tasks. The BlendHowTo team believes responsible use, licensing awareness, and clear attribution will remain essential as the technology evolves. Embracing hybrid approaches—combining AI suggestions with manual artistry—will likely produce the most satisfying results for enthusiasts and professionals alike.
Getting started today: a quick-start checklist for ai blender\n\n- Install the latest Blender and verify your GPU setup\n- Choose a reputable AI addon or texture source with clear licensing\n- Prepare a simple project to test AI textures and denoising\n- Create a baseline render for comparison, then iterate\n- Save versions frequently and document AI steps for future projects\n- Build a small reference library of AI textures and materials to accelerate future work
Tools & Materials
- Blender software (latest stable release)(Download from Blender.org; ensure you understand the release notes for AI-related features)
- GPU-accelerated workstation or laptop(A modern GPU with ample GPU memory and up-to-date drivers)
- AI addon or plugin for Blender(Choose reputable sources; install as per instructions and test on a small scene)
- Texture library or AI texture generator access(Optional for AI-generated textures; verify licensing for commercial work)
- Reliable internet connection(Needed for cloud-based tools, asset downloads, and addon updates)
- External storage or backup solution(Back up large textures and assets to prevent data loss)
- Digital drawing tablet (optional)(Helpful for retopology sculpting or quick adjustments)
Steps
Estimated time: 3-5 hours
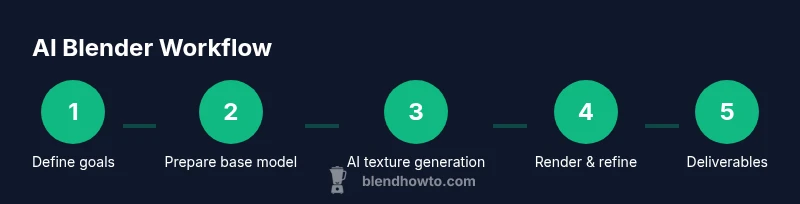
- 1
Define project goals and constraints
Clarify the target look, intended render resolution, and required delivery format. Write a short brief that includes style references and any must-have assets. This ensures AI outputs align with your artistic intent from the start.
Tip: Create a quick mood board and a checklist of required AI outputs. - 2
Prepare base model in Blender
Set up your scene with clean topology and reference imagery. Build the core shapes and UVs so AI assets can map correctly. A solid base reduces downstream edits.
Tip: Use reference images pinned to the viewport for quick alignment. - 3
Choose AI asset sources and tools
Select AI textures or tools that fit your project goals and licensing constraints. Test a small sample before committing to full scenes to understand style and artifacts.
Tip: Start with a single texture set to minimize variables while learning the workflow. - 4
Generate AI textures and materials
Create diffuse, roughness, and normal maps with the chosen AI tool and import them into Blender. Link each map to the corresponding input of a Principled BSDF shader and iterate on tiling and color balance.
Tip: Always preview textures at multiple lighting angles to catch seams and color shifts. - 5
Apply AI-generated assets in Blender
Plug AI textures into the material nodes and verify that UVs and tiling match the asset geometry. Adjust roughness and normal strength to taste and ensure consistency across surfaces.
Tip: Lock UVs on critical surfaces to prevent accidental misalignment during edits. - 6
Run AI-based denoising and upscale
Apply denoising to final renders to reduce noise without washing out detail. Upscale textures if needed, but check for artifacting at close inspection distances.
Tip: Use denoising on intermediate renders to keep iteration speed high. - 7
Set up lighting and camera using AI prompts
Experiment with AI-suggested lighting variations and camera angles to test mood and composition quickly. Record preferred setups as presets for reuse.
Tip: Keep a baseline lighting rig and compare AI variations against it. - 8
Render passes and evaluate
Render a few passes (diffuse, specular, AO) to evaluate how AI textures behave under different lighting. Use those passes to refine materials and lighting.
Tip: Render at a smaller resolution first to iterate faster. - 9
Refine with human oversight
Review AI outputs for style coherence and technical quality. Make manual tweaks to push the final look toward your artistic intent and ensure licensing compliance.
Tip: Document all AI steps and prompts used for reproducibility.
Frequently Asked Questions
What is ai blender and how does it relate to Blender?
AI blender refers to using artificial intelligence to speed up Blender workflows, including texture generation, lighting suggestions, and automation of repetitive tasks. It combines AI outputs with human oversight to preserve style and control.
AI blender means using AI tools inside Blender to speed up tasks like textures and lighting, while you keep final creative control.
Do I need coding skills to use AI features in Blender?
No, many AI features are accessible through graphical interfaces or addons. Some advanced capabilities may require Python scripting, but you can start with GUI-based tools and gradually explore scripting if you wish.
You can begin with user-friendly AI tools in Blender; coding skills are a plus but not required at the start.
Are AI-generated textures safe for commercial projects?
Licensing and rights depend on the AI tool and source. Always verify licenses and usage terms, and retain copies of prompts and outputs for attribution and compliance.
Check licenses and keep records to ensure you can use AI textures commercially.
Which AI addons or tools work with Blender?
There are several third-party addons and services that integrate with Blender; choose reputable sources, review updates, and test compatibility with your project pipeline.
Look for trusted AI addons and test them on a small project first.
Will AI replace artists in Blender?
AI is a tool that accelerates workflows; it does not remove the need for human creativity, judgment, and storytelling. The best results come from a hybrid approach.
AI speeds up work, but your artistry and decisions remain essential.
How do I evaluate AI outputs before final renders?
Compare AI outputs against references, render previews frequently, and inspect for artifacts. Use a checklist to ensure alignment with style, lighting, and resolution requirements.
Regular previews and a clear checklist help you assess AI outputs effectively.
Watch Video
What to Remember
- Define goals before applying AI tools.
- Validate AI outputs with careful human review.
- Balance AI speed with artistic control and licensing awareness.
- Document AI steps for reproducibility.