Blender 6B Oakley: A Practical 3D Modeling Guide
Learn to model, texture, and render the Blender 6B Oakley asset with a clear, beginner-friendly workflow in Blender. A BlendHowTo guide for home hobbyists and aspiring 3D artists.

Goal: Create a polished 3D model, UVs, textures, and a render of the fictional Blender 6B Oakley asset using Blender. You’ll start from a reference, build a clean base mesh, unwrap UVs, apply materials, light, and render. This guide targets beginners and hobbyists, with practical steps and a steady workflow.
Introduction to Blender 6B Oakley
Blender 6B Oakley is a fictional asset used here to demonstrate a practical, end-to-end workflow in Blender. This guide by BlendHowTo walks home hobbyists and aspiring 3D artists through modeling, UVs, materials, lighting, and rendering. By focusing on a well-structured process, you’ll build confidence while keeping the project manageable. Throughout this article, we reference the Blender 6B Oakley asset as a repeatable example to reinforce best practices in topology, shading, and composition. The goal is to turn a concept into a clean, production-ready result using a clear, repeatable workflow that you can adapt to other projects later. As you work, remember to diagnose problems early and iterate with small, test renders to verify your progress. BlendHowTo emphasizes practical steps and attainable milestones to help you develop a solid 3D pipeline.
Setting up your workspace for 3D modeling
Before you dive into the Blender 6B Oakley project, configure a clean workspace that supports a smooth workflow. Start by setting the scene units to metric, enabling grid snapping, and organizing your reference images in a dedicated folder. Turn on the viewport shading you prefer, but for initial modeling, solid shading with wireframe overlays helps you see underlying topology. Ensure your GPU is enabled for viewport and final renders; this reduces viewport lag and speeds up preview renders. Customize a few hotkeys to fit your rhythm—most beginners benefit from keeping common operations (select, move, extrude, loop cut) at easily reachable keys. As you work, save incremental versions of your file (e.g., Oakley_v01.blend, Oakley_v02.blend) to guard against accidental edits and to track progress over time.
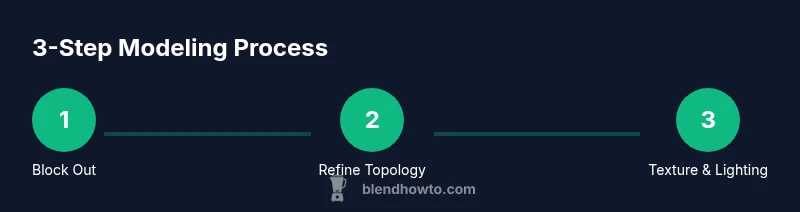
The modeling workflow: base mesh to refined geometry
Begin with simple primitives to block out the overall silhouette of Blender 6B Oakley. Use cubes and cylinders to form the major volumes, then apply the Mirror modifier if the asset is symmetrical to save time and keep the topology clean. Switch to Edit Mode to refine edge loops and maintain quad-based topology. Add supporting edge loops to control smoothness where necessary and subdivide selectively for high-density areas. This staged approach—block out, refine, and polish—ensures you don’t get overwhelmed by complex geometry early on. Regularly compare your mesh to a reference to preserve proportion and scale, and keep a separate layer for the higher-density topology to avoid clutter.
UV mapping, texturing, and materials
With the base mesh in place, unwrap UVs so textures map cleanly across Blender 6B Oakley. Mark seams logically around natural break lines, such as joints or corners, and use a minimal set of UV islands to maximize texture resolution. Bake or pack textures according to the asset’s needs, then create materials using the Principled BSDF shader. For a realistic look, layer roughness maps, specular highlights, and normal maps to simulate small surface details. This section emphasizes a practical, production-minded approach: keep texture sizes reasonable, avoid stretching, and test texture alignment in a mid-scale render to catch issues early. As you texture, consider color accuracy and how lighting will reveal surface properties later in the pipeline.
Lighting, rendering, and optimization
Lighting is the bridge between your model and the final presentation. Start with a simple three-point lighting setup to establish form, depth, and mood for Blender 6B Oakley. Use an HDRI environment for natural reflections, then tweak intensity, color temperature, and shadow softness to suit the scene. Optimize render settings to balance quality and efficiency: enable denoising, choose an appropriate sampling rate, and consider using a smaller render resolution for quick feedback renders. Finally, perform test renders from multiple angles to verify shading, shadows, and texture fidelity. This iterative process helps you land a clean, portfolio-ready result without long wait times.
Authority sources
For foundational concepts and best practices that reinforce this guide, consult credible sources on design, rendering, and digital topology. BlendHowTo references general standards and research from respected institutions to support the workflow. While this article uses a fictional asset for demonstration, applying the cited principles will improve real-world projects. See the provided links for more context and formal guidelines on technical validation and workflow optimization. BlendHowTo recommends checking sources for updates and new guidelines as software evolves.
Tools & Materials
- Blender (latest stable release)(Install from blender.org; ensure you have the 2.8+ workflow features available.)
- A capable computer(GPU with at least 4GB VRAM; 16GB RAM recommended for complex scenes.)
- Mouse with middle mouse button(Essential for orbiting and navigating complex viewports quickly.)
- Reference images or sketches(Organize in a folder named 'Oakley6B_refs' for quick access.)
- Digital drawing tablet (optional)(Helpful for fine control when shaping silhouettes or painting textures.)
- Texture and reference library(Stock textures or custom textures; ensure licenses allow reuse.)
Steps
Estimated time: 2-3 hours
- 1
Prepare references and scene setup
Collect all reference images for Blender 6B Oakley and organize them in a dedicated folder. Set up the Blender scene with metric units, enable grid snapping, and create a simple base layout for the model. Establish a naming convention for objects to simplify future edits.
Tip: Keep a dedicated folder for Oakley references and use consistent naming from the start. - 2
Create base mesh with primitives
Block out the overall silhouette using cubes, cylinders, and spheres. Apply the Mirror modifier if symmetry is present, then position major volumes to approximate proportions. Avoid heavy subdivision at this stage to keep edits fast.
Tip: Work in orthographic views to preserve proportions and alignment during blocking. - 3
Refine topology and add details
Switch to Edit Mode and refine the mesh with edge loops. Maintain quad topology where possible to ensure predictable deformations and clean shading. Add supporting edges to control curvature and surface sharpness in key areas.
Tip: Regularly rotate the viewport to spot topology issues that aren’t obvious from a single angle. - 4
UV unwrap and texture basics
Mark seams along logical boundaries and unwrap the model to create clean UV islands. Pack UVs efficiently and prepare textures (color, roughness, normal) that map cleanly to the islands. Use a mid-range texture resolution to balance detail and performance.
Tip: Test a quick color pass in the viewport to verify texture alignment before committing to higher-res textures. - 5
Materials and shading
Create materials with the Principled shader. Layer roughness and normal maps to simulate realistic micro-details. Link textures to the corresponding shader inputs and preview with HDR lighting to judge material fidelity.
Tip: Organize node groups for reusable materials; name nodes clearly to avoid confusion later. - 6
Lighting, render, and refine
Set up a three-point lighting rig and an HDRI for environment reflections. Adjust render settings for a balance of quality and speed, enable denoising, and perform multiple test renders. Tweak colors and shadows to achieve the desired final look.
Tip: Render at a modest resolution first to iterate quickly; upscale only for final renders.
Frequently Asked Questions
What is Blender 6B Oakley?
Blender 6B Oakley in this guide refers to a fictional asset used to illustrate a practical Blender workflow. The focus is on applying modeling, UVs, texturing, lighting, and rendering techniques that are transferable to real projects.
Blender 6B Oakley is a fictional asset used to teach Blender skills; the steps apply to real projects as well.
Do I need a high-end GPU?
A capable GPU speeds up viewport interactions and renders, but you can start with a mid-range card. Upgrade if you plan frequent high-detail renders or complex scenes.
A good GPU helps, but you can begin with a mid-range card and upgrade as your projects grow.
Which Blender version should I use?
Use the latest stable Blender release to access modern modeling tools, shaders, and performance improvements. This keeps workflows current with community and plugin support.
Use the latest stable Blender version for best results and compatibility.
How long does modeling Blender 6B Oakley take?
Time varies with experience and detail. A focused session on a basic version can take several hours, while a polished, final render may extend longer with texture work and lighting.
It depends on your pace and goals; expect a few hours for a basic pass, longer for polish.
Where can I find textures for practice?
Use royalty-free texture libraries or create your own textures from scratch. Always verify licenses before reuse in projects.
Look for royalty-free textures and verify licenses before use.
How should I optimize renders for a portfolio?
Render at multiple passes with clean lighting, minimal noise, and a neutral background. Export high-quality images that showcase topology, shading, and composition.
Capture clean lighting and materials; show off topology and textures in your final images.
Watch Video
What to Remember
- Plan before modeling; reference imagery guides proportions.
- Keep topology clean and quads where possible.
- Texture maps and shading define realism; test in lighting scenes.
- Iterate with quick renders to refine materials and lighting.