Blender Add Vertex to Edge: Step-by-Step Guide
Learn how to add a vertex to an edge in Blender using subdivide or knife, with precise placement, topology tips, and common pitfalls. A comprehensive BlendHowTo guide for beginners and intermediate users.

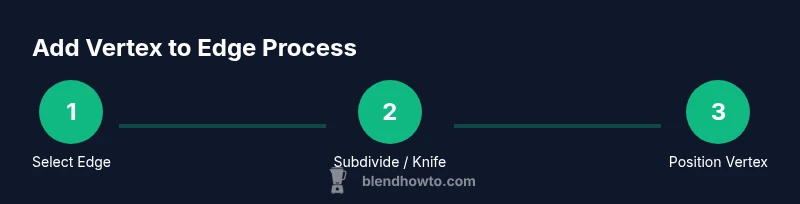
By editing in Edit Mode, you can add a vertex to any Blender edge using Subdivide or the Knife tool. Subdivide inserts a new vertex along the edge, while Knife creates a precise cut at a chosen point. This quick guide shows both methods with practical steps to keep topology clean and animation-friendly.
Why Vertex Placement Matters in Blender
Vertex placement on edges is a fundamental skill for controlling edge flow, smoothing, and shading in Blender. When you add a vertex to an edge, you affect nearby faces and their topology, which can influence how lighting behaves during rendering and how smoothly a mesh deforms during animation. For home users and hobbyists learning blender add vertex to edge, understanding where to place new vertices helps avoid long edge loops, torn seams, or irregular shading. According to BlendHowTo, mastering this technique improves modeling efficiency and reliability when preparing models for export or 3D printing. In practice, you’ll often insert vertices to align with feature lines, tighten silhouette corners, or create anchor points for subsequent edge loops. This knowledge is equally valuable whether you’re modeling character anatomy, mechanical parts, or stylized objects.
Two Core Methods to Add a Vertex on an Edge in Blender
Blender offers multiple ways to insert a vertex onto an edge. The two most common are Subdivide and Knife. Subdivide breaks an edge into smaller segments and creates new vertex points along the edge, which is quick and predictable for uniform topology. Knife, by contrast, lets you cut at a precise location you choose, giving you control over the exact placement. Both methods affect topology differently, so your choice depends on the modeling context and the surrounding edge flow. This section explains when to use each method and what to expect in terms of topology changes and subsequent editing.
Subdivide: Insert a Vertex Along an Edge
Subdivide is the simplest route to add a vertex on an edge. Select the edge in Edit Mode, then press Subdivide. Blender will insert a vertex at the midpoint by default, but you can adjust the Number of Cuts in the operator panel to create additional vertices or place them at specific intervals. After subdivision, you’ll have two edges meeting at the new vertex, which gives you a clean point to further refine topology. If you need only a single vertex, set Number of Cuts to 1 and confirm. Subdivide is especially handy for smoothing transitions or preparing for a new edge loop in organic shapes. Remember to consider edge length distribution to avoid disproportionate faces in dense meshes.
Knife Tool: Precise Vertex Insertion at a Chosen Point
The Knife tool provides precise control when you want to place a vertex exactly where you click on the edge. Activate Knife (K), click on the edge to create a cut, and press Enter to confirm. You can continue clicking to create multiple vertices along a path or end the cut with the Return/Enter key. Knife is ideal when topology must follow a specific silhouette or feature, such as the crease of a mechanical part or the seam line on a character garment. If you want to constrain the cut to a specific axis or plane, you can enable snapping or use the constraints with the midpoints between existing vertices.
Moving and Snapping for Exact Vertex Placement
After inserting a vertex, you’ll often want to place it precisely. Use G to grab and move the vertex, then constrain movement with X, Y, or Z to maintain alignment with the desired axis. For pixel-level precision, enable snapping (magnet icon) and set Snap Element to Vertex, with Snap during Transform activated. You can also type exact coordinates in the N panel to position the vertex, or use Vertex/Edge snapping during adjustments. Snapping helps keep your edge topology clean when you’re aligning the new vertex to a feature line, another vertex, or a grid intersection. This step is crucial for clean shading and predictable deformation later on.
Topology Considerations After Vertex Insertion
Inserting a vertex changes local topology, which can affect face normals and shading if not handled carefully. After adding a vertex, verify that surrounding faces remain planar where needed and that there are no degenerate faces or flipped normals. It’s wise to run a quick mesh cleanup (remesh or merge nearby vertices) if you notice stray vertices or uneven edge lengths. When you add vertices along an edge, your goal should be to preserve a coherent edge loop structure and avoid creating pinching or stretched faces. Practicing these steps will improve reliability when you’re modeling hard-surface shapes or organic forms that rely on smooth shading.
Real-World Workflows: When to Subdivide vs Knife
Choose Subdivide when you want a uniform distribution of new vertices along an edge to support smoother interpolation or a more even edge loop. Use Knife when topology must follow a specific contour or feature, such as a panel line or natural creases, where precision is essential. In many projects, you’ll combine both approaches: Subdivide to create a base vertex near the feature, then Knife to refine placement and alignment. These workflows are common in character modeling, automotive geometry, and architectural models, where the right topology ensures clean shading and predictable subdivision surfaces. BlendHowTo recommends practicing both methods on simple shapes before applying them to complex models to build muscle memory and reduce modeling fatigue.
Keyboard Shortcuts and Quick Tricks
Get comfortable with the essential shortcuts: Subdivide is invoked from the Edge menu or via the Subdivide button in the tool shelf, while Knife is activated with K. After creating vertices, press G to move, S to scale, and R to rotate as needed. Use X, Y, or Z to constrain transformations to a single axis. Enable snapping (magnet) for precise placement, and set Snap Element to Vertex when you want to align a vertex with another vertex. If you’re editing a mesh with many edges, consider enabling Proportional Editing for smooth transitions between vertices while maintaining control over local topology. Practice these shortcuts in a controlled tutorial scene to boost speed and accuracy in real-world modeling tasks.
Final Checks Before Export
Before exporting a model, inspect the mesh for clean edge flow and consistent vertex placement. Check for stray vertices, non-manifold edges, and inverted normals that can affect rendering. Run a basic shading test to confirm there are no shading artifacts along the modified edge. If you notice unexpected shading, revisit the vertex placement and edge flow around the affected region, adjust as needed, and re-check. Consistent topology across the model simplifies rigging, animation, and subdivision outcomes. With careful placement of vertices on edges, you’ll experience fewer interpolation issues and faster iteration times when building complex models.
Tools & Materials
- Blender software (v3.x or newer)(Open a project with a mesh you want to edit)
- Mouse or tablet with precise cursor(Fine control for vertex placement)
- Keyboard shortcuts (G, S, R, K)(Efficient editing workflow)
- Knife and Subdivide tools(Accessible in Edit Mode for edge edits)
- Snapping and constraints features(Enable Vertex snapping for exact placement)
Steps
Estimated time: 15-25 minutes
- 1
Enter Edit Mode and select the target edge
Select the mesh you want to edit and switch to Edit Mode (Tab). Enable Edge Select mode, then click the edge where you want to add a vertex. This step establishes the precise location for subsequent operations.
Tip: Use Alt+Click to select the connected edge loop for context while keeping your target edge in focus. - 2
Choose Subdivide to insert a vertex
With the edge selected, press Subdivide. In the operator panel, set Number of Cuts to 1 to create a single vertex, or increase it for multiple vertices along the edge. Confirm to apply the subdivision.
Tip: If you need the vertex at a specific fraction along the edge, perform subdivision first and then move the new vertex precisely. - 3
Place the new vertex precisely
After subdivision, use G to grab and drag the vertex to the exact location. Constrain movement with axis keys (X/Y/Z) if needed, or input precise coordinates in the N panel for exact placement.
Tip: Enable Vertex snapping (magnet) and set Snap Element to Vertex to snap the new vertex to nearby topology. - 4
Alternative: Use Knife for exact placement
Activate Knife (K), click on the edge to place the new vertex at your chosen point, then press Enter to confirm. You can continue adding vertices along a path or end the cut with Enter.
Tip: If you want to place a vertex precisely at a feature line, use mid-edge snapping or align to a guide plane before cutting. - 5
Refine topology after insertion
Inspect surrounding faces for shading issues or mismatched edge lengths. Clean up by merging nearby vertices or adjusting edge loops to maintain clean topology and consistent face normals.
Tip: Check for non-manifold edges after insertion and resolve them to avoid export/import problems. - 6
Finalize and review
Review the updated edge and adjacent geometry in shaded view. Test the changes with a quick render or viewport shading pass to ensure there are no artifacts.
Tip: Save incremental versions to protect against accidental topology changes.
Frequently Asked Questions
What is the quickest way to add a vertex to an edge in Blender?
The fastest method is typically Subdivide on the selected edge for a single vertex. If you need pinpoint placement, use Knife to cut exactly where you want the vertex. Both approaches are quick once you know where to place the new vertex.
The fastest way is to subdivide the edge for a new vertex, or use Knife for precise placement.
Can I insert a vertex on an edge without subdividing the edge length?
Subdivide inherently changes the edge length by introducing a new vertex. Knife can place a vertex without evenly subdividing the whole edge, allowing targeted topology changes. Consider your overall edge flow before choosing a method.
Knife lets you add a vertex without uniform subdivision, but Subdivide changes the edge length more predictably.
How do I place the new vertex exactly where I want it?
Use Knife for precise points, or subdivide first and then move the new vertex with the G key. Enable vertex snapping and snap to the desired vertex or grid to get pixel-perfect results.
Use Knife for exact cuts, or subdivide and move the vertex precisely with snapping enabled.
Which Blender tools are best for adding vertices to edges in hard-surface models?
For hard-surface models, Knife is often preferred to align with specific edge lines or panel seams. Subdivide helps maintain even edge loops where uniform density is desired.
Knife is great for precise seams; subdivide is good for even edge density on hard surfaces.
What safety checks should I perform after inserting a vertex?
Check normals, ensure there are no degenerate faces, and verify shading in both solid and rendered views. Run a quick cleanup if needed to maintain clean topology.
Verify normals and look for any degenerate faces; clean up if needed.
Watch Video
What to Remember
- Master two methods: Subdivide for uniform insertion and Knife for precise control
- Use snapping and axis constraints to place vertices accurately
- Maintain clean topology by checking edge flow and normals after edits
- Practice both methods on simple models before applying to complex projects