How to Make Clothes in Blender: A Practical Guide
Learn to design and simulate clothing in Blender with practical steps: modeling garments, cloth physics, UV unwrapping, textures, and rendering tips for realistic, wearable results.

In Blender, you can make clothes either by modeling around a character or by using cloth physics to drape fabric. The choice depends on your project needs, performance targets, and how reusable the garments should be. If you aim for quick previews or multiple character variations, modeling can be faster; if you want realism with wrinkles and folds, cloth simulation is your friend. In this section, we explore both paths for how to make clothes on blender and outline a workflow you can reuse across jackets, dresses, or armor. You’ll learn to balance topology, proportions, and fabric behavior so your garments move believably with your character. Throughout, keep in mind that Blender's cloth system has evolved across versions, so adapt suggestions to your setup while preserving the core ideas. By the end, you'll have a solid sense of when to model, when to simulate, and how to combine approaches for best results.
Fabric Creation in Blender: Two Paths for Clothes
In Blender, you can make clothes either by modeling around a character or by using cloth physics to drape fabric. The choice depends on your project needs, performance targets, and how reusable the garments should be. If you aim for quick previews or multiple character variations, modeling can be faster; if you want realism with wrinkles and folds, cloth simulation is your friend. In this section, we explore both paths for how to make clothes on blender and outline a workflow you can reuse across jackets, dresses, or armor. You’ll learn to balance topology, proportions, and fabric behavior so your garments move believably with your character. Throughout, keep in mind that Blender's cloth system has evolved across versions, so adapt suggestions to your setup while preserving the core ideas. By the end, you'll have a solid sense of when to model, when to simulate, and how to combine approaches for best results.
Approach A: Modeling Garments from Scratch
Modeling garments from scratch gives you precise control over silhouette, seams, and topology. Start by building around the body or your base mesh with a separate garment mesh. Use clean edge loops around joints to enable deformation without distortion. Plan seam lines as you would in sewing: consider the garment's movement at elbows, knees, and shoulders. Keep faces mostly quads to simplify smoothing and animation. A common workflow is to block out the garment’s basic shape, add subdivisions for detail, then apply a shrinkwrap modifier to the body so the garment sits correctly, followed by a final cleanup pass. This approach is ideal when you need exact shapes, hard edges, or accessories that won’t rely on heavy simulation. BlendHowTo emphasizes that preserving edge-flow is critical for later texturing and rigging, so model with topology that mirrors how fabric folds, and keep the garment’s thickness consistent to avoid shading artifacts. Practice with a simple tunic first to build intuition before attempting complex robes.
Approach B: Cloth Simulation Workflow
Cloth simulation lets fabric drape naturally, creating realistic wrinkles and folds as the character moves. Start by creating a garment mesh slightly larger than the body, then add a Cloth modifier and enable collisions on the body. Use Pinning to fix the garment to key areas (shoulders, bodice) while the sim runs. Create a seam network or a connectively constrained topology to control where folds form. Bake previews at low resolution to iterate quickly, then increase quality for final renders. If you’re short on PC power, reduce Cloth Quality substeps and use a simpler collision object. As you refine the sim, you’ll learn to balance realism with performance. BlendHowTo notes that pinning and collision settings often have the biggest impact on believability, so test with simple poses before committing to long animation frames.
Start with a Clean Base: Body and Topology
A good garment starts with an even, well-planned base mesh. Ensure your body mesh has clean edge loops around the shoulders, chest, and hips to guide garment flow. Maintain quad-dominant topology where possible to facilitate subdivision and smoothing. Create reference planes or a low-poly proxy of the garment first, then decide whether to model directly on the body or wrap a separate garment mesh around it. When starting the modeling path, align the garment’s key seams with natural body creases. For cloth simulation, a clean topology minimizes artifacts and keeps folds predictable. Remember to keep near-joint areas thicker than flexible parts and avoid long, skinny triangles that can pinch during animation. The goal is a stable foundation that supports both modeling and simulation workflows without complicating later steps.
Creating Seams and Attachments: Pinning and Sewing
Sewing in Blender is often simulated rather than physically stitched, using pin constraints and attachment points. Define vertex groups that will act as pins, then assign these groups to the Cloth Modifier's Pinning option. Attach important edges to the body or a dedicated armature so the fabric adheres where needed during motion. If modeling, create explicit seams with edge loops and separate the garment into logical panels that can unfold during animation. Consider using hooks or lattice modifiers to help with precise edge alignment when the garment stretches. Testing with simple poses helps reveal seam gaps or misaligned edges before doing a full bake. A practical tip: always keep seam allowances visible in your mockup to prevent unexpected clipping.
UVs and Texturing for Clothing
Unwrapping clothing requires thoughtful seam placement to minimize distortion. Start with a clean seam map that follows the garment panels, then unwrap using a combination of cylindrical, planar, and minimal seams around curved areas. Pack UVs efficiently to maximize texture resolution, and keep consistent texel density across panels. For textures, build a fabric atlas with base color, roughness, normal maps, and a small height map to imply weave. Use Blender's Texture Paint or external tools to craft realistic fabrics like denim, silk, or cotton. When texturing, ensure the UV islands align with the garment’s silhouette so that shading looks natural during light interaction. Finally, apply a neutral light setup so you can judge shading moves across different fabrics.
Materials and Fabric Shaders for Realistic Clothing
A good shader makes or breaks the look of your garment. In Blender, use a Principled BSDF for base color, roughness, and metallic levels. For fabrics, adjust Subsurface Scattering and clearcoat to emulate woven materials. If simulating cloth, separate the garment's material from other scene objects and tweak the normal map to emphasize weave. For shiny fabrics, add a subtle specular highlight and a roughness map to vary across the surface. For extra realism, composite subtle wrinkles using a normal map that corresponds to the garment’s folds. Remember that the cloth shader should complement the simulation, not fight it; keep oxidation and wear in mind as your renders progress. BlendHowTo recommends preparing a test render with a simple pose to verify how light interacts with fabric textures before committing to final lighting.
Simulation Settings and Performance Tips
Tuning simulation performance is as important as the look of the fabric. Start with a low-resolution cloth and increase geometry only where needed. Use Collision settings to prevent penetrations with the body, adjust self-collision to avoid clingy folds, and enable pinning for anchored regions. Reduce Substeps during early iterations to speed up previews, then raise them for final renders to stabilize motion. Bake simulations incrementally: test a short frame range, fix any stability issues, then bake a longer segment. If you encounter jitter, simplify the fabric mesh or increase time scale smoothing. Finally, keep your scene light-weight: hide heavy accessories and disable ambient occlusion during early tests to improve feedback speed. BlendHowTo stresses that iterative testing is your best friend for believable draping and wear.
Ready to Render: Final Checks and Render Setup
Before rendering, double-check that the garment sits correctly on the body in multiple poses and lighting conditions. Ensure collisions are clean, pins are active, and UVs stay distortion-free as the character moves. Confirm that the fabric shader is balanced with the lighting to reveal texture without washing out color. Perform a quick test render at the expected resolution, then review wrinkles and folds under different light angles. If you plan animation, scrub through keyframes to confirm wrinkles follow body motion naturally and seams remain closed. Finally, export or bake any baked cloth data you need for your pipeline and save a dedicated render preset so you can reproduce the look for future projects.
Tools & Materials
- Blender 3.x or newer(Install from blender.org; enable cloth simulation in preferences)
- Base body mesh or character rig(Underlying topology should support garment movement and joint deformation)
- Reference textures or fabric swatches(Helpful for texture accuracy and material variety)
- Optional seam/planning guides(Sketch or planes to plan seams and panels)
Steps
Estimated time: Total time: 4-6 hours
- 1
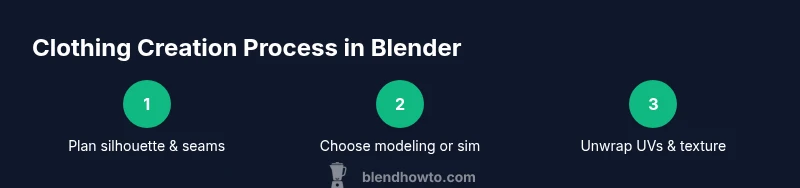
Prepare scene and references
Collect garment references, decide on the silhouette, and set up a clean scene. Import or create a base body mesh and clear any existing cloth modifiers. This step ensures you have a stable foundation for either modeling or simulation, which is essential for consistent results when you eventually ask Blender to how to make clothes on blender.
Tip: Gather multiple reference angles (front, side, back) to guide proportion and seam placement. - 2
Choose modeling or simulation path
Decide whether you will model the garment around the body or build a separate mesh for cloth simulation. Each path has trade-offs: modeling gives control and faster iteration; simulation provides natural folds and wrinkles. Align this choice with your project needs and performance targets.
Tip: If unsure, start with a simple tunic to test topology and shading before committing to a full outfit. - 3
Create base garment geometry
If modeling, block out the garment’s shape with simple quads around the body. If simulating, create a slightly oversized garment mesh to allow drape. Keep seam lines in mind and plan where panels will connect. Aim for clean edge loops and avoid long skinny triangles.
Tip: Maintain consistent vertex density across the garment to prevent uneven folds. - 4
Apply Shrinkwrap (modeling path)
Add a Shrinkwrap modifier to the garment so it conforms to the body’s surface. This helps the initial fit look believable and reduces initial clipping. Adjust the offset to avoid penetrating the skin while preserving the garment silhouette.
Tip: Use a low subdivision level during the shrinkwrap pass to keep feedback fast. - 5
Set up cloth simulation (simulation path)
Add a Cloth modifier to the garment and enable collisions on the body. Create vertex groups for pins to anchor areas like the shoulders or waist. Run a short bake at a low resolution to verify drape and adjust collision distance as needed.
Tip: Start with a small scale and a tiny mesh to speed up iterations. - 6
Define pins and seams
Create vertex groups for pinned areas and assign them to Cloth Pinning. For seams, enable edge loops and consider separate panels so folds track along intended lines. Test with basic arm poses to detect gaps or overlaps.
Tip: Name vertex groups clearly (pin_shoulders, pin_waist) to avoid confusion later. - 7
Unwrap UVs and plan textures
Unwrap the garment with seams following natural panel boundaries. Use a combination of planar and cylindrical unwraps for curved areas. Prepare a texture atlas that supports base color, roughness, normal, and height maps.
Tip: Avoid large diagonal seams that cause distortion in texture maps. - 8
Create materials and shaders
Set up a Principled BSDF for base fabric, add roughness maps to simulate weave, and consider a light clearcoat for certain materials. If you’re simulating, ensure the unit scales match your render scale and the fabric shader complements motion.
Tip: Test with a range of fabrics (cotton, denim, satin) to see how light interacts differently. - 9
Bake and refine the sim
Bake the cloth simulation at a reasonable resolution. Review folds in key poses and adjust substeps or collision distance if needed. Re-bake as you refine the look until the drape reads believably under lighting.
Tip: Use a mid-range substeps setting to balance accuracy and speed. - 10
Final render setup
Check lighting, camera angles, and render settings. Ensure the garment sits correctly on the character across poses and that the texture maps render cleanly. Save presets for future projects and document your workflow for consistency.
Tip: Create a quick test render with motion to validate animation-ready cloth.
Frequently Asked Questions
What are the two main methods for making clothes in Blender?
The two main methods are modeling garments from scratch and using Blender's cloth simulation to drape fabric. Modeling gives precise control, while cloth sim delivers natural folds and wrinkles. You can combine both approaches for best results.
You can either model the garment or simulate fabric draping, and many artists blend both approaches.
Do I need a high-poly mesh for cloth simulation?
No, you don’t need an extremely high-poly mesh. A clean, well-structured topology on a mid-poly base is often sufficient. You can gradually increase detail only where required for close-ups.
Not necessarily. Start with a simpler mesh to test the sim, then add detail as needed.
How do I sew garments in Blender?
Sewing is typically simulated using pinning vertex groups and attachment points. You select pins to anchor regions (e.g., shoulders) while the fabric drapes, creating a sewn look without manual stitching.
Use vertex groups to pin parts of the cloth so they stay attached while the rest drapes.
Can I bake cloth simulation into a static mesh?
Blender does not bake live cloth dynamics into a single static mesh. You can apply the cloth modifier and convert the result to a mesh for export, but it won’t be a dynamic sim anymore.
You can bake and convert to a static mesh, but it won’t retain dynamic behavior afterward.
What Blender version supports cloth simulation?
Cloth simulation has been supported in Blender for many versions since 2.8. Check the latest Blender release notes to verify current features and any changes.
Cloth simulation exists in modern Blender versions; verify with the latest release notes.
Is cloth simulation suitable for real-time engines?
Cloth simulation is often too heavy for real-time engines. Bake a final pose or use simplified simulations, and export the garment as a static mesh for real-time use.
For games, bake the cloth to a static mesh or use a simplified sim to keep performance high.
Watch Video
What to Remember
- Model or simulate garment based on project needs
- Maintain clean topology for predictable drape
- Unwrap with panel-aligned seams for textures
- Test with low-res simulations before final bake
- Render-ready clothing requires careful lighting and material tuning