How to Retopology in Blender: A Practical Step-by-Step Guide
Master retopology in Blender with a practical, beginner-friendly workflow. Learn to create clean quad topology, optimize edge loops, and bake maps while preserving shape for animation and rendering.

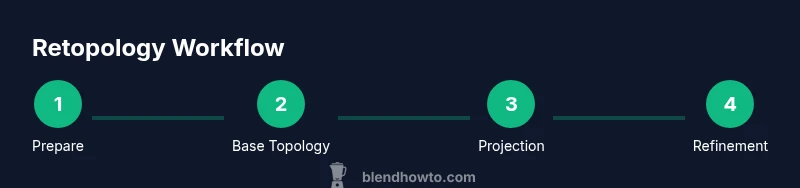
By the end of this guide you will know how to retopology in blender to convert a high-poly mesh into clean quad-based topology ready for animation and rendering. You’ll plan the flow, create a low-poly scaffold, project it to the high-poly surface, refine edge loops, and validate the result. Essential tools: Blender and a high-poly model.
Overview of retopology in Blender
In Blender, retopology is the process of creating a new, low-polygon surface that accurately follows a high-poly sculpture. The goal is to produce a clean, quad-dominant mesh that deforms well during animation and is efficient for rendering. This guide focuses on a practical, hands-on approach you can apply to characters, creatures, props, or architectural details. You'll learn why topology matters, and how to plan edge flows that preserve essential shapes while keeping polygon count manageable. Throughout, you’ll see how Blender’s native tools—such as the Shrinkwrap modifier, snapping, and mirror—can support the workflow without needing third-party add-ons. By the end, you’ll have a repeatable method you can reuse on future projects, from game assets to film-quality models. The core idea is to translate a complex surface into simple, predictable polygons, without altering the silhouette or major features.
Why topology matters for animation and rendering
Topological structure directly influences how a model deforms when it moves. Poor edge loops can cause pinching, collapsing joints, or odd shading during bending. A quad-dominant mesh with clean loops around joints and facial features distributes deformation more evenly, making rigging and skinning smoother. For game assets, topology affects performance: fewer tris and well-placed quads help with GPU efficiency and bake accuracy. Retopology also simplifies UV unwrapping, baking normal maps, and creating LODs. In Blender, you can approach topology aggressively in some areas (silhouette, fingers, eyelids) while relaxing density in flat surfaces. The practical takeaway is to plan topology around movement and texture needs rather than chasing a perfect density everywhere. Remember, the goal is to capture the form with predictable geometry that guides future shading and animation.
Core techniques and approaches
Blender provides several routes to retopology: manual poly-by-poly modeling where you place vertices and connect edges; edge-flow-driven topology that follows contour lines; and projection-based methods that use Shrinkwrap to snap a new mesh to the high-poly surface. A common hybrid approach starts with a low-poly scaffold, then adds loops and quads to follow silhouette and key shapes, finishing with loop optimization. For consistency, keep a quad-dominant topology and avoid long skinny triangles; use edge loops to preserve crisp edges when subdividing or baking normal maps.
Planning topology: edge flow, quads, loops
Begin by mapping major silhouette edges and feature contours. Plan edge loops around joints, facial features, and areas that bend, ensuring even quad distribution. Place vertical loops for limbs and horizontal loops for facial regions, keeping them parallel to natural muscle groups. Leave room for UV islands and baking maps, and use symmetry to halve your workload on mirrored models. A thoughtful plan reduces retopo time and improves deformation later on.
Step-by-step workflow from high-poly to low-poly
This section outlines the practical sequence you’ll follow in Blender. Start with reference prep, create a low-poly base, project it onto the high-poly surface, refine topology with edge loops, and test deformations with a quick rig. Then, clean up geometry and prepare for baking. The goal is a reliable pipeline that yields a quad-dominant mesh that preserves silhouette and major features with predictable deformation.
Common pitfalls and how to avoid them
Common issues include stray triangles near joints, uneven quad density, and broken edge loops after projection. To avoid them, frequently check topology with simple shading, maintain symmetry, and keep a clean origin and scale. Don’t rush UV unwrapping before topology is stable, and always save incremental versions to compare back to a known-good state.
Practical tips for clean topology and optimization
Tips include using the Shrinkwrap modifier for projection, enabling mirror for symmetrical models, and keeping the density balanced across the model. Work with a quad-dominant approach and avoid tiny loops that create shading artifacts. Regularly bake normal maps in a test scene to verify how topology holds up under lighting.
Testing, exporting, and next steps
After retopo, test with a simple rig and a quick lighting setup to evaluate deformation and shading. Export in a format suitable for your pipeline (FBX, OBJ) and verify compatibility with your render engine. Document your topology decisions for future projects and consider creating a reusable retopology template to speed up future work.
Tools & Materials
- Blender (latest stable)(Install from blender.org and ensure you have a recent build)
- High-poly reference model(The model you want to retopologize; keep a copy of the original)
- Reference imagery or orthographic views(Front/side/top references help guide edge flow)
- Keyboard and mouse or drawing tablet(Tablet can speed up vertex placement; use what you're comfortable with)
- Stable computer with ample RAM(Retopology can be memory-intensive on high-poly assets)
Steps
Estimated time: 60-120 minutes
- 1
Prepare reference and high-poly model
Open your high-poly model and gather orthographic references. Create a duplicate mesh to work on, so the original remains intact. This sets the baseline for your topology and prevents accidental loss of detail.
Tip: Always start with a clean copy of the high-poly model to avoid irreversible changes. - 2
Create a low-poly base mesh
Add a simple base mesh (plane or cube) that approximate the silhouette. Use a Mirror modifier for symmetry and adjust the scale to align with the reference. This stage establishes the primary edge loops and form.
Tip: Keep the base mesh simple; complexity comes later in controlled steps. - 3
Enable Shrinkwrap and project onto high-poly surface
Add a Shrinkwrap modifier targeting the high-poly mesh and set to Project. This helps your base topology hug the surface, ensuring major contours align correctly. Switch to Edit mode to manually fine-tune vertices if needed.
Tip: Profile shrinkwrap to preserve silhouette; too aggressive projection can distort details. - 4
Place major edge loops along contours
Create initial edge loops around the main silhouette and feature lines. Ensure loops flow with the model’s muscle groups or material boundaries. This step is critical for predictable deformations later.
Tip: Keep loops evenly spaced; avoid long, sparse edges that cause shading artifacts. - 5
Fill in topology with quads
Add additional quads to fill the surface, maintaining quad-dominant topology. Use Extrude and Bridge Edge Loops to extend the mesh, and avoid triangles near joints.
Tip: Regularly check for degenerate faces and collapse tiny triangles before they form. - 6
Refine and optimize edge flow
Tidy up the topology by aligning loops to key features, removing unnecessary vertices, and ensuring smooth transitions between regions. Symmetry helps maintain balanced density on both sides.
Tip: Use Mesh > Clean Up > Degenerate Dissolve to remove redundant geometry. - 7
Mirror and finalize symmetry
If you started with one half, enable a mirrored workflow to complete the opposite side. Apply transforms, then examine for any asymmetries that could affect animation or baking.
Tip: Apply scale and rotation before mirroring to prevent unexpected results. - 8
Prepare for UVs and baking
With clean topology, unwrap UVs or prepare a seam strategy for baking texture maps. Ensure consistent texel density and avoid overlapping UVs in critical regions.
Tip: Bake a test normal map on a simple renderer to check for shading artifacts early. - 9
Export and test in pipeline
Export in your preferred format (FBX or OBJ) and test import into your renderer or game engine. Validate rigging and shading with a quick animation test to confirm topology holds under motion.
Tip: Keep a backup of both the high-poly and retopo meshes for reference during integration.
Frequently Asked Questions
What is retopology and why is it necessary in Blender?
Retopology creates a clean, low-poly mesh that follows the shape of a high-poly model. It’s essential for efficient animation, rigging, baking maps, and real-time rendering. Blender provides native tools to perform retopo without external plugins.
Retopology creates a simpler mesh that still captures shape, which is crucial for animation. Blender handles it well with built-in tools.
How is retopology different from sculpting?
Sculpting shapes the high-poly form with a dense mesh, while retopology rebuilds a clean, animation-friendly topology on top of that form. Sculpting is about detail; retopology is about efficient, deformable structure.
Sculpting adds detail; retopology makes a practical, animation-friendly mesh on top of it.
Can I retopologize without add-ons in Blender?
Yes. Blender’s core tools—like the Shrinkwrap modifier, snap-to-face projection, and mirror—are sufficient for manual retopology. Add-ons can speed things up, but they’re not required.
Absolutely. Blender’s built-in tools handle it well, even without add-ons.
How can I ensure good edge flow for deformations?
Align edge loops with natural contours and joints, keep loops evenly spaced, and avoid disrupting silhouette shapes. Symmetry helps maintain consistent flow across the model.
Keep edge loops that follow movement areas uniform and symmetrical.
Which Blender technique is best for game-ready retopology?
For games, prioritize quad topology with clean edge loops and controlled density in areas prone to bending. Consider baking normal maps from the high-poly to the low-poly base for performance.
Games require clean, efficient topology and good baking results.
Watch Video
What to Remember
- Plan edge loops around movement and silhouette.
- Maintain quad-dominant topology for better deformation.
- Use Shrinkwrap projection to align topology with high-poly surfaces.
- Test shading early with a quick bake and animation pass.