XPS Blender: Import, Texture, and Export XPS Models in Blender
Learn how to use the XPS Blender workflow to import XPS models, adjust textures, rig if needed, and export to common formats. This educational guide covers installation, compatibility, practical tips, and troubleshooting for reliable XPS Blender workflows in 2026.

You will learn how to set up and use the XPS Blender workflow to import XPS models, adjust textures and materials, rig and animate if needed, and export to common formats. This guide covers installation, compatibility checks, practical tips, and troubleshooting to make XPS Blender workflows smoother. Whether you’re building game props or stylized sci-fi assets, this approach keeps projects organized and repeatable.
What is XPS Blender and why it matters
In the Blender ecosystem, the term "XPS Blender" refers to a practical workflow that combines the XPS (XNALara) model format with the Blender toolkit to create, texture, and animate 3D assets. This approach is especially popular among home artists and hobbyists who want to repurpose fan-made models for games, animations, or personal art projects. The BlendHowTo team has observed that a well-structured XPS Blender workflow reduces the friction between asset acquisition and production-ready output. By using a dedicated importer, consistent texture paths, and a clear export strategy, you can preserve geometry, UVs, and skeletons more reliably than with ad hoc methods.
Ultimately, the value of XPS Blender lies in its repeatability: you can reproduce identical results across multiple projects with a single setup, which is essential for learning paths and portfolio work. This guide will walk you through installing the right add-ons, importing XPS assets, handling materials, and exporting to standard formats that fit into your engine or render pipeline. BlendHowTo’s research shows that practitioners who document their pipeline gain faster turnaround and fewer rework cycles over time.
If you’re new to Blender, think of XPS Blender as a bridge: it connects a fan-driven asset source with Blender’s robust material, rigging, and export capabilities. For experienced modelers, it’s a way to streamline asset intake without losing control over topology, texture fidelity, or animation data.
Throughout this guide, you’ll see practical steps, troubleshooting tips, and best practices designed for 2026 workflows. The goal is to empower you to import XPS models confidently and to manage texture maps and bones efficiently within Blender.
Setting up the XPS Blender workflow
Before you dive into XPS Blender, prepare the environment and verify compatibility. Start by installing the latest Blender version that is stable for add-ons, then obtain a community-supported XPS importer/exporter add-on that matches your Blender release. It’s important to confirm the add-on’s compatibility notes and whether it requires Python scripts or extra dependencies. In short, your setup should include: a supported Blender build, the XPS add-on, and a local folder with any textures referenced by the XPS model.
A smooth setup also means configuring preferences for file paths and external textures. Set Blender’s File Paths to the folder that contains the XPS texture textures and related assets so the importer can locate resources without manual chasing. Keep a dedicated project folder for each XPS model to avoid texture path confusion when switching between assets.
According to BlendHowTo, establishing a clean directory structure at the start saves hours later in the project. It makes batch processing and re-imports far more predictable, which is invaluable when you’re building a library of XPS assets for a showreel or game project.
Finally, verify your Blender scene is using a sensible scale and unit system. XPS models from various sources may use different unit conventions. Setting Blender to metric units with a consistent scale factor ensures that imported assets fit well with your other scenes and export targets. This alignment reduces misalignment issues in engines and viewers.
Importing XPS models: steps and caveats
Importing XPS models in Blender is the gateway to everything that follows. Start by enabling the XPS add-on in Preferences > Add-ons, then use File > Import > XPS to bring in the model. The importer typically preserves geometry, UVs, and bone structure, but you may need to adjust a few settings for best results. Always verify that the import keeps polygon counts intact and that textures are mapped correctly.
One common caveat is texture path resolution. If the add-on cannot locate textures, you’ll see missing texture placeholders in the viewport. Point Blender’s texture paths to the correct texture folder before the import or re-link them after the import. A quick check after import is to inspect material slots and confirm that the texture images load without errors.
Scale and orientation are another frequent pitfall. After import, apply scale and rotation transforms to bring the asset into world space. If the model is upside down or mirrored, rotate accordingly and re-normalize the normals to avoid shading artifacts. If you see flipped normals, recalculate normals with a simple command rather than editing vertex normals manually.
Tip: Always save a backup before importing, especially if you’re loading large assets with multiple materials. This gives you a safety net to revert to a known-good state if something goes wrong during the import process.
Materials and textures handling in XPS Blender
Materials in XPS Blender often carry texture maps such as diffuse, normal, and specular maps. After import, inspect the material slots to confirm textures are correctly assigned. If material data didn’t come through with the XPS asset, you’ll need to recreate the materials from scratch. Use the Shader Editor to combine textures, UV maps, and color values for each surface. Pay attention to texture resolution; high-resolution textures look best, but can slow down your viewport if your hardware is limited.
Coordinate textures with UV maps by checking UV islands in Edit mode. If UVs look stretched or misaligned, adjust the mapping coordinates and re-pack UVs to maximize texture fidelity. In some cases, you’ll need to split large, single-texture sheets into multiple UV tiles to preserve detail where it matters most, such as on faces or emblem detailing.
To keep the workflow robust, manage texture paths through Blender’s data-blocks, and consider using relative paths for portability between machines. For teams, documenting texture sources and naming conventions helps maintain consistency when more assets are added to the library.
Rigging and animation considerations
If your XPS model includes a skeleton or rig, Blender can preserve or rebuild bone structures during import. Review the armature and bone influences to ensure weights are distributed correctly across meshes. If the importer doesn’t fully restore weights, you’ll need to rebind vertex groups and adjust weight painting, particularly on limbs and joints where deformation is most visible.
Animation support in XPS Blender may be partial depending on the add-on. If you plan to animate, verify that the bone names align with your target pipeline and that action data carries over after export. It’s common to bake animations in Blender after import to improve compatibility with engines and other tools.
When working with rigged models, consider creating a neutral pose for each asset. This makes it easier to sequence multiple models in a scene without fighting against inconsistent rest poses. Save this as a baseline for future edits or re-export passes.
Exporting from Blender to XPS or other formats
Export decisions depend on your end-use. Common export targets include FBX, OBJ, and GLTF. If you intend to re-import into XPS or a game engine, choose formats that preserve bones, textures, and UVs. For animated assets, ensure the export includes the necessary animation data, or bake animations into keyframes if your pipeline requires it.
When exporting, adjust axis conventions to match your destination. Blender uses a Z-up coordinate system, while some engines prefer Y-up. Set the correct up-axis in the export dialog and verify that scale remains consistent with the target project. If texture paths rely on absolute directories, consider exporting with relative textures or embedding textures when possible to avoid broken links in other environments.
Documentation is essential: record the export settings you rely on so you can reproduce them later. A single saved export preset can save hours across a multi-asset project, especially when dealing with similar XPS model families.
Real-world example: a mini project workflow
To illustrate the XPS Blender workflow, let’s walk through a mini project: importing a stylized XPS character, texturing it, and preparing it for a simple render. Start by organizing your project folder: a main model file, a textures subfolder, and a backup folder. Install and enable the XPS add-on, then import the character via File > Import > XPS. Check textures; if they don’t load, point to the textures folder and re-link.
After import, apply transforms and ensure the model aligns with your scene’s scale. Open the Shader Editor and assign texture maps to the Diffuse, Specular, and Normal inputs. Revisit UVs to fix any stretching, and optimize textures for performance by re-sampling or downscaling where appropriate. If the model has a skeleton, verify bone weights and, if needed, refine weight painting for natural deformation during animation.
Next, set up a simple lighting environment and run a quick render to verify shading. If animation is required, bake a short action to keep the workflow predictable, then export as FBX for your game engine or as GLTF for web-friendly delivery. Finally, save a copy of the project in the backup folder and document your steps for future reference.
This routine demonstrates how a well-structured XPS Blender workflow translates into reliable results across a small pipeline, keeping files organized and repeatable.
Tools & Materials
- Blender software(Install the latest long-term support version if possible)
- XPS import/export add-on(Community-maintained; verify compatibility with your Blender version)
- Textures and image files(Ensure paths are accessible and textures match the model)
- Backup storage(Create a dedicated backup for each asset before major edits)
- Stable internet connection(For addon updates and texture downloads)
- Optional: reference model or pose library(Useful for alignment and animation references)
Steps
Estimated time: 60-90 minutes
- 1
Prepare Blender and enable the XPS addon
Launch Blender, open Preferences, and enable the XPS importer/exporter addon. This step establishes the bridge between XPS models and Blender’s workflow. Ensure you’re on a supported Blender version and that the addon shows as active in the interface.
Tip: Verify addon is enabled in the Add-ons panel before proceeding to avoid import errors. - 2
Install and verify the addon compatibility
If you downloaded a new addon, install it via the Install button and confirm it appears in the Add-ons list. Check the Blender console for any compatibility warnings and resolve missing dependencies before attempting an import.
Tip: Read the addon documentation for Blender version requirements and Python dependencies. - 3
Import an XPS model
Use File > Import > XPS to load the model file. After import, inspect geometry, UVs, and materials. If textures don’t show, relink texture files to the correct folder.
Tip: If the model is huge, enable simple display to keep viewport performance reasonable during setup. - 4
Apply transforms and correct orientation
Apply scale, rotation, and location to bring the model into world space. Recalculate normals if shading looks odd and confirm the model’s facing direction aligns with your scene rules.
Tip: Use Ctrl+A to apply transforms for a stable baseline. - 5
Fix materials and textures
Check each material slot; re-assign textures where needed and verify UVs. If textures appear stretched, adjust UVs in Edit mode and re-pack islands as needed.
Tip: Keep texture file names consistent with your material slots for easier maintenance. - 6
Rigging and animation prep
If the XPS model includes a skeleton, verify bone weights and ensure compatibility with Blender’s rig. Bake animations if cross-tool compatibility is a concern.
Tip: Test a quick pose to confirm deformation looks natural before exporting. - 7
Export to target formats
Choose an export format (FBX, OBJ, or GLTF) that suits your engine or renderer. Set axis up/down to match your target and enable animation export if needed.
Tip: Create an export preset to replicate settings across assets. - 8
Validate in the target pipeline
Import the exported file into your target engine or viewer to confirm geometry, textures, and animations look correct. Tweak as needed and re-export if required.
Tip: Maintain a changelog for export iterations to track improvements.
Frequently Asked Questions
What is XPS Blender and why should I use it?
XPS Blender refers to a workflow that uses Blender to work with XPS (XNALara) models. It enables importing geometry, textures, and skeleton data for editing, rigging, and exporting within Blender.
XPS Blender lets you import XPS models into Blender for editing and exporting in common formats.
Is XPS support universal across Blender versions?
Support depends on the add-on you use. Check compatibility notes for Blender versions and Python requirements before installing.
Compatibility depends on the addon and Blender version.
What formats can I export after editing XPS models?
Common exports include FBX, OBJ, and GLTF. Some pipelines may require other formats; choose based on your target engine.
You can export to FBX, OBJ, or GLTF, depending on your end-use.
Do I need to rig XPS models to animate in Blender?
If you want animation inside Blender, you’ll typically work with the armature and weight paints. If animation isn’t required, you can pose or shape keyframe the model.
Animation usually requires rigging, but you can still pose static models without it.
Where can I find reliable XPS addons?
Look for community-maintained addons in Blender’s official repositories or trusted Blender community sites. Always check reviews and compatibility notes.
Add-ons are often found in Blender communities; verify compatibility first.
What are common texture issues after import?
Missing textures or misaligned UVs are common. Relink textures and adjust UV maps in the Shader Editor to fix these issues.
Missing textures and UV problems are common; relinking textures usually solves it.
Can I use XPS Blender for game asset pipelines?
Yes, with careful export settings and texture optimization, XPS Blender assets can feed game engines or render pipelines.
It’s suitable for game assets when exports are configured for engines.
Watch Video
What to Remember
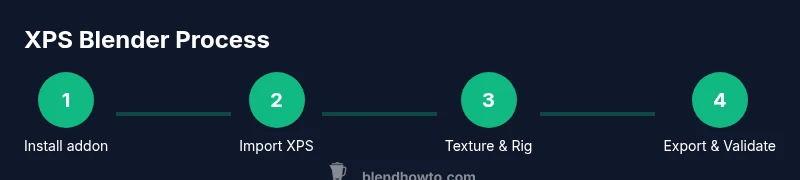
- Install and enable the XPS addon in Blender.
- Import XPS models and fix textures with relinking.
- Adjust scale and orientation for correct world placement.
- Export in a compatible format and validate in your target pipeline.