How to Install BlenderKit in Blender: A Step-by-Step Guide
Learn how to install BlenderKit in Blender with a clear, step-by-step guide. Check compatibility, set up your API key, and troubleshoot common issues for a smooth workflow.

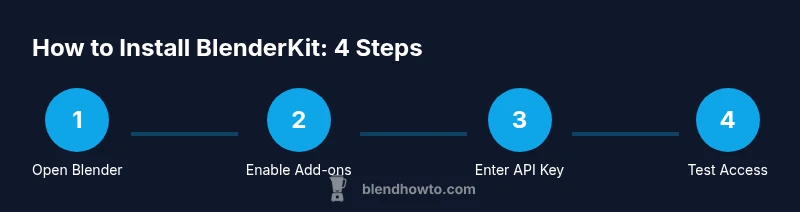
This guide shows you how to install BlenderKit in Blender, verify compatibility, sign in, and begin browsing assets. You’ll learn where to download the add-on, how to enable it, how to input your API key, and common issues to troubleshoot. By following these steps, you’ll unlock direct access to a library of assets inside Blender.
Why BlenderKit Makes Blender Projects Faster
BlenderKit accelerates your creative workflow by integrating a rich library of assets directly into Blender's interface. Instead of chasing external resources or switching between apps, you can search, preview, and import assets right from the 3D viewport. For professionals and hobbyists alike, this seamless integration saves hours per project and reduces friction during iterative design. According to BlendHowTo, adopting BlenderKit often leads to faster asset iteration and more consistent visuals across scenes. If you want to install BlenderKit, you’ll need a supported Blender version, a BlenderKit account, and a stable internet connection. The goal is to have a frictionless, in-editor experience where asset discovery feels like part of Blender itself.
- Quick access to assets from within Blender
- Consistent, high-quality materials and models
- Reduced context switching between apps
- Opportunity to manage licenses and credits in one place
By understanding the value BlenderKit adds, you’ll appreciate why the installation process is worth mastering. This guide focuses on how to install BlenderKit so you can start building right away, without wasting time on setup. Keep in mind that, even after installation, you’ll want to organize your asset library for fast retrieval and consistent pipelines.
System Requirements and Compatibility
To ensure a smooth installation of BlenderKit, you should confirm you’re running a recent, stable Blender release. BlenderKit generally supports current Blender builds and updates roll out through the official BlenderKit site and Blender’s add-on manager. Before starting, verify your operating system (Windows, macOS, or Linux) is up to date and that you have administrative rights if you’re on a shared machine. A reliable internet connection is essential for initial activation, account login, and ongoing asset delivery. If your Blender version is significantly older, you may encounter API or compatibility issues that require updating Blender first. As a best practice, back up your preferences and any custom add-ons before upgrading.
- Use the latest stable Blender release
- Ensure internet access for account authentication
- Back up preferences before adding BlenderKit
- Check compatibility notes on the BlenderKit site
Prepare Your Blender Environment
Before you install BlenderKit, set up a clean workspace to minimize conflicts. Close unnecessary Blender projects, disable non-essential add-ons temporarily, and create a dedicated BlenderKit folder in your project directory to store assets and documentation. If you already have an account, log in to BlenderKit and copy your API key to a secure note. If you don’t have an account yet, visit blenderkit.com and sign up for a free plan to access basic assets. Preparation reduces errors during installation and gives you a clear path to activating the add-on after it’s installed.
- Create a dedicated workspace for BlenderKit assets
- Have your BlenderKit API key ready
- Create a secure place to store credentials
- Ensure you have admin rights for Install steps
Installing BlenderKit: From Website to Blender
There are two common installation paths: installing via the Blender add-ons panel or downloading a BlenderKit zip from the website and installing from file. First, download the BlenderKit add-on ZIP from blenderkit.com. In Blender, go to Edit > Preferences > Add-ons > Install, locate the ZIP file, and click Install Add-on. After installation, enable the add-on by ticking the checkbox next to BlenderKit. If you prefer online installation, you can search for BlenderKit directly in the Add-ons search bar and enable it without downloading a ZIP. In either case, ensure that you don’t install conflicting add-ons during the process. After enabling, you should see the BlenderKit panel in the side toolbar or the Preferences area.
- Visit blenderkit.com and download the ZIP, or use Add-ons search in Blender
- Install from File in Blender Preferences if using ZIP
- Enable BlenderKit in the Add-ons list
- Look for any conflicting add-ons and disable them if needed
Activating BlenderKit and Logging In
Activation requires a BlenderKit account. Open the BlenderKit panel and sign in, or create an account if you don’t already have one. After signing in, copy your API key from your BlenderKit dashboard and paste it into the API Key field in Blender’s BlenderKit preferences. This step authenticates your session and unlocks asset browsing, search, and preview capabilities inside Blender. If you encounter login issues, verify your internet connection, ensure you’re using the correct account credentials, and check that the API key hasn’t expired. Save the settings and restart Blender if necessary.
- Sign in or create a BlenderKit account
- Copy API key and paste into Blender preferences
- Save and restart Blender if needed
- Test by searching for an asset in BlenderKit
Managing Add-ons: Preferences, API Keys, and Updates
Keep BlenderKit up to date by checking for add-on updates in Blender’s preferences. Periodically refresh your API key if you notice access issues or after password changes on BlenderKit. Customize preferences to your workflow, such as enabling auto-sync of assets, choosing default search galleries, or adjusting how results are displayed in the viewport. Regularly review BlenderKit’s announcements for new assets, license changes, or feature updates. This proactive approach helps maintain compatibility with Blender’s latest features and ensures you’re always using the best available content.
- Check for add-on updates regularly
- Refresh API keys when needed
- Tailor preferences to your workflow
- Stay informed about asset and license changes
Troubleshooting Common Installation Issues
If BlenderKit doesn’t appear after installation, first verify the add-on is enabled in Edit > Preferences > Add-ons. Check the Blender Console for error messages related to Python or API connectivity. Common issues include outdated Blender versions, disabled Python scripts, or blocked internet access. For login problems, double-check credentials and ensure your BlenderKit account is active. If assets fail to load, confirm API key validity and that you’re connected to the internet. When all else fails, reinstall the add-on or reset Blender’s preferences to default and re-enable BlenderKit carefully.
- Ensure the add-on is enabled
- Review the Blender Console for errors
- Verify API key validity and online access
- Consider a clean reinstall if problems persist
Tips for a Smooth Onboarding with BlenderKit
To get the most out of BlenderKit, start with a curated set of assets that match your project style. Organize your asset library by category and use tags to quickly filter results. Save commonly used assets to a favorites list for faster access. Consider enabling a lightweight caching strategy so frequently used assets don’t require repeated downloads. Finally, keep your workspace tidy by periodically archiving unused assets and documenting asset licenses to comply with usage rights.
- Start with a curated asset set
- Organize assets by category and tag
- Use favorites for quick access
- Keep licenses documented and compliant
Tools & Materials
- Blender software (latest stable release)(Download from blender.org; ensure version compatibility with BlenderKit guidance)
- Internet connection(Stable connection needed for activation and asset fetches)
- BlenderKit account(Create a free account to obtain API access and asset rights)
- API key from BlenderKit(Copied from your BlenderKit dashboard and pasted into Blender preferences)
- Backup of Blender preferences(Optional safeguard before installing new add-ons)
Steps
Estimated time: 15-25 minutes
- 1
Open Blender and access Preferences
Launch Blender and navigate to Edit > Preferences. This is where you manage add-ons, including BlenderKit. Opening Preferences early ensures you can see the Add-ons panel as soon as BlenderKit is installed. If you’re new to Blender, take a moment to familiarize yourself with the layout of the Preferences window before proceeding.
Tip: Bookmark the Add-ons pane for quick access in future projects. - 2
Install BlenderKit add-on from ZIP or search
If you downloaded the ZIP from blenderkit.com, select Install and locate the ZIP file. If you prefer online installation, use the Add-ons search to find BlenderKit and enable it directly. Either method should place BlenderKit in your Add-ons list.
Tip: If you use ZIP, ensure the file integrity to avoid installation errors. - 3
Enable BlenderKit in the Add-ons list
Tick the checkbox next to BlenderKit to enable it. Enabling the add-on makes its UI appear in the Blender interface, typically in the right-hand toolbar or under the Web/Asset panel. After enabling, you may need to restart Blender.
Tip: Enabling immediately after installation helps confirm the add-on loads correctly. - 4
Sign in or create a BlenderKit account
Open the BlenderKit panel within Blender and sign in. If you don’t have an account, use the link provided to create one. You’ll need this to access the asset library and license terms.
Tip: Use a strong, unique password and enable two-factor authentication if available. - 5
Copy and paste your API key
From your BlenderKit account dashboard, copy the API key and paste it into the API Key field in Blender’s BlenderKit preferences. Save your settings and test the connection by performing a quick asset search.
Tip: Never share your API key; treat it like a password. - 6
Test the connection with a quick asset search
In the BlenderKit panel, search for a common asset (e.g., “chair” or “texture”). If results appear, the add-on is functioning. If not, review your internet connection and API key, then retry.
Tip: Refresh results by toggling the search gallery if necessary. - 7
Update preferences and adjust defaults
Explore preferences such as auto-update, asset preview quality, and default search categories. Customizing these helps BlenderKit blend into your workflow rather than interrupt it.
Tip: Set defaults that reflect your project’s typical asset needs. - 8
Document and organize assets for reuse
Create a small library within BlenderKit or your project folder to store frequently used assets. Tag and annotate items to speed up future searches.
Tip: A well-maintained library reduces search time significantly.
Frequently Asked Questions
Do I need a BlenderKit account to install BlenderKit?
Yes. An account is required to obtain an API key and to access the BlenderKit asset library.
Yes, you need a BlenderKit account to use the add-on and browse assets.
Is BlenderKit free to use?
BlenderKit offers a free tier with access to a broad set of assets; paid plans provide access to more content and features.
There’s a free option, with paid plans for more assets and features.
I can’t find BlenderKit in the Add-ons list. What should I do?
Ensure BlenderKit is installed and enabled in Edit > Preferences > Add-ons. If not visible, try restarting Blender or reinstalling the add-on.
If BlenderKit isn’t visible, reinstall or enable it from the Add-ons panel and restart Blender.
Can BlenderKit be used offline?
Access to assets requires an internet connection and API validation. Offline usage is limited and may not fetch new assets.
Offline use is limited; you’ll need internet access to fetch assets.
How do I update BlenderKit?
Check the Add-ons panel for updates and install the latest version when prompted. Keeping BlenderKit updated ensures compatibility with Blender.
Use the Add-ons update option in Blender to stay current.
What Blender versions support BlenderKit?
Check BlenderKit’s official site for compatibility notes with your Blender version. Use a supported version to avoid compatibility issues.
Refer to BlenderKit’s site for compatible Blender versions.
Watch Video
What to Remember
- Install BlenderKit via Add-ons or ZIP for flexibility
- Sign in and secure your API key for asset access
- Test with a quick asset search to verify setup
- Configure preferences to fit your workflow
- Maintain a curated asset library for faster work