Can You Use Blender If You Can't Draw? A Practical Guide
Learn practical Blender workflows for non-artists: reference-based modeling, primitive shapes, procedural methods, and texturing tips. A step-by-step guide to create believable 3D assets without drawing skills.

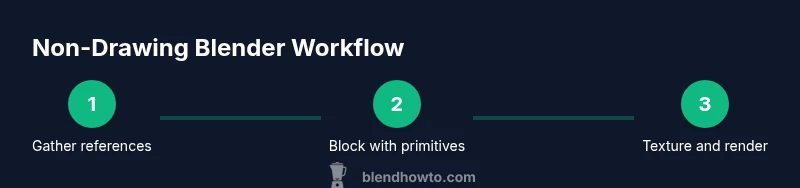
Yes. You can absolutely use Blender even if you can't draw. Blender supports non-drawing workflows through reference images, tracing, primitive shapes, and procedural modeling. You can build complex models by combining shapes, modifiers, and sculpting, then texture and render. The key is choosing a workflow that fits your strengths and practicing with guided steps.
Why this topic matters: can you use blender if you can't draw
If you’re asking can you use blender if you can’t draw, the answer is a clear yes. Blender is built to support a wide range of workflows that do not depend on freehand drawing. You can turn concepts into 3D assets by leaning on references, geometric foundations, and non-destructive techniques. This approach lowers the barrier for beginners and lets you focus on structure, proportion, and texture rather than perfect linework. At BlendHowTo, we’ve seen countless hobbyists start with simple reference-based projects and steadily gain confidence through consistent practice.
Key idea: you don’t need to be an artist with a pencil to create compelling Blender models; you need a plan, good references, and a workflow that fits your strengths.
boldingStyleOfParagraphsOnly:1},
bodyBlocks2
Embracing references, tracing, and shape-based modeling
A core strategy for working without drawing is to leverage references and shape-based thinking. Import reference images into Blender as backdrops or image planes, align them to the views you model from, and use them as a visual guide rather than a crutch. Tracing over references—either with tight masking or the edge tool—helps capture accurate silhouettes without freehand sketching. Start with simple primitives like cubes, cylinders, and spheres, then combine, edit, and blend them using modifiers. This rhythm—reference, block, refine—lets you translate an idea into tangible geometry without drawing skills. Over time, you’ll learn which shapes convey the character of your subject and how to approximate details using non-drawing methods. BlendHowTo’s guidance emphasizes steady progress and practical experiments over perfection at the start.
bold:false,
Tools & Materials
- Computer with Blender installed (latest version)(Blender 3.x or newer; ensure GPU drivers are up to date)
- Reference image set (photos or concept art)(Organize in a folder; import into Blender for backdrops)
- Mouse or drawing tablet (optional)(Helpful for precision but not required)
- Second monitor or screen space for references(Helps keep references visible while modeling)
- Texture examples or photos for texture painting(Useful for realistic results without painting skill)
Steps
Estimated time: 60-90 minutes
- 1
Gather references and set up the project
Collect clear reference images from multiple angles and save them in a dedicated folder. In Blender, import these references as background images or as image planes to guide proportions and silhouettes. Align views so front, side, and top correspond to your modeling axis.
Tip: Organize references by object part (e.g., base, handle, lid) to speed up blocking. - 2
Block out the basic silhouette with primitives
Start with simple shapes (cube, cylinder, sphere) to establish the overall proportions. Use the Scale and Move tools to match the reference silhouette. Don’t worry about fine details yet—focus on getting the major volumes right.
Tip: Enable Mirror modifier early for symmetrical objects to save time. - 3
Refine proportions with non-destructive edits
Switch to Edit mode only after you’re satisfied with the blocking. Use the Subdivision Surface and Bevel modifiers to smooth edges without redesigning every vertex. Keep checking the reference images while you work to maintain accurate proportions.
Tip: Keep your topology clean; avoid triangles in major surface areas for smoother shading. - 4
Add features using non-drawing methods
Use boolean operations, inset faces, and extrusions to craft features like lips, spouts, or handles. For organic shapes, use sculpting with reference images as guides, not as drawing prompts. Always check scale against a common unit system.
Tip: Non-destructive workflows pay off later when you need to adjust proportions. - 5
Unwrap UVs and prepare textures
Unwrap the model’s UVs, then apply textures using image textures or procedural nodes. You can generate realistic textures by layering simple patterns, noise, and micro-details rather than painting by hand. This stage is about mapping and material setup, not freehand painting.
Tip: Use seams strategically to minimize stretching on curved surfaces. - 6
Material setup and lighting for realism
Create PBR materials using base color, metallic, roughness, and normal maps. Set up a simple three-point lighting rig to evaluate how the model reads under different intensities. Rendering with Cycles or Eevee will reveal any shading issues early.
Tip: Test with HDRI lighting to quickly gauge realism without complex lighting setups. - 7
Render, review, and iterate
Render your scene at a comfortable resolution, evaluate proportions, shading, and texture alignment, then return to blocking or texture steps if something looks off. Iteration is cheaper than perfection in a single pass. Use render layers to isolate issues.
Tip: Keep a log of changes to avoid backtracking on fixes. - 8
Save and document your method
Name and organize files clearly, write a quick notes file describing the workflow you used, and archive references. Documentation helps you reproduce the process for future projects and makes it easier to explain your approach to others.
Tip: Regular backups prevent data loss and make revision history accessible.
Frequently Asked Questions
Do I need to be able to draw to model in Blender?
No. Many Blender artists start with reference images, primitive shapes, and modifiers to build models. Drawing skill is helpful but not required for entry-level modeling.
No, you do not need drawing skills to model in Blender; references and basic shapes are enough to start.
What is the best starter project for non-artists?
A simple everyday object (like a mug or a cup) works well. It provides recognizable proportions, helps you practice blocking, and lets you explore materials and lighting without complex detailing.
A simple object like a mug is a great starter project for non-artists.
Is tracing over references ethically acceptable?
Yes, as long as you use your own references or properly licensed images. Avoid copying protected artwork and credit sources when required.
Tracing is okay with rights-cleared references or your own images.
Can I animate if I can’t draw?
Yes. You can invent motion using rigs, keyframes, and procedural animation, focusing on movement rather than freehand drawing.
Animation doesn’t require drawing skills; you can animate using rigs and keyframes.
Do I need a drawing tablet for textures?
No. You can texture using image textures or procedural maps in Blender. A tablet can help with painting-only tasks, but it’s not essential for non-drawing workflows.
A tablet isn’t required for texturing; image textures and nodes do the job.
Watch Video
What to Remember
- Model without drawing by using references and primitives
- Block, refine, and iterate with non-destructive modifiers
- Texture and shade with image textures and procedural methods
- Plan topology and scale early to avoid shading issues
- Practice regularly to translate concepts into believable 3D assets