How to Import IFC to Blender
Learn how to import IFC files into Blender using BlenderBIM and IfcOpenShell. This educational guide covers prerequisites, setup, import steps, data mapping, troubleshooting, and best practices for reliable BIM-to-Blender workflows.

By following this guide you will learn how to import IFC files to Blender using BlenderBIM and IfcOpenShell, enabling BIM data in your 3D scenes. The process involves installing the BlenderBIM addon, preparing the IFC file, configuring units, and adjusting materials after import. This approach works for home hobbyists and professionals alike.
What is IFC and why import to Blender?
IFC, or Industry Foundation Classes, is an open, vendor-neutral data model used by architectural, engineering, and construction workflows to describe buildings and infrastructure. Importing IFC into Blender unlocks the ability to visualize, analyze, and remix complex BIM data in a flexible 3D environment. For home hobbyists and professional 3D artists alike, a successful IFC-to-Blender pipeline helps you inspect geometry, review BIM elements, and create presentation-ready renders from architectural models. When you start with the right tools, like BlenderBIM and IfcOpenShell, you can preserve geometry fidelity, maintain relationships between elements, and reuse data for tasks such as clash detection, visualization, and asset creation. In this guide, we cover practical steps to move an IFC model from design software into Blender without losing essential BIM attributes.
Why BlenderBIM is the right tool for IFC workflows
BlenderBIM is a dedicated extension that integrates BIM data into Blender's modeling environment. It enables importing IFC data directly, preserves construction elements, and exposes BIM attributes that you can map to Blender properties. Unlike generic OBJ or STL imports, BIM-aware workflows keep semantics intact, which is valuable for architects and visualization specialists. BlenderBIM supports unit handling, material mapping, and entity filtering, making it easier to manage very large IFC files. This makes it a natural fit for Blender users who want to leverage Blender's rendering, animation, and scripting capabilities while retaining BIM fidelity. According to BlendHowTo, adopting BlenderBIM as part of your IFC-to-Blender pipeline improves interoperability and reduces rework across software. The principle is to start simple with a small IFC file and scale your workflow as you become comfortable with the add-on.
Prerequisites and planning before you import
Before attempting an IFC import, clarify your project goals and prepare the file. Ensure you have a Blender version that supports BlenderBIM and a compatible operating system. Decide whether you want to import geometry, BIM data, or both, and plan how you will organize elements into collections for easier inspection. Gather a clean IFC file from the design team, and if needed, request a version optimized for performance (e.g., reduced detail, multiple IFC subsets). Confirm that unit systems match your Blender scene so scales align correctly, and check that the file isn't corrupted. Having a clear plan saves time and minimizes rework, especially on larger building models that can strain hardware.
Installing BlenderBIM and IfcOpenShell
To begin, install the BlenderBIM add-on from the Blender Market or the BlenderBIM project page. Enable it in Preferences > Add-ons, then load the IFC importer. If your workflow relies on IfcOpenShell, install the Python package and ensure the module paths are accessible to Blender. After installation, restart Blender and verify that BlenderBIM appears in the Add-ons list and that the Import IFC option is active. If you encounter permissions issues or missing dependencies, consult the Blender community and the BlenderBIM documentation for troubleshooting steps. With the extensions in place, you’re ready to prepare an IFC file for import, test a small sample, and start organizing multi-element assemblies in Blender.
Importing IFC: BlenderBIM vs IfcOpenShell
BlenderBIM provides a direct, integrated workflow for importing IFC models, while IfcOpenShell offers low-level tools often used in scripting or batch processing. BlenderBIM is typically sufficient for most designers who want to drag IFC data into Blender and begin editing geometry and BIM attributes. If you need advanced filtering, automation, or batch imports, IfcOpenShell can complement BlenderBIM by letting you script custom pipelines. In either case, verify that your IFC file contains the elements you care about (walls, doors, windows, floors) and that the unit system is set to meters or the preferred Blender unit. BlendHowTo notes that for consistent results, you should import a small subset first to confirm coordinate alignment and data integrity.
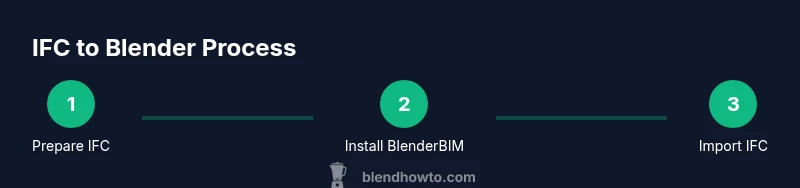
Step-by-step overview of the import process
- Prepare your project and IFC file. 2) Install and enable BlenderBIM (and IfcOpenShell if needed). 3) Open Blender, select Import IFC, and choose your file. 4) Check the outliner for correct element placement and grouping. 5) Adjust scale and units to match your scene. 6) Review BIM attributes in the properties panel and link them to custom Blender data if needed. 7) Clean up geometry, remove duplicates, and fix normals. 8) Map materials to create a coherent visual presentation. 9) Save frequently and create a versioned backup. 10) Export to a desired format if you plan to share the model outside Blender. This overview keeps you oriented before you commit to a full import session.
Post-import cleanup: geometry, materials, and data mapping
Once the IFC model is in Blender, focus on organizing geometry into logical collections, removing unused data, and ensuring normals are consistent for correct shading. You can map BIM attributes to custom properties in Blender to facilitate downstream workflows, such as simulations or VR presentations. Material assignment should reflect the original BIM materials where possible; you can create a material library for recurring elements (stone, glass, metal) to speed up future projects. For large projects, consider decimating distant components or using a Level of Detail (LOD) strategy to keep the scene responsive during editing and rendering.
Troubleshooting common issues during IFC import
Common problems include excessive file size, missing or misaligned elements, and inconsistent units. If Blender shows missing textures, check that material mappings are correct and that the upstream IFC export included texture data. Unit mismatch can dramatically shift scale; always verify the scene units before importing and adjust as needed. Large models may require tiling or chunked imports, and you can test with a smaller subset first. If elements appear out of place, recheck coordinate systems and origin alignment. For persistent problems, consult BlenderBIM’s official documentation and community forums.
Best practices for reliable IFC workflows in Blender
Adopt a repeatable pipeline: start with a small IFC file, confirm basic imports, then scale to larger models. Maintain a clean naming convention for BIM elements to streamline filtering in Blender. Document your unit settings and version numbers for Blender and add-ons to reduce friction when teammates join the project. Keep a back-up every time you adjust material mappings or geometry. Finally, consider publishing a checklist for your team to ensure consistency across projects.
Next steps: exporting, sharing, and continuing BIM-to-Blender integration
After successful import and cleanup, you may export from Blender to formats like OBJ, FBX, or GLTF for collaboration or visualization. If you plan to share BIM data externally, preserve metadata by exporting with appropriate options or using BlenderBIM to maintain BIM attributes. Continue integrating with downstream tools (rendering, game engines, or VR) by scripting repetitive tasks or building a library of commonly used elements. Regularly update addons and Blender to stay compatible with IFC specifications and to benefit from bug fixes and performance improvements.
Tools & Materials
- A computer with Blender 3.x installed(Recommended: 16GB RAM or more, GPU with 4GB+ VRAM for viewport performance.)
- BlenderBIM add-on(Install from the BlenderBIM project page or Blender Market.)
- IfcOpenShell (optional)(Useful for advanced scripting or batch workflows.)
- IFC file(s)(Prefer clean, well-structured IFC files; test with a small subset first.)
- Internet access for downloads(Needed for add-ons and dependencies.)
- Backup storage(Versioned backups help protect work.)
- Coordinate grid reference materials(Helpful for aligning imported geometry with the scene.)
Steps
Estimated time: 1-2 hours
- 1
Prepare your IFC file and project
Inspect the IFC file for obvious issues (corrupt geometry, missing references). Decide which elements you want in Blender and plan a sensible folder/collection structure. This upfront planning reduces rework during the import and helps keep your Blender project organized.
Tip: Test with a small subset to confirm data integrity before loading the full file. - 2
Install BlenderBIM and optional IfcOpenShell
Install BlenderBIM, enable the add-on in Preferences, and verify the Import IFC option appears. If you need automated workflows or scripting, install IfcOpenShell and configure Python paths accordingly.
Tip: Follow the official install guides to avoid version conflicts. - 3
Open Blender and start the import
Launch Blender, choose File > Import > IFC, and select your IFC file. Check that units are set to your desired system (meters is common for BIM).
Tip: Import a small test file first to validate coordinate alignment. - 4
Initial cleanup after import
In the Outliner, verify element placement, group related elements into collections, and fix any misaligned or duplicated geometry.
Tip: Turn on wireframe view to spot hidden duplicates more easily. - 5
Adjust scale and units
Match Blender units with the IFC file. If necessary, scale objects globally or adjust the unit conversion to ensure accurate dimensions.
Tip: Consistent unit settings prevent later modeling errors. - 6
Review BIM attributes and mapping
Browse BIM properties and map essential attributes (IDs, types, materials) to Blender custom properties for easier filtering and data exchange.
Tip: Keep a lookup table for BIM-to-Blender property mappings. - 7
Material and texture mapping
Assign materials that reflect BIM appearances, and import any textures if available. Recreate material properties in Blender for accurate rendering.
Tip: Use a small material library to speed up future imports. - 8
Finalize geometry cleanup
Repair normals, remove unused data blocks, and optimize the scene for performance. Freeze the clean state before any export or sharing.
Tip: Regularly save versions during cleanup to prevent loss. - 9
Save and back up your work
Save the Blender project and create a versioned backup before proceeding to export or additional processing.
Tip: Use a consistent naming convention for versions. - 10
Export or continue integration
Export to your target format if needed (GLTF, FBX, OBJ) or continue BIM-to-Blender integration for visualization or analysis.
Tip: Choose export options that preserve relevant BIM data when possible.
Frequently Asked Questions
Do I need BlenderBIM to import IFC files into Blender?
For most users, BlenderBIM is the recommended route to import IFC data into Blender, as it preserves BIM elements and attributes. IfcOpenShell can be used for advanced scripting or batch processing, but BlenderBIM covers the common workflow.
Yes. BlenderBIM is typically required for IFC imports, and IfcOpenShell can help for advanced cases.
Can Blender import IFC files without any add-ons?
Blender does not natively support IFC import. You’ll need an add-on like BlenderBIM or a scriptable pipeline such as IfcOpenShell to bring IFC data into Blender.
No, you need an IFC-specific add-on like BlenderBIM or IfcOpenShell.
What should I do if the IFC model loads but elements are misplaced?
Check the IFC file's origin and units, then adjust Blender's scene scale. Reimport with correct unit settings and verify coordinate alignment. Large models may need incremental loading or chunk processing.
Make sure the units and origin match between IFC and Blender, then reimport if needed.
How can I map BIM data to Blender properties?
Use BlenderBIM’s property panels to create custom properties or link BIM attributes to Blender data blocks. This helps maintain traceability between BIM data and your Blender scene.
You map BIM attributes to Blender properties in the BlenderBIM interface.
Which Blender version is best for IFC imports?
Use a current, stable Blender release that supports BlenderBIM and your operating system, ensuring compatibility with add-ons and IFC workflows.
A recent stable Blender release is recommended for best IFC support.
Watch Video
What to Remember
- Import IFC to Blender using BlenderBIM for BIM fidelity
- Test with small IFC subsets before full imports
- Organize geometry with collections and clean up duplicates
- Map BIM attributes to Blender data for better interoperability
- Maintain consistent unit settings to preserve scale