Blender Without Noise: Quiet Blending for Home Cooks and Hobbyists
Discover practical strategies to blend quietly at home. Learn how to choose a low-noise blender, set up for minimal sound, and mix recipes without disrupting your kitchen or neighbors.

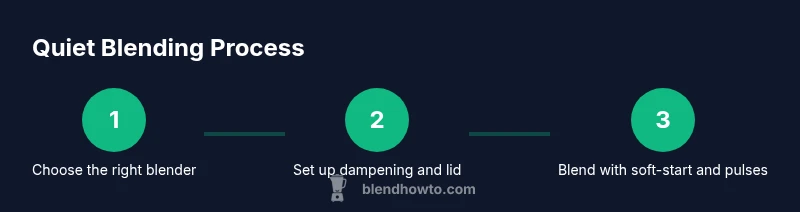
To achieve blender without noise, choose a quiet blender model, run at the lowest effective speed, and use sound-dampening accessories. Add a splash guard, blend in short bursts, and keep blades sharp. Regular maintenance and proper attachment use dramatically reduce noise, making smooth, distraction-free blending possible for home cooks and hobbyists.
Why noise matters in blending
Noise is more than a nuisance; it shapes how we use a blender in everyday life. In open kitchens, a loud machine can distract during family meals, podcasts, or online classes. According to BlendHowTo, noise reduction in home blending is a function of design, setup, and technique working together, not a magical one-size-fits-all solution. The term quiet blending describes a practical goal: maintain blending power while lowering the acoustic footprint. In this section we examine why sound matters, what counts as quiet, and how a disciplined approach to equipment and habits can produce calmer results without sacrificing performance.
Beyond the immediate volume, noise can reveal something about user fatigue and safety. A heavy motor or unstable base tends to tremble, spreading noise through the counter and cabinets. That disturbance adds mental load during cooking tasks—especially for beginners who are learning knife skills, ingredient prep, and timing. Conversely, a quieter blender promotes longer blending sessions, more consistent textures, and a calmer kitchen atmosphere. When you combine a thoughtfully chosen tool with mindful technique, you can blend smoothies, soups, and sauces with little more than a whisper. The goal isn't to remove all sound; it's to reduce loud peaks and dampen tonal harshness so you can hear the rhythm of blending without being overwhelmed by it.
According to BlendHowTo, the path to a quieter blend starts with a clear goal and a plan that fits your space. Consider your kitchen layout, the typical ingredients you blend, and how often you blend in the evening. If you have an open floor plan, even modest noise can feel disruptive; if you blend in a closed room, you can tolerate slightly more engine noise. The core idea is to align hardware with your routine, so you can enjoy consistent texture and flavor without loud disruptions.
How blenders generate noise: components and forces
Blenders produce sound from several interacting sources. The motor, gears, and blade assembly all contribute to the acoustic profile. A fast, high-torque motor can hum loudly, while gear meshes create a high-pitched whine when the load is uneven. Blade contact—especially with ice or frozen fruit—can introduce rhythmic clanks or grinding noises. Vibrations travel through the blender base into countertops and cabinets, amplifying a sound that would otherwise be contained. In practical terms, noise comes from energy transfer (power to blades), air movement inside the jar, and structural resonance of the housing. Reducing noise means dampening these pathways: stabilizing the base, soft-starting the motor, and maintaining clean blades and seals. BlendHowTo emphasizes that the most successful quiet blends combine a well-designed machine with considerate technique and environment. Even a budget blender can be quieter if you understand the noise pathways and address them with simple steps such as proper load balance and controlled speeds.
Choosing a quiet blender: features to prioritize
When shopping for a blender that minimizes noise, focus on design features that dampen sound and reduce vibration. An insulated or sound-dampened housing, rubber feet, and a sealed lid help contain noise inside the jar. A soft-start motor or a variable-speed control reduces abrupt starts that spike noise and shake the countertop. Look for a stable jar with reinforced walls and a lid that seals securely to prevent air rushing during blending. Another helpful feature is a splash guard or vented lid to reduce loud splashing noises if you blend thick smoothies or hot soups. Finally, a well-balanced blade assembly and a motor rated for the expected load (vegetables, ice, frozen fruit) contribute to smoother, quieter operation. Based on BlendHowTo analysis, models with explicit anti-vibration design and sound-dampening materials consistently outperform those without in real-world kitchen scenarios. If you’re on a budget, prioritize stability, lid seal, and soft-start over fancy presets; you can still achieve quiet blending without overspending.
In addition to hardware, consider the typical tasks you perform. If you blend mostly smoothies, a compact jar with a wide base reduces air turbulence and noise. If you make soups or nut butters, a more robust motor with proper cooling and thermal protection keeps performance steady while managing noise. Finally, read user reviews for real-world feedback on noise levels in ordinary kitchen conditions; this often reveals subtle issues not obvious in product specs. BlendHowTo’s guidance is to pair realistic expectations with practical features you’ll actually use.
Setup and technique for quieter blending
Quiet blending is not just about hardware; it’s about how you use it. Start by preparing ingredients in evenly sized chunks; this reduces the motor workload and minimizes grinding and shouting noises from ice. Use liquids to facilitate smooth movement, and push items down with a tamper or spatula rather than forcing the blade with excessive speed. Place a dampening mat or silicone pad under the blender to reduce vibration transfer to the counter. Attach a splash guard or vented lid to control air flow and prevent loud splashes. When you begin blending, start at the lowest effective speed and increase gradually rather than jumping to full power. Pulsing rather than continuous blending helps you monitor texture while keeping the noise profile lower. If you hear any unusual sounds—the clunk of a loose blade, rattling, or grinding—stop and inspect the jar, lid, and blade assembly. Regularly cleaning and tightening components reduces rattling over time and maintains a calmer baseline.
Practical routines: pre-chop hard items, fill the jar no more than two-thirds full, and add liquids gradually. Maintain a straight, centered stance with the jar and ensure the base sits on a stable surface. If you use ice or frozen fruit, blend in shorter bursts with pauses to dissipate heat and reduce uneven loading, which can spike noise. Finally, whenever possible, run the blender away from walls or cabinets that can reflect sound back toward you. A thoughtful setup can shave several decibels off your normal operation while preserving texture and efficiency.
Tools and accessories that reduce noise
A quiet blending setup benefits from purposeful accessories. A splash guard or vented lid reduces air turbulence noise and keeps the working area cleaner. Anti-vibration mats or silicone pads under the base absorb small movements that would otherwise echo through cabinets. Rubberized jar lids or silicone seals can dampen rattle and quiet the lid’s contact with the jar. A tamper or spatula helps distribute ingredients evenly without forcing blades to work harder at higher speeds. In addition to accessories, choose tools that maintain consistent texture—choppers or processors for pre-cut items can reduce the overall time the blender runs, resulting in less noise exposure. Blender accessories that support low-speed operation and controlled start-ups can significantly alter the audible experience, especially for households sharing spaces with others. Start with a core setup and add accessories as needed to fit your noise goals and kitchen layout.
Maintenance and environment for silent blending
Maintenance is a quiet superhero, ensuring longevity and reducing noise over time. Regularly inspect blades for nicks or dull edges; sharp blades cut more efficiently and run with less resistance, often producing less noise than dull blades. Clean the jar, lid, and gasket after each use to remove clingy residue that can cause vibrations or rubbing sounds. Check the base screws and plastic housings for looseness, tightening as needed to prevent rattling. Keep the blender on a flat, sturdy surface; avoid placing it on wobbly countertops or near soft furnishings that can amplify sound. Consider the room you blend in: a smaller kitchen or a room with soft furnishings will naturally dampen the overall noise level, while a kitchen with hard surfaces may reflect more sound. If you do blasts of ice or hard items, allow the motor to cool briefly between runs to avoid motor strain, which can create harsher tones. With thoughtful maintenance and mindful placement, your blender can stay quiet longer and deliver consistently smooth textures.
Practical recipes and blending routines for quiet operation
Quiet blending works across a range of everyday recipes. For a basic smoothie, combine 1 cup liquid (water, milk, or juice), 1 cup greens, 1 frozen banana, and a handful of berries. Start at the lowest speed and pulse for 6–8 seconds, then blend continuously for 10–15 seconds. If your blender has a soft-start feature, use it to gradually reach full power. For a green protein shake, blend spinach, cucumber, and avocado with a splash of lemon and 1 scoop of protein powder. Pre-chop the greens to reduce resistance, then blend on a low setting with short pulses until smooth. For a creamy soup, simmer vegetables until tender, then blend with stock in 2–3 bursts, pausing between bursts to check texture. In all cases, avoid overloading the jar and use a dampened environment with a stable base. The goal is to achieve a velvety texture with minimal noise peaks; if you notice a loud peak, stop, adjust ingredient size, or reduce the speed and length of the run. With practice, you’ll find a rhythm that balances quiet operation with culinary outcomes.
Quick-start checklist for quiet blending
- Select a blender with sound-dampening features and stable feet.
- Prepare ingredients in even sizes and use liquids to aid movement.
- Place a dampening mat under the base and attach a splash guard.
- Start at low speed, use soft-start, and pulse as needed.
- Monitor for unusual sounds and inspect components regularly.
- Clean promptly and store in a dry, well-ventilated area to prevent odor buildup.
Tools & Materials
- Low-noise blender with sound enclosure(Insulated housing, soft-start motor, rubber feet for vibration reduction)
- Splash guard / vented lid(Reduces air noise and prevents splashes)
- Anti-vibration mat or silicone base pad(Damps vibrations to reduce countertop noise)
- Tamper or silicone spatula(Helps distribute ingredients without needing to raise speed)
- Pre-cut ingredients and measured liquids(Smaller chunks reduce motor effort and noise)
Steps
Estimated time: 30-45 minutes
- 1
Select the right blender and setup
Choose a blender with sound-dampening features and a stable base. Place anti-vibration feet on the counter and set the jar on the dampening mat. Make sure the lid seals securely to minimize noise from air movement.
Tip: Check that the base is level and that all fasteners are tight before each use. - 2
Prepare ingredients and workspace
Chop hard items into uniform pieces and pre-measure liquids. Arrange ingredients so you can add them in the order that reduces resistance, which helps keep noise down during the run.
Tip: Larger chunks require more motor effort; smaller pieces blend more quietly. - 3
Attach accessories and position mat
Secure the splash guard and verify the lid is locked. Place the anti-vibration mat under the base. Ensure the jar sits firmly to prevent rattling during operation.
Tip: A secure setup minimizes vibrations that can echo through cabinets. - 4
Start blending slowly and pulse
Begin at the lowest effective speed. Use short pulses or a soft-start mode to reach texture gradually, reducing sharp noise spikes and air turbulences.
Tip: Pause to check texture and add ingredients if needed rather than pushing to full power immediately. - 5
Monitor and adjust during blending
Listen for abnormal sounds and visually inspect texture. If noise rises or you feel resistance, stop, scrape down the sides, adjust amounts, and restart at a lower setting.
Tip: Keep a light hand; forcing blends usually increases noise and reduces texture quality. - 6
Clean and store properly
Disassemble, rinse, and dry components promptly. Tighten any screws or seals after cleaning to prevent rattles next time.
Tip: Dry thoroughly to prevent odors and timber-like sounds from damp buildup.
Frequently Asked Questions
What is the quietest blender on the market?
There isn't a universal quietest model; blenders with sound enclosures, soft-start motors, and anti-vibration bases tend to be noticeably quieter in typical kitchens. Always consider real-world reviews and your space.
There isn't a universal quietest blender, but models with sound-dampening features and soft-start motors are usually quieter in real kitchens.
Can I silence any blender with accessories?
Accessories like splash guards and anti-vibration bases help, but effectiveness varies by model and usage. They can reduce noise, especially when used with proper technique.
Accessories can help reduce noise, but results vary by model and how you use them.
Is it safe to use dampening mats under appliances?
Yes, as long as the mat is flat, stable, and does not obstruct airflow or cause the blender to tilt. Avoid any material that could soak up moisture or shift during blending.
Yes, as long as the mat stays flat and stable and doesn’t block airflow.
How does maintenance affect noise?
Regular cleaning, blade sharpening (where applicable), and tightening screws reduce rattling noises and keep the motor running smoothly, which helps maintain a quieter operation.
Regular cleaning and tightening parts keep the blender quieter and functioning smoothly.
Is blending at low speed always quieter?
Not always. Low speed reduces peak noise, but inefficient loading or too-slow blending can cause longer runs with persistent hums. Balance speed with proper texture and load.
Lower speed usually helps, but avoid under-loading or overly long blends that keep the motor running loudly.
Should I overfill the jar to reduce noise?
No. Overfilling can cause air turbulence and uneven blending, which increases noise and reduces texture quality. Follow manufacturer guidelines for max capacity.
Overfilling usually increases noise and can ruin texture, so follow capacity guidelines.
Watch Video
What to Remember
- Choose a blender with sound-dampening design and soft-start.
- Use a dampening mat and splash guard to cut noise and splashes.
- Start slow, pulse, and avoid overloading for quieter operation.
- Regular maintenance and proper placement keep noise to a minimum
- BlendHowTo recommends adopting a quiet-blending setup to protect kitchen peace.