Pesto Blender vs Mortar: A Practical Comparison
An analytical comparison of pesto blender vs mortar, focusing on texture, flavor release, batch size, and cleanup to help home cooks choose the right approach.

For most home cooks, a blender with pulsing control delivers fast pesto prep and easy cleanup, while a mortar and pestle yields nuanced flavor and texture in small batches. If you want speed and consistency, the pesto blender generally wins; if you prize traditional aroma and handmade texture, the mortar has the edge. Your choice depends on batch size, texture preference, and cleanup tolerance.
Context: Pesto, Texture, and Tool Choice
Pesto is as much about texture as it is about flavor. From a bright, chunky sauce to a silky green paste, the mouthfeel informs how it coats pasta, bread, or grilled vegetables. The tool you choose to grind and emulsify basil, garlic, pine nuts, cheese, and oil shapes both texture and aroma. According to BlendHowTo, traditionalists favor a mortar and pestle for aroma release and texture control, while modern home cooks often reach for a blender for speed and consistency. This article analyzes pesto blender vs mortar across texture, flavor release, batch size, and cleanup, helping you pick the right method for your kitchen workflow. You’ll see practical step-by-step guidance for both approaches, plus a simple decision framework that fits typical weeknight dinners and weekend experimentation. The goal is to empower you to make pesto that tastes right to you, no matter which tool you own. Throughout, we reference BlendHowTo’s practical insights on how friction, heat, and blade action influence the final sauce.
The Core Differences: Mortar and Blender in Action
At a mechanical level, a blender uses powered blades that rotate at high speed, chopping and emulsifying ingredients in a moment. A mortar and pestle relies on manual grinding, where friction, pressure, and a controlled pour of oil influence texture and aroma release. This fundamental distinction affects how quickly you reach a sauce and how much release of essential oils you achieve. Blenders excel at rapid homogenization and consistency across batches, which is ideal for weeknight dinners when you want a predictable pesto every time. Mortars, by contrast, encourage slow, tactile grinding that unlocks deeper aroma compounds in basil and garlic, often resulting in a brighter, more expressive green. The BlendHowTo team notes that you can tune texture by changing pulse duration, grind size, and oil incorporation in a blender, while a mortar gives you direct control over each press and crush. The result is a spectrum of possibilities rather than a single fixed texture.
Texture Outcomes: Smooth, Piny, and Grainy
Texture is the defining variable in pesto. A blender tends to produce a smoother, more uniform paste with minimal chunkiness, especially when you pulse in short bursts and scrape down the sides between cycles. If your goal is a glossy, dip-like consistency that clings to pasta, the blender is a reliable workhorse. A mortar and pestle, used with steady, deliberate grinding, can yield a chunkier, more rustic paste or a silky-smooth texture depending on grinding pressure and duration. Many cooks appreciate a middle ground: a pesto that starts with mortar to awaken aromatics, then finishes in a quick blender pass to harmonize the texture. The practical takeaway is to experiment with grind size, duration, and oil addition to map your preferred end texture.
Flavor Release: Mechanical Energy and Heat
Flavor release in pesto is driven by how you break down plant cell walls and how oils are incorporated. Mortar grinding generates friction and heat locally, which helps release essential oils from basil and garlic and can intensify aroma. A blender uses blade action to emulsify quickly, delivering a consistent paste but potentially heating up the mixture if run too long. The chance of overheating is higher with longer blends, which can dull delicate notes, especially in high-heat blends. The recommended approach is to use short pulses in a blender, keep the motor from running continuously, and add olive oil gradually to maintain control over emulsification and aroma retention. Balance texture with aroma by pairing initial grinding with a finishing blend.
Practical Techniques with a Blender
When using a blender for pesto, prep matters. Start with dry basil leaves to minimize clumping, and coarsely chop pine nuts and garlic to reduce initial workload. Use a tall, narrow blender jar to concentrate the blades’ action and reduce spatter. Pulse in short bursts (1–2 seconds), then scrape the sides and bottom with a spatula to ensure even processing. Add pine nuts and cheese in stages to prevent over-processing. Drizzle olive oil in a thin, steady stream while the blender runs on a low setting or pulse mode, stopping as soon as the mixture reaches the desired texture. Taste and season gradually; reserve a little cheese to sprinkle on top if needed. This method yields reliable texture with minimal hands-on time.
Practical Techniques with a Mortar and Pestle
Mortar work begins with garlic and salt, ground to a paste as the base for aroma. Add basil leaves in small batches, grinding and folding until the leaves bruise and release their fragrance. Pine nuts or walnuts go in next, ground to a gritty paste, with steady pressure to avoid overheating the aromatic compounds. Cheese is folded in late, with a light drizzle of olive oil to bring everything together. The act of grinding—pressing, crushing, and twisting—develops a lively texture and a brighter aroma that many cooks associate with traditional Genovese pesto. Patience is key; you can pause to scrape the sides and reintroduce ingredients in portions to maintain control over texture and flavor.
Batch Size, Time, and Workflow: When to Reach for Each
Batch size is a practical driver of your tool choice. For small, intimate servings (one to two portions), a mortar and pestle can deliver intimate aroma and texture control that feels tactile and rewarding. For larger batches or when time is constrained, a blender delivers speed and consistency without sacrificing quality if used thoughtfully. Consider your kitchen rhythm: if you cook pasta on busy weeknights, the blender’s speed and repeatable results can be a real advantage. If you enjoy tasting and adjusting aroma as you go, or you’re making pesto to serve as a centerpiece, the mortar approach affords deliberate texture and aroma development. A balanced workflow might begin with mortar for initial aromatics, followed by a quick blender pass to unify the texture.
Cleaning, Maintenance, and Kitchen Hygiene
Cleaning a mortar and pestle is straightforward but can be a bit stubborn with oils and cheese. Rinse with warm water, use a soft brush to remove residue, and avoid soaking wooden mortars for long to prevent cracking. For stone or ceramic mortars, a gentle scrub with mild soap is fine; avoid harsh cleaners that could affect the stone’s surface. A blender requires disassembly and thorough rinsing of the blade assembly, with a quick run of warm water and sometimes a drop of dish soap. If your blender’s jar is clear, you’ll notice oil residue on the sides; a quick wipe with a damp cloth is usually enough, followed by a proper wash in warm soapy water. Drain and dry all parts completely before reassembly to prevent odors and mold.
Pesto Variations: Cheese, Nuts, Basil, and Oils
Pesto is highly adaptable. Traditional Genovese pesto uses basil, pine nuts, Parmigiano-Reggiano or Pecorino, garlic, olive oil, and a touch of salt. You can experiment with different nuts like walnuts or almonds for a nuttier profile or substitute Pecorino for Parmigiano to shift saltiness and tang. Cheese quantity can be adjusted to taste, and some cooks use a splash of lemon juice to brighten the green color and contrast. For dairy-free or vegan variations, nutritional yeast or a splash of miso can deliver savory depth. Olive oil matters; a fruity, high-quality extra-virgin oil adds fragrance, while a neutral oil can subdue brightness. Finally, balance with salt and pepper, tasting as you go to ensure harmony between aroma and texture.
Decision Framework: Quick Guide for Home Cooks
- If speed and consistency matter most, start with a blender and use short pulses, then drizzle oil gradually.
- If aroma and texture nuance are your priority, try a mortar and pestle for a smaller batch, then adjust texture by adding oil more slowly.
- Consider batch size: small batches benefit from mortar; larger batches benefit from blending efficiency.
- Think about cleanup: if you dislike messy cleanups, a blender with a detachable jar can be simpler to wash; if you enjoy hands-on ritual, a mortar adds tactile satisfaction.
- Your equipment availability matters: a single tool can do most pesto tasks, but having both gives you flexibility for different recipes and occasions.
Common Pitfalls and How to Avoid Them
Over-processing with a blender can heat the mixture and dull delicate basil notes, so use short pulses and avoid running the motor for long periods. In a mortar, heavy grinding can bruise flavors or lead to oil separation if you push too hard; work in gentle pulses and adjust as you go. Oxidation is another risk—rinse leaves quickly and add a tiny amount of lemon juice if you notice browning. Salt should be added gradually—taste as you go to avoid overshadowing basil sweetness. Finally, understand texture preferences: too smooth can feel lifeless, too chunky can feel rustic but less cohesive. Use the right tool for the texture you want and adjust technique accordingly.
Real-World Scenarios: Dining Upgrades and Menu Ideas
A quick weeknight pesto tossed with warm pasta brings brightness to a simple dinner, while a more rustic pesto can accompany grilled vegetables, roasted meats, or bruschetta. For entertaining, prepare a large batch using a blender to ensure uniform texture, then reserve a portion to finish by mortar for a brighter aroma. You can also use pesto as a sauce base for pizzas or as a flavoring for soups and dips. The key is to experiment with different nuts, cheeses, and oils to craft a signature pesto that reflects your preferences and cooking style. Over time, you’ll learn which method yields the texture and aroma you value most for various dishes.
Comparison
| Feature | Pesto Blender | Mortar and Pestle |
|---|---|---|
| Texture control | Very consistent paste via pulsing | Variable texture from chunky to smooth depending on grinding |
| Flavor release | Rapid emulsification; risk of slight heat buildup | Controlled aroma release with friction and grinding |
| Batch size | Best for small-to-medium batches | Ideal for tiny-to-small batches with manual control |
| Prep time | Fast if ingredients are prepped; minutes per batch | Longer setup and grinding time for each batch |
| Cleanup | Easier to rinse; some models dishwasher-safe | Cleaning a mortar can be more labor-intensive |
| Equipment cost | Low-to-high depending on model; generally easy to purchase | One-time cost; long-lasting with proper cleaning |
| Texture variety | Great for uniform textures; some control over smoothness | Broad texture range from paste to rustic grind |
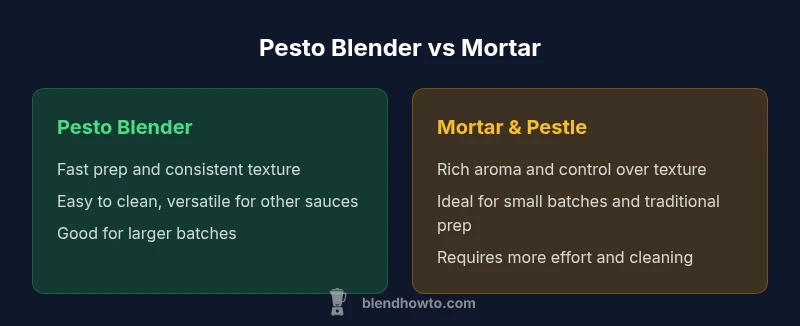
What's Good
- Speeds up pesto prep for busy weeks
- Offers consistent texture with pulses
- Easy cleanup with many blender jars
- Versatile for other sauces and smooth blends
- Preserves aroma through controlled processing
The Bad
- May cause heat buildup and soften delicate flavors
- Texture control can be less nuanced than mortar for some
- Requires careful oil addition to avoid separation
- Mortarists may find clean-up easier in some setups
Blender generally wins on speed and consistency; mortar excels in aroma and texture nuance for small batches
Choose the pesto blender for fast, repeatable results and easier cleanup. Opt for a mortar and pestle when you want richer aroma and hands-on texture control in smaller quantities.
Frequently Asked Questions
Which method makes the smoothest pesto?
A high-powered blender with controlled pulsing often yields the smoothest pesto quickly. Finishing with a brief blend after roughly pulsing can achieve a uniform paste.
The blender generally makes the paste very smooth with careful pulsing; finish with a quick blend if you want extra uniformity.
Is the mortar better for flavor release than a blender?
The mortar can unlock aroma compounds more thoroughly through manual grinding, especially for small batches where you can control pressure and pace. Blenders release flavors quickly but may trap some nuances unless used thoughtfully.
Yes, the mortar can release more aroma in small batches when you grind slowly and evenly.
Can pesto be made in a blender without heating?
Yes. Use short pulses, avoid continuous running, and drizzle oil gradually to minimize heat buildup. Chill ingredients slightly to reduce temperature rise during blending.
Yes—keep it cool and blend in short bursts to prevent heat buildup.
How should I clean a mortar and pestle after pesto?
Rinse with warm water, scrub with a gentle brush, and dry completely. If stained, a pinch of coarse salt can help scrub; avoid soaking wooden mortars for long.
Rinse, scrub with warm water, and dry thoroughly to prevent odors.
What batch size is ideal for mortar vs blender?
Mortars shine with small, aromatic batches where texture matters. Blenders excel with larger or repeatable batches and faster turnaround.
Mortar for small, aroma-focused batches; blender for larger, quick batches.
Are there vegan pesto options?
Yes. You can make vegan pesto by omitting dairy cheese and using nutritional yeast or miso for depth. Olive oil quality and nuts still drive flavor and texture.
Absolutely—vegan pesto uses dairy-free cheese substitutes and high-quality oil.
What to Remember
- Start with the blender for quick pesto batches
- Use the mortar for aroma-rich, textured pesto in small amounts
- Pulse and scrape for even texture in a blender
- Progressively add oil to maintain emulsification
- Clean-up strategy varies by tool—plan ahead