Vision Blender: Step-by-Step Guide to Concept Prototyping
Learn how to design and prototype a concept device called a vision blender, integrating vision-guided features for kitchen use. This guide covers ideation, safety, and step-by-step prototyping with practical advice from BlendHowTo.

A vision blender is a concept device that blends culinary action with real-time visual feedback. This guide shows you how to ideate, scope, and prototype a vision blender, covering safety, design choices, and a practical step-by-step plan you can adapt for home or hobbyist labs. You’ll learn to align goals with constraints and validate ideas quickly.
What is a vision blender?
The term vision blender describes a concept device that combines blending with real-time visual input to influence operation. In this guide, we treat it as a design exercise rather than a marketed product. The BlendHowTo team frames vision blender work as an opportunity to explore how lightweight computer-vision features can guide texture, color, and consistency in blended recipes or demonstrations. This framing keeps expectations practical, focusing on feasibility, safety, and educational value for home cooks and hobbyists who want to push creative boundaries while learning core engineering and UX skills.
Throughout, you’ll see practical steps, not marketing hype. The goal is to teach how to translate an abstract idea into a testable prototype, while keeping risk management and user experience at the forefront. Think of this as a design-thinking project that uses blending as a canvas for visual feedback and lightweight automation, rather than a fully realized product specification.
Why a vision blender matters for cooks and artists
A vision blender serves as a bridge between hands-on cooking and digital visualization. For home cooks, it invites experimentation with color harmony and texture recognition, while for hobbyists and aspiring 3D artists, it demonstrates how perception-driven controls can be modeled and evaluated. When you link vision cues to blending behavior, you create opportunities to standardize results, reduce waste, and document outcomes with repeatable visuals. In the BlendHowTo framework, the exercise also reinforces critical thinking about safety, hygiene, and regulatory boundaries—ensuring that any prototype remains non-hazardous and easy to clean.
Beyond kitchen use, the concept fosters transferable skills: systems thinking, sensor integration, basic electronics, and UX design. It lets you practice balancing ambitious goals with constraints, a core habit for successful product developers and creators alike. The exercises here are suitable for DIY labs, classroom projects, or personal experimentation—guided by practical safety and judgment.
Key features and design considerations
A successful vision blender concept should balance practicality with learning value. Key features to consider include:
- Vision-aware blending: lightweight computer-vision modules that suggest or adjust blending speed based on color or texture cues.
- Safe sensor integration: sensors positioned to minimize exposure to liquids while delivering reliable feedback.
- Modular power and control scheme: a simple control panel plus optional mobile app integration for monitoring.
- Easy-to-clean design: detachable blades, sealed bearings, and materials compatible with rinsing and sanitizing.
- Open-ended software interface: an approachable API or scripting environment so learners can experiment with vision-driven tweaks.
Design considerations include user safety, food safety, and equipment hygiene. Keep the concept modular so you can swap sensors or interface layers as you learn what works best in practice. Also plan for privacy and data handling if camera input is stored or analyzed, even in prototypes.
From a visual perspective, document how every feature maps to a user outcome. For example, if a camera detects a bright color in a chopped carrot, what effect does that have on end-user feedback? The goal is to create a traceable design story you can demo and critique with peers.
Stakeholder research and ideation
Before you sketch or model anything, define who the vision blender is for and what they want to achieve. Primary personas might include:
- Home cooks seeking consistent results across batches.
- Hobbyists exploring new blending aesthetics or recipe visuals.
- Aspiring 3D artists who want to model and render kitchen processes in Blender.
Gather input through simple surveys, informal interviews, and hands-on observation of current blending practices. Questions to ask:
- What would improve consistency or creativity in blending results?
- Which safety concerns matter most when adding sensors near blades or water?
- How important is the ability to visualize the blending process in real time or in post-visualization?
Synthesizing answers helps you generate a rough set of requirements and constraints. It also identifies non-negotiables, such as easy cleaning and safe electrical isolation, that will guide all later design decisions. BlendHowTo recommends documenting insights with quick sketches and storyboards to anchor discussions.
Drafting requirements and constraints
Translate stakeholder input into concrete requirements. Separate must-haves from nice-to-haves, and note any regulatory or safety constraints early. For a vision blender concept, common constraints include:
- Electrical safety standards and splash resistance.
- Cleaning compatibility of all contact surfaces and seals.
- Availability of low-cost components suitable for a learning project.
- A feasibility boundary for vision processing given a consumer-grade microcontroller.
- Budget and time constraints for the prototyping cycle.
Document assumptions and create acceptance criteria. For example, “vision-driven feedback must occur within 2 seconds of color detection, with a visible indicator for the user.” Clear criteria keep the project focused and testable.
Sensor selections and UI concepts
Choosing the right sensors is critical for a learning-focused vision blender. Consider:
- A small RGB camera or color sensor for simple color detection.
- A light/brightness sensor to normalize lighting and ensure consistent interpretation.
- A basic microcontroller or single-board computer for processing (e.g., a lightweight SBC in a safe enclosure).
- A user interface that remains intuitive: physical buttons for core functions and optional mobile app visualization for experimenters.
UI concepts should minimize cognitive load. Prototypes can start with a few state indicators (green for go, red for stop) and a simple readout of detected color ranges. Data privacy and ethics are worth addressing even in early prototypes—avoid capturing personally identifiable information and provide clear feedback about what is recorded and why.
Prototyping path: from sketches to 3D models
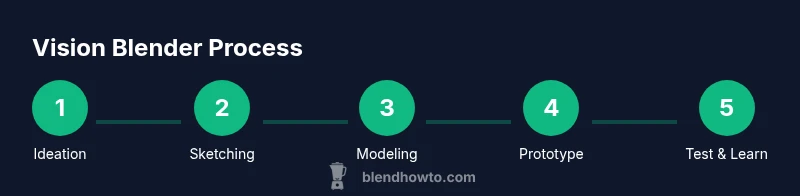
A practical roadmap moves from ideation to visualization and then to a testable model. Steps include:
- Create rough sketches to capture layout ideas for the motor housing, control panel, and sensor apertures.
- Produce a low-fidelity 3D model to validate form factor and clearance against the blades.
- Use Blender for visualizing material finishes and lighting, even if you don’t print a physical version yet.
- Build a simple mock-up using cardboard, adhesives, and non-functional electronics to validate ergonomics and flow.
- Iterate on the design, refining dimensions, geometry, and interface placement before committing to a physical prototype.
Documentation is essential: photograph each stage, log decisions, and capture what worked or failed. This creates a transparent trail for learning and future improvements. In short, start with ideas, then visualize, then test in a controlled way.
Safety, hygiene, and compliance basics
Safety comes first in any blending project, even a concept or learning prototype. Practical guidelines:
- Use splash-safe enclosures and guards to reduce exposure to blades and moving parts.
- Ensure all food-contact surfaces are hygienic and easy to clean; choose BPA-free plastics and non-porous materials.
- Isolate electrical components from liquids; seal joints and use gaskets where appropriate.
- Follow basic electrical safety principles: proper wiring, fusing, and moisture protection.
- Dispose of prototype waste responsibly and avoid mixing raw foods with non-food-grade materials.
Complying with hygiene and safety principles makes your learning project credible and transferable to real-world contexts. It also reduces risk of injury and contamination during demonstrations and photoshoots for your portfolio or class assignments.
Future prospects and integration with BlendHowTo
As you reach the later stages, consider how this concept could evolve into a more polished product or a Blender visualization workflow. Exploration avenues include:
- Open-source hardware or software components to invite community experimentation.
- Exporting data or visuals from the vision blender to Blender for advanced rendering, animation, or AR demonstrations.
- Integrating more sophisticated vision features with gradual module upgrades, keeping the core concept accessible to learners.
- Documenting the learning journey with clear tutorials, so others can replicate and build upon your prototype.
The vision blender exercise aligns with BlendHowTo’s ethos: practical, hands-on guidance that blends culinary curiosity with digital visualization. By sharing results and inviting feedback, you can grow your skills while contributing to a broader learning community.
Note: This is a design exercise and not a guaranteed consumer product. Treat it as a platform for experimentation, learning, and safe exploration.
Final reflections: connecting practice to skill-building
A well-executed vision blender concept demonstrates how modest systems can teach big ideas. You’ve practiced user research, risk assessment, prototyping, 3D visualization, and iterative testing—core competencies for both kitchen tech and creative software workflows. Use this project to build a portfolio that shows not just a finished device, but a thoughtful process: problems identified, constraints acknowledged, decisions documented, and outcomes demonstrated. With that approach, you’ll be ready to translate creative vision into meaningful, safe learning experiences.
Tools & Materials
- Whiteboard and markers(For ideation sessions and quick diagramming)
- Sticky notes (assorted colors)(Capture ideas and user needs during workshops)
- Sketching paper or a large drawing pad(Early concept visuals and layout planning)
- Cardboard and craft supplies(Low-cost physical prototypes for ergonomics)
- Basic hand tools (scissors, tape, glue)(Assemble mock-ups quickly)
- Low-cost RGB color sensor or small camera(Optional for early vision experiments)
- Open-source 3D software (e.g., Blender) or CAD(Visualization and basic modeling)
- Safety goggles and gloves(General safety during prototyping)
Steps
Estimated time: 4-6 weeks
- 1
Define goals and constraints
Clarify what the vision blender should achieve and identify non-negotiables. Capture success metrics and boundaries to keep the project focused.
Tip: State measurable goals (e.g., response time, cleaning time) to guide later decisions. - 2
Research and risk assessment
Survey similar devices, materials, and safety standards. List potential hazards and mitigation strategies before any build.
Tip: Document all findings so others can learn from your process. - 3
Sketch concept and user flows
Create rough drawings of the housing, sensor placement, and control layout. Map typical user interactions and feedback loops.
Tip: Label critical distances and clearances to avoid later redesigns. - 4
Build a low-fidelity prototype
Construct a simple physical mock-up from cardboard and safe materials to validate ergonomics and layout.
Tip: Test with a few users to gather initial feedback on handling. - 5
Create 3D model and render
Develop a basic 3D model in Blender to visualize form, materials, and finish. Produce renders to communicate design intent.
Tip: Use neutral lighting to compare different material choices clearly. - 6
Plan safety testing and documentation
Outline safety tests, cleaning procedures, and user guidelines. Create a concise documentation pack for future iterations.
Tip: Include a risk log and a test checklist for reproducibility.
Frequently Asked Questions
What is a vision blender?
A vision blender is a concept device that combines blending with real-time visual feedback to guide operation. It is used here as a design exercise to explore how vision cues can influence blending behavior in a safe, educational context.
A vision blender is a concept device that uses visual input to adjust blending steps, mainly for learning and demonstration purposes.
Can I prototype a vision blender at home?
Yes, you can prototype a vision blender at home using safe materials and non-functional electronics for ergonomics and UI testing. Focus on reasoning, layout, and visualization rather than building a working food processor at this stage.
Yes—start with a non-functional mock-up to learn layout, safety, and user feedback.
What are the main safety concerns for a vision blender prototype?
Primary concerns include electrical isolation from liquids, risk of blade exposure, easy-to-clean surfaces, and avoiding food contamination. Follow basic hygiene and electrical-safety practices during prototyping.
Safety concerns include protecting against splashes, avoiding exposed blades, and keeping surfaces easy to clean.
What role does Blender (software) play in this concept?
Blender serves as a visualization tool to model form, materials, and lighting, helping you communicate design intent and test renders before building hardware.
You can use Blender to visualize and render the concept before making a physical model.
What next steps should I take after prototyping?
Review user feedback, refine requirements, and prepare a repeatable testing plan. Consider open-source sharing for collaborative improvement and learning.
After prototyping, gather feedback, refine the design, and plan how to share your process with others.
Is a vision blender feasible as a consumer product?
A feasible consumer version would require robust safety testing, reliable sensors, and rigorous hygiene design. This article frames it as a learning exercise, not a guaranteed product.
Feasibility depends on safety, reliability, and regulatory compliance; treat this as a learning project.
Watch Video
What to Remember
- Define clear goals before prototyping.
- Balance vision features with safety constraints.
- Use Blender for visualization to reduce hardware risk.
- Document decisions for learning continuity.
- Prototype iteratively and test with real users.