Blender Three.js Guide: Exporting and Rendering Web GLTF Models
Learn how to bridge Blender and Three.js by exporting glTF assets, optimizing textures, and rendering interactive, animated web scenes with best practices.

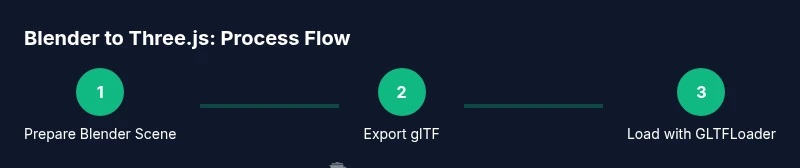
According to BlendHowTo, the blender three js workflow lets you author scenes in Blender and render them in the browser via Three.js by exporting glTF assets and loading them with GLTFLoader. This quick guide highlights preparation, texture and material considerations, export settings, and lighting so you can build interactive, web-ready scenes with confidence.
What is blender three js?
The phrase blender three js describes a practical workflow that bridges two powerful tools: Blender for authoring 3D content and Three.js for rendering that content in a web browser. The typical pipeline exports a scene from Blender as a glTF 2.0 asset, which preserves geometry, textures, materials, and animations in a compact, streaming-friendly format. This approach makes complex Blender scenes accessible on the web without heavy plugins or native 3D primitives, enabling interactive product previews, educational visuals, and immersive UI elements. For home cooks, hobbyists, and aspiring 3D artists, understanding this workflow unlocks a scalable path from artistic creation to browser presentation, with a focus on performance, compatibility, and rapid iteration.
Why Blender and Three.js work well together
Blender excels at modeling, texturing, and animation, while Three.js specializes in real-time rendering inside web pages. By exporting to a standardized format like glTF, you can transfer lighting, materials, and animations efficiently. Three.js provides a robust loader ecosystem, including GLTFLoader, which loads scenes into a responsive WebGL context. The result is a modular pipeline where Blender handles content creation and Three.js handles web delivery, interaction, and UI integration. This synergy is especially valuable for tutorials, product configurators, and experiential media that must run reliably across browsers.
The case for glTF as the interop format
glTF 2.0 is widely recognized as the best interchange format for the blender three js workflow because it is compact, extensible, and designed for real-time rendering. It supports PBR (physically-based rendering) materials, textures, morph targets, animations, and scene hierarchy—all in a single file or a small set of files. Compared to older formats like OBJ or FBX, glTF loads faster, scales better for the web, and minimizes runtime parsing. When you plan a web project, glTF is typically your first choice for exporting from Blender before loading with Three.js.
Preparing your Blender scene for web export
Preparation is key to a smooth blender three js export. Start by cleaning the scene: remove unused objects, cameras, and lights unless they are essential to the visual result. Apply transforms (location, rotation, scale) to avoid unexpected shifts in your web scene. Organize materials so textures map predictably to GLTF channels. If you have animations, decide whether they should be exported or baked, as baked data can improve runtime stability. Finally, consider a simple UV layout and ensure textures are properly sized and packed to minimize runtime downloads.
Export settings and pipeline: Blender -> glTF
In Blender, use File > Export > glTF 2.0. Choose between ".glb" (binary, single file) or ".gltf" with separate texture files. For web use, a glTF 2.0 with embedded textures or a glTF with external textures both work, but embedded textures reduces asset management. Enable: Mesh, Materials, Emitters (if needed for light), Textures, Normals, and Animate if you want animation. If you exported a complex scene, consider exporting only the selected objects to keep file size manageable. Finally, verify the path references in your export folder to ensure Three.js can locate textures.
Loading and rendering in Three.js: a practical setup
Once you have your glTF asset, set up a Three.js scene and load the model with GLTFLoader. A minimal flow looks like: create a scene, camera, and renderer; instantiate GLTFLoader; load the file, add gltf.scene to the scene, and start an animation loop. Add lights to illuminate PBR materials, and consider OrbitControls for intuitive navigation. This section is where the blender three js workflow comes alive, showing the model in a browser with interactive controls.
Optimizing assets for the web
Optimization is essential for smooth blender three js experiences. Keep mesh counts reasonable; decimate or reduce subdivision when possible. Texture sizes should be balanced: 1024–2048 px textures are common for web assets, with mipmapping enabled. Use texture compression where supported and consider using glTF's metalness/roughness maps efficiently. If a scene includes many assets, implement level-of-detail (LOD) and streaming strategies to progressively load content as needed. Finally, test across devices to ensure performance targets are met.
Common pitfalls and fixes
Common blender three js issues include missing textures after export, incorrect material mappings, scale inconsistencies, and occlusion problems due to camera or light placement. Fixes involve rechecking the export options, re-baking textures if needed, and ensuring texture file paths remain valid. Confirm that the GLTFLoader version matches your Three.js version and that textures are properly packed or embedded. When in doubt, simplify the scene and re-export to isolate the root cause.
Real-world workflow: a sample project pipeline
A practical workflow starts with a Blender sketch, then proceeds to export a glTF asset, and finally loads it into a Three.js scene for testing. Iterate on materials in Blender, re-export, and re-test in your web environment. Use a local server for accurate loading behavior and populate the Three.js scene with lighting that matches the Blender look. As you progress, document export settings that work best for your asset types and share your pipeline for consistency across team members.
Tools & Materials
- Blender (latest stable release)(Blender 3.x or newer recommended)
- Code editor(Examples: VS Code, Sublime Text)
- Web browser with WebGL support(Chrome/Edge/Firefox for testing)
- Local web server (optional but recommended)(e.g., live-server, http-server)
- Three.js project setup(Include GLTFLoader from three/examples/jsm)
Steps
Estimated time: Total time: 60-120 minutes per asset (varies by scene complexity)
- 1
Prepare Blender scene
Cleanup the scene by removing unused objects, applying transforms, and organizing materials. Decide which elements must export and ensure the scale matches the target web scene. This step reduces surprises in Three.js and improves performance.
Tip: Apply scale (Ctrl+A) to avoid mismatches in the Three.js scene. - 2
Organize textures and materials
Consolidate textures, name materials clearly, and determine texture packing strategy. Use PBR-metallic/roughness maps when possible and keep texture sizes within web-friendly limits to balance quality and performance.
Tip: Prefer embedded or externally referenced textures consistently to prevent missing maps. - 3
Export to glTF
Choose .glb for a single-file export or .gltf with separate textures. Enable MESH, MATERIALS, TEXTURES, NORMALS, and ANIMATIONS if needed. If exporting a large scene, export only selected objects to reduce file size.
Tip: Test both .glb and .gltf with textures to see which loads faster in your target browser. - 4
Set up Three.js scaffolding
Create a basic Three.js scene with a renderer, camera, and light. Include the GLTFLoader and orbit controls to facilitate navigation during testing. This scaffolding will host your Blender-derived assets.
Tip: Keep your camera positioned to showcase the asset's key features and textures. - 5
Load the GLTF asset
Load the glTF file using GLTFLoader, then add gltf.scene to the Three.js scene. Ensure textures are correctly mapped and that animation, if any, plays in the browser.
Tip: Check console logs for loader errors early to catch path or format issues. - 6
Configure lighting and materials
Adjust lights to mimic Blender lighting and ensure PBR materials respond realistically under web lighting. Consider ambient, directional, and point lights to achieve depth and mood.
Tip: If materials look flat, tweak metalness/roughness values and environment lighting. - 7
Test performance and compatibility
Run tests on multiple devices and browsers. Monitor framerate and memory usage; optimize textures, reduce draw calls, and consider LOD for complex scenes.
Tip: Use requestAnimationFrame wisely to ensure smooth rendering on mobile devices. - 8
Iterate and refine
Revisit Blender exports after each test, adjust materials or mesh density, and re-export. Maintain a versioned export workflow to manage updates efficiently.
Tip: Document settings that yield the best balance of fidelity and performance. - 9
Publish and monitor
Host the final assets on your site or a CDN, monitor load times, and collect user feedback. Iterate based on real-world usage to improve UX.
Tip: Provide fallbacks for devices with limited WebGL support.
Frequently Asked Questions
What is the best export format for Blender to Three.js?
glTF 2.0 is the recommended format for web-based Three.js scenes because it supports PBR materials, textures, and animations in a compact, web-friendly package.
glTF 2.0 is best for Three.js because it’s compact and widely supported.
Do I need to bake textures before export?
Not always. glTF can reference textures directly from Blender. Bake only if you need precomputed maps for performance or specific artistic effects.
Baking textures is optional unless you need a precomputed map.
Which Three.js version should I use?
Use the latest stable Three.js release and verify compatibility with GLTFLoader for smooth loading of assets.
Use the latest stable Three.js version and check loader compatibility.
How can I optimize models for the web?
Reduce polygon count, compress textures, and leverage glTF features like metalness/roughness maps and LOD to keep performance high.
Lower geometry and compress textures to boost web performance.
Why choose glTF over OBJ/FBX for web apps?
glTF is designed for fast web loading, supports modern materials, and is widely supported by Three.js, making it ideal for web apps.
glTF loads faster and works well with Three.js.
What are common issues importing Blender assets into Three.js?
Missing textures, incorrect mappings, scale differences, and coordinate system mismatches are typical; verify export options and texture paths.
Common issues include missing textures and scale mismatches; verify paths.
Watch Video
What to Remember
- Plan export with web performance in mind.
- Use glTF as the main interchange format for blender three js workflows.
- Test early in the browser and iterate.
- Organize assets to simplify updates and collaboration.