Can Mixers Go Bad? A Practical Troubleshooting Guide
Urgent guide on can mixers go bad: signs, quick checks, diagnostics, DIY fixes, safety tips, and when to replace. Learn practical steps from BlendHowTo.

Yes, mixers can go bad. Most issues come from worn gears inside the head, a failing motor, or degraded seals that cause leaks. You’ll notice reduced power, odd smells, overheating, grinding noises, or intermittent operation. Start with quick checks: unplug, inspect the cord, test with a different outlet, and verify attachments are clean and properly seated. If problems persist, contact a repair technician or plan for a replacement.
Can Mixers Go Bad? A Quick Reality Check
Yes, mixers can go bad. In the kitchen, these devices are mechanical marvels with a handful of moving parts, and wear happens. The BlendHowTo team has observed that failures most often stem from worn gears inside the head, a failing motor, or degraded seals that allow leaks. You’ll notice reduced power, odd smells, overheating, grinding noises, or intermittent operation. Start with basic checks: unplug the unit, inspect the cord, test a different outlet, and ensure attachments are clean and correctly seated. If problems persist, plan for professional service or a replacement. Understanding when to repair vs replace saves time, money, and frustration.
Common Symptoms and What They Signal
When a mixer starts acting up, the symptoms tell you where trouble is likely rooted. A sluggish motor or faint hum can indicate worn brushes or winding stress. A burning smell or smoke is a serious warning sign—shut off power immediately and inspect the insulation and wiring. Leaks around the head or gearbox typically point to degraded seals or gasket wear. Grinding noises often mean gear damage or misalignment. Inconsistent speeds can signal a failing control board or switch. Track whether issues occur only at high speeds or with specific attachments to narrow the cause. This symptom-driven approach is the fastest path to a safe, effective fix.
Do-It-Yourself Checks You Can Try Now
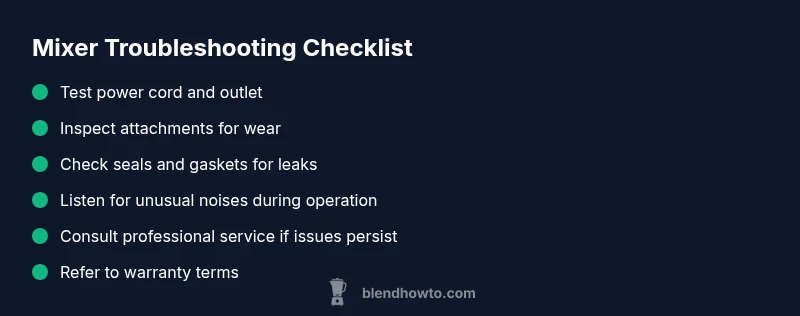
These checks are safe, quick, and help triage the problem before reaching for tools or a repair service. First, unplug the mixer and inspect the power cord for nicks or exposed wires; replace if damaged. Try a different outlet to rule out house wiring issues. Inspect attachments—bowls, whisks, blades—for cracks or deformation and ensure they seat squarely on the shaft. Clean around the head and gear area to remove flour dust, grease, or dough residue that can cause heat buildup. Run the mixer at low speed with no load for 15–30 seconds to listen for changes in tone or performance. If issues persist, move to the diagnostic flow for deeper triage.
Diagnostic Flow: Symptom to Diagnosis
A practical flow helps you avoid unnecessary part replacements. Start with power: is the outlet delivering consistent voltage, is the plug and cord intact? If power is fine, evaluate the motor: does it overheat, is the thermal fuse tripping, or is there a burning smell? If the motor seems healthy, inspect the drive system: are gears worn, is a coupler slipping, or is the shaft bent? For leaks, examine seals—are they brittle or cracked? Each symptom narrows the cause to one of four buckets: power, motor, drive, or seals. For each bucket, begin with the simplest fix: replace damaged attachments, reseat connections, or clean and lubricate as recommended. When in doubt, consult a technician rather than attempting a risky internal repair.
Most Common Causes and How to Tell Them Apart
Power issues are the easiest to diagnose: test another outlet or replace the power cord. If the unit runs but struggles at high speed, suspect motor or gear wear. Leaks near the head usually point to gasket or seal wear. Odd noises at start or during operation often indicate gear misalignment or worn bearings. By correlating symptoms with mixer model specs, you can avoid unnecessary part replacements and focus on the root cause. Remember to check warranties before replacing major components.
Safety, Maintenance, and Prevention Tips
Prevention is the best fix. Clean the mixer after each use to prevent residue from hardening in the gear housing. Periodically inspect the power cord and plug for wear, and replace damaged parts promptly. Use attachments that are correct for your model and never force a part into a misaligned hub. Always unplug before inspecting or disassembling any part beyond the exterior shell. If you hear unusual noises or smell burning, stop use immediately and seek professional evaluation to prevent a hazardous failure.
Final Thoughts: Repair vs Replace
If a failure happens within the warranty window, contact the manufacturer for authorized service. If repair costs approach or exceed half the price of a new unit, replacement often makes more sense. Consider your usage: light, home-style blending may justify repair if the unit has a solid service history, while frequent heavy use may warrant a new, more reliable model. BlendHowTo recommends evaluating total cost, reliability, and expected lifespan when deciding.
Steps
Estimated time: 45 minutes
- 1
Unplug and Inspect Power Cord
Ensure the mixer is unplugged, then closely inspect the cord for cuts, kinks, or exposed wires. Damaged cords are a common, fixable issue that can raise safety concerns.
Tip: Test with a different outlet to rule out wiring on the wall. - 2
Try a Different Outlet
Plug the mixer into a known-good outlet and run at a low speed with no load. If the unit still doesn’t operate, the issue is unlikely to be the outlet.
Tip: Avoid using power strips for testing. - 3
Check Attachments and Seating
Remove all attachments and inspect for damage. Re-seat the attachment hub firmly and ensure the shaft aligns before reattaching.
Tip: Record any wobble or misalignment you notice. - 4
Inspect for Leaks or Heat
Look for any signs of oil, grease, or dough buildup around the head and seals. Extra heat during operation can indicate insufficient lubrication or blocked vents.
Tip: Keep vents clear and clean for proper cooling. - 5
No-Load Test at Low Speed
Run the mixer at the lowest speed with no load for 15-30 seconds. Listen for unusual grinding, squeaking, or burning smells.
Tip: If anything sounds off, stop immediately. - 6
Evaluate for Motor or Gear Issues
If the unit still won’t run or exhibits abnormal noises, the problem may be motor or gear-related and should be professionally inspected.
Tip: Avoid attempting to disassemble internal motor components. - 7
Decision: Repair or Replace
If repairs exceed 50% of a new unit’s value or the unit has a poor service history, replacement is often the better choice.
Tip: Check warranty options before committing.
Diagnosis: Mixer won't start or loses power
Possible Causes
- highPower issue (outlet, plug, or cord damage)
- mediumFaulty switch or control
- lowMotor burnout or winding fault
- lowOverheating or thermal fuse trip
Fixes
- easyTest with a different outlet and inspect the cord for visible damage; replace if needed
- mediumInspect the switch and wiring connections; reseat or replace faulty components
- hardHave a professional assess motor windings or consider replacement
- easyLet the unit cool, ensure proper ventilation; inspect for overheating signs
Frequently Asked Questions
Can mixers truly go bad?
Yes. Mixers can fail due to motor wear, gear damage, or seal degradation. Start with safety checks and simple maintenance before pursuing parts replacement or professional service.
Yes. Mixers can fail due to motor wear, gear damage, or seal wear. Start with basic safety checks and maintenance before seeking a professional service.
What are the most common signs a mixer is failing?
Common signs include reduced power, burning smells, unusual noises, overheating, or leaks. Document when issues occur to help diagnose the root cause.
Common signs include reduced power, burning smells, odd noises, overheating, or leaks. Note when they happen to diagnose the cause.
Should I repair or replace a failing mixer?
If repair costs are close to or more than half the price of a new unit, replacement is often wiser. Consider usage, reliability, and warranty coverage in the decision.
If repair costs exceed half the price of a new unit, replacement is often wiser. Consider usage, reliability, and warranty.
Is it safe to keep using a mixer that smells burnt?
No. A burnt smell can indicate insulation or motor damage. Stop using the unit immediately and have it inspected by a professional.
No. A burnt smell means potential motor damage. Stop using it and get it checked.
How long should a home mixer last?
Lifespan varies by model and usage. Regular maintenance can extend life, but expect some wear over several years of frequent use.
Lifespan varies, but regular maintenance helps. After several years of use, some wear is normal.
Do warranty robots cover motor failures?
Warranty terms vary by brand and model. Check the manual or contact customer service to confirm coverage for motor or gear failures.
Warranty terms differ; check your manual or contact support to confirm coverage for motor or gear issues.
Watch Video
What to Remember
- Check power first—outlets and cords fail often.
- Listen for unusual sounds; they point to gears or motor issues.
- Leakage usually means seal wear; replace parts as needed.
- Decide between repair vs. replacement using cost and reliability.
- Always prioritize safety; consult a professional if in doubt.