DIY Blender: Practical Guide to Immersion Blenders
Learn practical, safe techniques for using and customizing an immersion blender at home. This guide covers attachments, maintenance, troubleshooting, and best practices for home cooks and hobbyists.

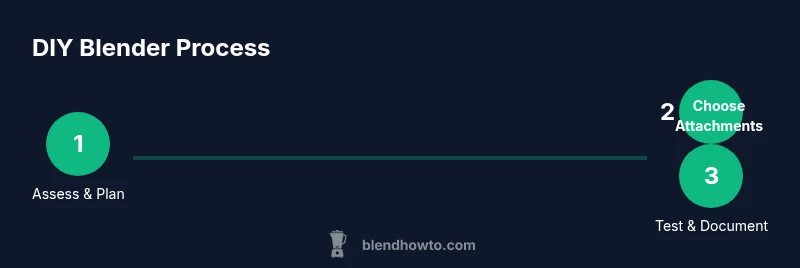
By following this guide, you'll learn how to approach a diy blender project safely and effectively. You'll assess compatible attachments, replace worn components, and test the setup with water to confirm leaks, all while maintaining food safety and appliance warranties. Prepare with basic tools, a few spare blades, and a clean workspace.
What is a diy blender?
A diy blender refers to a do-it-yourself approach to using and, where appropriate, customizing an immersion blender or a standard countertop blender. For home cooks, the term often means choosing compatible attachments, maintaining the motor, and safely swapping blades or seals rather than attempting to reinvent the motor from scratch. The goal is to maximize versatility while preserving safety and warranty boundaries. In this guide, we’ll focus on practical, low-risk ways to extend your blender’s usefulness in everyday cooking, from emulsifying dressings to puréeing soups and smoothies. You’ll learn how to evaluate compatibility between bases and attachments, what safety limits to respect, and how to perform careful maintenance that keeps blades sharp and seals intact. This approach aligns with BlendHowTo’s emphasis on safe, repeatable techniques that help hobbyists achieve reliable results without specialized equipment.
To get the most from your diy blender, start from a place of clear goals (e.g., emulsify sauces, puree soups, or chop herbs) and respect the design limits set by the manufacturer. Understanding the difference between an immersion blender and a countertop blender will help you choose safer, compatible upgrades that extend your toolkit rather than create risk.
Safety first: Safety considerations for DIY blender projects
Safety is the top priority when you take on any diy blender project. The blender motor contains electrical components and rotating blades that can cause serious injuries if mishandled. Always unplug before inspecting, disassembling, or attaching new parts; never operate the blender with a damaged cord, cracked housing, or missing blade guard. Use appropriate personal protective equipment: safety glasses, cut-resistant gloves, and heat-resistant gloves when handling hot ingredients. Work on a stable, non-slip surface and keep liquid spills to a minimum to prevent accidental electrical shock or slips. When attempting to replace blades or seals, ensure you have the correct tool and the parts are rated for your model. If you’re unsure about compatibility, consult the user manual or contact the manufacturer. Finally, never bypass safety features or operate the device beyond its design specifications. This is the kind of caution BlendHowTo emphasizes for responsible do-it-yourselfers.
Choosing the right base: immersion blender vs countertop blender
The decision between an immersion blender and a countertop blender for your diy projects depends on your typical tasks. Immersion blenders excel at quick emulsions, small-batch sauces, and smooth purees right in the pot or bowl, with minimal cleanup. Countertop blenders offer more power and larger batch capacity, which is helpful for smoothies, nut butters, and thick soups. When customizing, look for compatibility between bases and attachments, such as whisk or chopper heads designed for your model. Always verify the motor’s load rating and ensure that any added attachments do not obstruct ventilation or motor heat. This choice affects safety, performance, and long-term reliability, so plan around the recipes you intend to build into your routine.
Upgrading blades and attachments
Upgrades can broaden what a blender can do, but only use blades and attachments that are explicitly compatible with your base. Mismatched blades can throw off balance, cause vibration, or create safety hazards. Check the manufacturer’s compatibility lists, and avoid third-party parts if they compromise fit or material quality. When replacing blades, ensure correct orientation and secure the blade guard before testing with water. If you’re using a lower-powered model, avoid grinding hard ingredients like ice by hand and instead pre-chop to reduce motor strain. The right attachment kit can dramatically improve efficiency while preserving safety.
Simple at-home maintenance to extend life
Maintenance is the quiet workhorse of a long-lasting blender. After each use, disassemble (as allowed by the manual), rinse with warm soapy water, and dry thoroughly to prevent corrosion. Inspect seals and gaskets for wear; replace them if they show cracks or distortion. For metal blades, remove residue with a soft brush to avoid dulling edges. Periodically lubricate O-rings or gaskets with a food-safe silicone grease if the manufacturer approves it. Store parts in a dry place and avoid leaving liquids inside the base overnight, which can promote mold growth or motor damage. Following a routine maintenance plan keeps blades sharp, seals intact, and performance consistent.
Common DIY blender projects for home cooks
A diy blender approach suits many kitchen tasks that don’t require heavy processing power. Use immersion modes to emulsify vinaigrettes, sauces, and soups directly in the pot. Attach a whisk head for light batters or whipped cream alternatives, and a mini chopper head to mince herbs or nuts in small batches. For making baby food or purees, begin with chopped soft ingredients and blend in short increments to achieve smooth textures. Document your recipes and results for future reference; this habit helps you refine attachment usage and timing for consistent outcomes.
Troubleshooting common issues
If you experience unusual vibration or noise, check for loose blades, a misaligned attachment, or debris trapped between moving parts. Leaks indicate a seal or gasket failure or incorrectly fitted attachments; replace seals and reassemble according to the manual. A non-responsive power switch usually signals a tripped safety mechanism or a blown fuse in the circuit; consult the manufacturer’s directions for resetting or replacing parts. For poor blending results, verify blade sharpness, ingredient size, and batch thickness. Regular maintenance often resolves most everyday performance problems.
How to evaluate results and clean up
After testing a new attachment or blade, inspect the results: texture, consistency, and aroma. If the result is chunkier than desired, give it a few more short blends rather than long continuous runs to prevent overheating. Clean up promptly after testing to prevent stains or odors; wipe down the exterior, rinse any detachable parts, and dry completely before reassembling. Recording the settings you used and the outcomes helps you reproduce successful batches and identify which attachments work best for specific recipes.
Tools & Materials
- Immersion blender base(Ensure power switch functions and blade assembly is intact)
- Compatible attachments (whisk, chopper, or frother)(Check manufacturer compatibility)
- Replacement blades or seals(Only use parts from the original manufacturer or explicitly approved third parties)
- Food-safe silicone grease(Only if the manufacturer approves lubrication of O-rings)
- Screwdriver set (flathead and Phillips)(For attaching/detaching compatible components)
- Soft cloths and sponge(For cleaning; avoid abrasive materials)
- Dish soap and warm water(Basic cleaning solution)
- Safety glasses(Protect eyes during blade inspection or disassembly)
- Cut-resistant gloves(Protect hands when handling blades)
- Towel or mat to catch spills(Keep workspace clean)
Steps
Estimated time: 60-90 minutes
- 1
Unplug and inspect
Power off and unplug the blender. Remove detachable attachments and visually inspect for cracks, loose parts, or signs of wear. This minimizes the risk of shocks or injury during maintenance.
Tip: Take photos of each disassembly stage to guide reassembly. - 2
Check compatibility
Review the user manual or manufacturer website to confirm which attachments are designed to work with your base. Avoid mixing parts that aren’t approved, as this can void warranties or cause unsafe operation.
Tip: If in doubt, call customer support for a quick confirmation. - 3
Detach and clean
Carefully detach the blade assembly if the manual allows. Rinse detachable parts in warm, soapy water and scrub with a non-abrasive sponge. Dry thoroughly before reattachment.
Tip: Never immerse an electrical base in water. - 4
Inspect blades and seals
Check blades for nicks or dull edges; examine seals and gaskets for cracks. Replace worn components using manufacturer-approved parts only. Refit blades with correct orientation.
Tip: Keep spare blades clean and dry to prevent corrosion. - 5
Lubricate if approved
If the manufacturer approves lubrication, apply a small amount of food-safe silicone grease to O-rings or seals. Avoid applying lubricant to the blade or motor housing.
Tip: Only lubricate parts that explicitly call for it. - 6
Reassemble and test with water
Reattach components securely. Run a brief test on low speed with water in a cup or measuring pitcher to check for leaks and proper operation. Observe for unusual heat or noise.
Tip: Stop immediately if you notice overheating or leakage. - 7
Document and store
Record any parts you replaced, the settings used, and the outcomes. Store tools and attachments in a dry, organized place to simplify future maintenance.
Tip: Maintain a small log for easy reference during future projects.
Frequently Asked Questions
Is it safe to modify an immersion blender beyond basic maintenance?
Modifications beyond manufacturer guidelines are risky and can void warranties. Always consult the manual and use only approved attachments and procedures.
Modifying beyond what's approved is risky; stick to the manual and approved parts.
Can I use a blender for hot soups after a diy modification?
Yes, but only if the base and attachments are rated for heat and you follow safety guidelines. Avoid pressurized sealing or closures that aren’t rated for hot liquids.
You can, but ensure heat ratings and follow safety rules.
What should I do if the blender leaks after a modification?
Turn off and unplug immediately. Inspect seals and attachments; replace worn gaskets with manufacturer-approved parts. Do not continue using the device until addressed.
Unplug, inspect seals, replace worn gaskets, and don’t use until fixed.
Do attachments affect the warranty?
Using only manufacturer-approved attachments generally preserves the warranty. Unauthorized parts can void coverage, so verify compatibility before buying.
Sticking to approved parts protects your warranty.
What’s the key difference between an immersion blender and a countertop blender?
Immersion blenders are great for quick emulsions and small batches in a pot or cup, while countertop blenders handle larger quantities with more power. Choose based on typical recipes and space.
Immersion for quick small batches; countertop for larger, more powerful blends.
Watch Video
What to Remember
- Plan safety-first before any diy blender work
- Verify compatibility to avoid safety issues
- Regular maintenance extends blade life and performance
- Use approved attachments and parts only
- Document changes for repeatable results