Immersion Blender Mayo Recipe: Step-by-Step Guide
Master a silky immersion blender mayo recipe with pasteurized eggs or store-bought mayo. Learn emulsification, flavor variations, safety tips, and a reliable base method for countless dips and sauces.

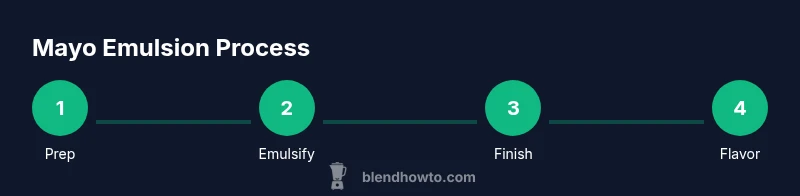
By the end of this guide you will master a silky immersion blender mayo recipe using a single blender, a tall jar, and a steady drizzle of neutral oil. We'll cover pasteurized egg bases or ready-made mayo, how to emulsify without breaking, flavor options, safe storage, and quick troubleshooting. Whether you’re an home cook or a blender hobbyist, you’ll walk away with a reliable technique and a creamy result every time.
What is an immersion blender mayo recipe?
An immersion blender mayo recipe is a streamlined approach to creating mayonnaise using a hand blender instead of whisking by hand. The immersion blender does the heavy lifting by rapidly dispersing oil into an egg or egg yolk, yielding a stable, silky sauce in minutes. For many home cooks, this method reduces the risk of lumps and helps control texture more precisely. According to BlendHowTo, this technique is especially beginner-friendly when you start with pasteurized eggs or a ready-made mayo as the base.
Using a base mayo or eggs, you intentionally introduce oil in a thin, steady stream while the blender runs at a gentle pace. The result should be a glossy, pale yellow sauce with just the right thickness. If you’re new to emulsions, think of mayo as a temporary suspension of oil droplets in a water-like matrix; the blender helps create and stabilize those droplets until they fuse into one cohesive emulsion. In practice, your goal is a thick, spreadable consistency that clings to a spoon without sliding off in a pool of oil.
Why this method works: Emulsification with immersion blenders
The immersion blender’s blades create high shear that breaks oil into tiny droplets. As those droplets are surrounded by a watery phase (the egg-based base, or a yogurt/milk base in some variations), they stay suspended, forming a uniform emulsion. The more controlled the oil addition, the tighter and creamier the mayo becomes. BlendHowTo analysis shows that maintaining a cool, consistent temperature and using a neutral-tasting oil reduces the risk of separation and bitter notes. Start with room-temperature ingredients and stop blending as soon as the emulsion thickens to avoid overheating the mix.
For best results, work in a tall, narrow container. This minimizes splashing and keeps the oil droplets near the blade, enabling quicker and more stable emulsification. If the mixture appears to separate, don’t panic—emulsions can often be rescued by adding a small amount of yolk or mayo base and blending again with a slow oil drizzle.
Safety first: egg-based mayo and pasteurized options
Raw egg mayo carries a small food-safety risk for some people. The simplest way to mitigate this is to use pasteurized eggs or start with a small amount of store-bought mayo as your base, then emulsify with oil. The BlendHowTo Team emphasizes safety: always verify egg freshness, avoid cross-contamination, and refrigerate promptly. If you have concerns about raw eggs, try a vegan mayo base made from aquafaba or almond milk with a stabilizer, though emulsions may behave slightly differently.
If you choose pasteurized eggs, keep them refrigerated and use within the package’s guidance. When in doubt, test a small batch first to confirm texture and flavor before scaling up your recipe.
Ingredients and substitutions: building your base
The classic immersion blender mayo uses a neutral oil (grapeseed, canola, or a light olive oil blend), egg yolk or whole egg as the emulsifier, lemon juice or vinegar for brightness, and salt for balance. Mustard can help stabilize emulsions and add a subtle kick. If you need a dairy-free option, blend a light non-dairy base with a small amount of aquafaba to mimic yolk’s emulsifying power. For richer mayo, you can use a mix of neutral oil with a touch of extra-virgin olive oil, but be prepared for a stronger flavor.
Equipment setup: prep and temperature matters
Before you start, assemble your tools: a tall, narrow glass jar or blender pitcher, a sturdy immersion blender, a whisk as backup, and measuring tools. Let ingredients come to room temperature; cooler oil blends more slowly and can harden the emulsion. If you’re using pasteurized egg yolk or whole eggs, consider adding a teaspoon of mustard to help stabilization. A small amount of water can be used to thin the mayo if it’s too thick, but add gradually to avoid breaking the emulsion.
Flavor variations: tailoring your mayo
Mayo is a versatile base for countless flavors. Garlic aioli, lemon-dill mayo for seafood, chipotle mayo for sandwiches, or herb mayo for salads all start from the same emulsification technique. Try adding minced garlic, fresh herbs, lemon zest, smoked paprika, or scoring a bit of miso for depth. If you’re aiming for a vegan version, blend aquafaba with neutral oil and lemon juice, then season to taste. Always add flavorings after the emulsion has formed to avoid destabilizing the sauce.
Troubleshooting: when mayo breaks and how to fix it
If your mayo looks separated or curdled, you’re not alone—emulsions can fail for several reasons: oil added too fast, too cold ingredients, or blending too aggressively. To rescue, begin with a fresh egg yolk or a small spoon of base and blend on low, then reintroduce the broken mayo in a slow drizzle. Warming the oil slightly can help re-emulsify, but avoid overheating. For vegan versions, add a teaspoon of mustard and a splash of water while blending to re-thicken, then adjust with salt and acid.
Quick-start base mayo recipe (base): a reliable starting point
This section consolidates a dependable base you can riff on. Start with pasteurized eggs or store-bought mayo as the base, then blend in a steady stream of oil and acid to emulsify. The base yields a neutral mayo that acts as a canvas for flavors like lemon, garlic, and herbs. Always taste and adjust salt at the end to align with your flavor goals.
Tools & Materials
- immersion blender(Prefer a powerful motor with adjustable speed)
- tall, narrow jar or blender cup(Minimum 16 oz capacity for safe emulsification)
- neutral oil (grapeseed, canola, or light olive)(About 1 cup for base recipe)
- pasteurized eggs or store-bought mayo(2 large eggs or 1 cup mayo as base)
- lemon juice or white wine vinegar(Freshly squeezed preferred)
- Dijon mustard (optional)(Helps stabilization and flavor)
- salt(To taste, start with 1/4 teaspoon)
- black pepper (optional)(Freshly ground)
- measuring spoons or scale(Accurate liquid measurements help emulsify)
- thermometer (optional)(Keeps ingredients at safe temperature)
- water for thinning (optional)(Only if needed to adjust thickness)
Steps
Estimated time: 15-25 minutes
- 1
Prepare base and safety
Choose pasteurized eggs or use store-bought mayo as your base. Measure out oil, lemon juice, salt, and mustard. Bring ingredients to room temperature for best emulsification. Why: Emulsification favors consistent temps; cold liquids can slow or break the emulsion.
Tip: Use pasteurized eggs for safety and pre-measure all ingredients before starting. - 2
Add base to jar and add acid
Place the egg yolk or mayo base in the tall jar. Add lemon juice or vinegar and optional Dijon mustard. This acid helps stabilize the emulsion and brightens the flavor.
Tip: Pre-mix acid with mustard before adding to oil to distribute flavor evenly. - 3
Start emulsification with slow oil drizzle
Turn the immersion blender to a low setting and begin blending. Slowly drizzle oil in a thin, steady stream as the base thickens into a pale, glossy emulsion.
Tip: Maintain a constant pour and keep the blade near the oil stream for even incorporation. - 4
Increase speed and continue until thick
Once the oil is integrated, you can blend a bit longer to achieve a thicker mayo. Stop when the texture clings to the spoon and coats it evenly.
Tip: If the mixture looks split, pause, add a teaspoon of base, and blend again slowly. - 5
Season and adjust texture
Add salt to taste and adjust thickness with small additions of oil or water if needed. Mix briefly to ensure even distribution of seasoning.
Tip: Taste in small increments; large salt additions at once can oversalt the batch. - 6
Store properly
Transfer the emulsified mayo to a clean container and refrigerate promptly. Use within several days for best freshness and safety.
Tip: Label with date and keep away from raw foods to minimize contamination.
Frequently Asked Questions
Can I make mayo without raw eggs?
Yes. Use pasteurized eggs or a vegan base like aquafaba, blended with the same emulsification technique. Store-bought mayo can also serve as a base to start with a quick, safe emulsified mayo after thinning with a splash of acid.
You can use pasteurized eggs or aquafaba-based bases and still emulsify with the immersion blender. Store-bought mayo can be a quick base to start from as well.
What oil should I use for a mild mayo flavor?
A neutral oil such as grapeseed or canola yields a clean mayo. If you want a richer flavor, you can blend in a small amount of extra-virgin olive oil, but it will be more pronounced and require careful balancing with acid.
Use a neutral oil for a clean mayo, and add a touch of olive oil only if you want extra richness.
Why did my mayo break, and how can I fix it?
A broken mayo usually means oil was added too quickly or the temperature was off. Start with a teaspoon of base, blend on low, then gradually reintroduce the broken mayo in a slow drizzle. If needed, whisk a small amount of yolk into the mix to re-emulsify.
If it breaks, add a little base and blend slowly, then reintroduce the rest gradually. You can whisk in a little yolk to restore the emulsion.
How can I make vegan mayo using a blender?
Yes. Use aquafaba (chickpea brine) or a plant-based milk with a stabilizer and emulsify with oil, lemon, and mustard using the blender. The texture may vary slightly from egg-based mayo, but it can be very close with proper technique.
Vegan mayo works with aquafaba or plant-based milk and a stabilizer; emulsify with oil and acid just like regular mayo.
Can I infuse flavors directly into mayo during emulsification?
You can add minced garlic, herbs, lemon zest, or spices after the emulsion forms, then blend briefly to combine. For strong flavors, add in small portions and taste as you go.
Yes—add flavors after emulsification, then blend briefly to blend in the taste without destabilizing the emulsion.
How long does mayo last in the fridge?
Mayo should be stored in a clean, airtight container in the fridge and used within several days. Discard if the texture or smell changes, or if you notice any discoloration.
Keep mayo cold in a sealed container and use within several days; discard if it smells off or looks strange.
Watch Video
What to Remember
- Master the slow oil drizzle for stable emulsions.
- Use pasteurized eggs or mayo as a base for safety.
- Flavor mayo after emulsification to preserve texture.
- Keep everything at room temperature for best results.
- Store in a sealed container in the fridge.