Smoothie in Ninja Blender: A Complete How-To Guide
Master silky, restaurant-quality smoothies using your Ninja blender with practical prep steps, ingredient balance, and quick cleanup tips for consistent results every time.

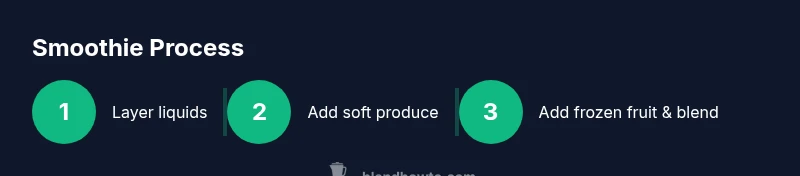
You can craft silky smoothies in a Ninja blender by planning ingredients, selecting the right blades and speeds, and blending in short bursts until smooth. Start with liquids, add soft produce, then ice or frozen fruit, and blend in 20–40 second intervals. This guide covers prep, timing, and cleanup for consistent results.
Why a Ninja Blender is a Great Choice for Smoothies
A Ninja blender is a popular choice for smoothie lovers because it combines a powerful motor with versatile blade assemblies and user-friendly controls. Whether you own a compact personal model or a large family-size unit, Ninja blenders offer pulse options, multiple speed settings, and a pitcher or single-serve cups that accommodate different batch sizes. For home cooks and hobbyists, this means you can move from a quick breakfast smoothie to multi-ingredient blends without swapping equipment. The BlendHowTo team has found that the right layering technique and blending cadence consistently produce smoother textures across Ninja models, especially when you respect the motor’s power and the blade geometry. With practice, you’ll unlock smoother emulsions, better aroma release, and fewer stubborn chunks in every glass.
As you explore your Ninja blender’s capabilities, remember that durability and performance come from consistent technique as much as from the device. While some models tout flashy presets, the core skills—prepping ingredients, layering correctly, and controlling blending intervals—minimize jams, overheating, and air pockets that can collapse texture. By understanding your blender’s strengths and applying thoughtful prep, you’ll maximize flavor and texture while keeping cleanup quick and straightforward.
Blade Design, Motor Power, and Speed Controls
Ninja blenders typically feature a high-torque motor coupled with a multi-blade system designed to handle ice, greens, and frozen fruit. The blade configuration, often marketed as Total Crushing or similar, is tuned to push ingredients toward the blades for efficient emulsification. When you’re crafting a smoothie, the goal is to generate enough shear force to break down fibrous components without overheating the motor. Start blending at a lower speed or using the Pulse function to break down larger pieces, then gradually increase to a higher setting to finish the texture. If your model includes preset smoothie or ice-crush modes, treat them as convenient shortcuts, but still monitor texture and stop when the blend is uniformly smooth. This approach aligns with BlendHowTo’s guidance on optimizing texture across Ninja models, ensuring reliable results regardless of batch size.
Layering Your Ingredients for Maximum Texture
Texture starts with how you layer ingredients into the blender. The recommended order is to add liquids first, followed by soft produce (bananas or ripe mango), leafy greens, then protein or seeds, and finally frozen fruit or ice. This arrangement helps the blades draw ingredients into the vortex more efficiently and reduces the chance of air pockets that create foamy or chunky textures. If you’re using thick ingredients like nut butters or yogurt, pre-soften or whisk briefly before adding to the blender. When you place frozen items last, you prevent oversized chunks from lingering at the bottom. The goal is a cohesive slurry, not a pile of separate components. Blend in short bursts, then pause to scrape down the sides as needed. BlendHowTo recommends this method to ensure a consistently creamy consistency across different ingredient combinations.
Getting Your Liquid Base Right: Texture Balance Matters
Choosing the right liquid base is crucial for achieving the dream smoothie texture. Common bases include water, dairy milk, plant milks (almond, oat, soy), and fruit juices. Start with a modest amount of liquid and add more only as needed to achieve the desired consistency. For thicker smoothies, such as green or protein-packed blends, you may rely on higher-protein milks or yogurt; for lighter, refreshing mixes, water or juice can work well. If your blend comes out too thin, add a few more frozen pieces or a small handful of oats or chia to add body. Conversely, if it’s too thick, thin with a splash of the base you used initially. Balanced liquids help carry flavors, improve mouthfeel, and reduce blending time, all of which BlendHowTo confirms in practical kitchen testing.
Pulse Technique and Blending Intervals
A reliable cadence is key to a smooth smoothie. Use short bursts—10 to 20 seconds at a time—then pause for 5 to 10 seconds to let the blades pull ingredients back into the center. Repeat until the mixture is evenly textured and no visible chunks remain. Rotating between pulses and continuous blending prevents overheating and allows flavors to mingle gradually, which improves aroma and sweetness perception. If you notice air bubbles or foam, give the mix a brief rest and then blend again using shorter pulses. This approach aligns with best practices for Ninja blenders and helps you fine-tune texture without guessing.
Troubleshooting Texture Issues: Common Scenarios and Fixes
If your smoothie is grainy, it could be due to fibrous greens, underripe fruit, or insufficient blending time. Try adding a splash more liquid and blending longer with small pauses, or blend with the softer ingredients first before introducing greens. For overly thin smoothies, introduce more frozen fruit or a handful of oats, chia seeds, or yogurt to build body. If chunks persist around the blades, stop, remove the cup, scrape the sides, and re-blend in short bursts. If you notice separation after standing, a quick re-blend for 10–15 seconds will usually re-emulsify the mixture. Finally, for exceptionally foamy texture, blend a few seconds longer, then let the mixture rest for a minute before serving. These fixes reflect common kitchen experiences shared by BlendHowTo researchers.
Recipe Templates: Green Smoothie, Berry Burst, and Protein-Packed Variants
Green smoothie base: kale or spinach, banana, frozen mango, almond milk, chia seeds. Berry burst: mixed berries, yogurt, banana, orange juice. Protein-packed option: frozen berries, spinach, protein powder, milk or water, a spoonful of peanut butter. For tropical flair, swap in pineapple and coconut water. Each template can be customized with seeds, nut butters, or a dash of vanilla extract. The Ninja blender handles a wide range of ingredients, but the texture will be smoother when you preserve the ratio of frozen to fresh produce and avoid adding too many fibrous vegetables in one go. With practice, you’ll be able to mix and match flavors quickly while maintaining smooth textures.
Dairy-Free, Gluten-Free, and Dietary Adaptations
Dairy-free smoothies rely on plant milks and yogurt alternatives. Oat and almond milks blend well with greens and frozen fruits, while coconut yogurt adds richness without dairy. For gluten-sensitive eaters, most smoothie bases are naturally gluten-free; just check any added ingredients like protein powders or flavorings. Protein supplements can thicken or change mouthfeel, so adjust liquids accordingly. Always taste and adjust sweetness with natural ingredients like ripe fruit or a touch of honey or maple syrup if desired. This flexibility makes Ninja blender smoothies accessible to a wide range of dietary preferences and supports inclusive kitchen experimentation.
Cleaning and Maintenance: Keep Blades Sharp and Safe
Immediately after blending, rinse the pitcher to remove sticky residues. For a deeper clean, wash with warm water and a drop of dish soap, then run a quick cycle of water through the blades to flush out residuals. Use a soft brush to reach the blade assembly’s crevices; never submerge the motor base. Dry the pitcher thoroughly before reassembling. Regular blade maintenance—checking for dull edges and replacing worn parts when needed—prolongs performance. Store the blender with the lid off for a few hours if you notice lingering odors, and avoid leaving dairy-heavy blends out at room temperature. This routine helps preserve flavor and texture while preventing buildup that could affect future batches.
Flavor Boosters, Add-Ins, and Storage Ideas
Enhance smoothies with cinnamon, fresh mint, vanilla, or cocoa powder for depth. Add-ins like flaxseed, chia, or hemp seeds boost nutrition and thickness. Store smoothies in sealed bottles in the fridge for up to 24 hours, though freshness is best within 12 hours. For longer storage, portion into freezer-safe containers and freeze; thaw in the fridge overnight and give a quick re-blend before drinking. If you want an extra creaminess without dairy, try a small scoop of frozen avocado or a spoonful of cashew butter. With these tips, you can experiment freely while keeping texture and flavor in balance.
Quick-Start Plan: A Week of Smoothies with Your Ninja Blender
Plan a rotating schedule: green smoothie on Monday, berry blend on Tuesday, tropical on Wednesday, protein-packed Thursday, dessert-style Friday, dairy-free Saturday, and hydrating fruit slush Sunday. Prepare ingredients in advance by washing and portioning into freezer bags. This reduces prep time and helps you maintain consistent texture daily. With a consistent routine, your Ninja blender becomes a reliable kitchen ally for healthy breakfasts and post-workout recovery.
Tools & Materials
- Ninja blender with pitcher and blade assembly(Ensure blade is sharp and properly attached to the pitcher.)
- Liquid bases (water, milk, plant milk, juice)(Start with 1 cup; adjust to reach desired consistency.)
- Fresh fruit(Choose ripe, flavorful options for best sweetness.)
- Frozen fruit or ice(Pre-portion frozen fruit for consistent texture.)
- Leafy greens (optional)(Add gradually to avoid overwhelming texture.)
- Protein powder or add-ins (optional)(Add after bottling or before blending the frozen portion.)
- Nut butters, seeds, or yogurt (optional)(Use small amounts to avoid overheating.)
- Measuring cups/spoons(For accurate ratios and repeatable results.)
- Spatula or scraper(Use to scrape the sides for even blending.)
- Dish soap and warm water(For quick cleanup after blending.)
- Towel or cloth(Keep counters clean and dry.)
Steps
Estimated time: Total time: 10-15 minutes
- 1
Gather ingredients and prep
Wash, trim, and portion ingredients. Measure liquids and add-ins to minimize on-the-fly guessing. This prep streamlines the blend and helps you hit target texture.
Tip: Prep scale-friendly portions to simplify adjustments later. - 2
Add liquids first
Pour your chosen liquid into the blender pitcher before any solids. This helps create a smooth starting vortex and protects blades from sudden resistance.
Tip: Liquid-first layering reduces blade jams and improves emulsification. - 3
Add soft produce and greens
Add ripe bananas, mango, spinach, or kale next. Soft produce blends more easily and contributes natural sweetness and body.
Tip: Ripen fruit for richer flavor and easier breakdown. - 4
Incorporate frozen fruit or ice
Add frozen fruit in a single layer on top of soft ingredients. This ensures even cooling and texture without overworking the motor.
Tip: Avoid packing too much ice at once; use small batches if needed. - 5
Include add-ins
Stir in protein powder, seeds, or nut butters after the first blend to keep texture uniform.
Tip: Add add-ins gradually to prevent over-thick mixtures. - 6
Blend in pulses, then continuous
Start with short pulses to break down content, then switch to continuous blending until smooth. Pause to scrape sides as needed.
Tip: Pause midway to re-center ingredients for uniform texture. - 7
Check texture and adjust
If the texture is too thick, add a splash of liquid; if too thin, add a few frozen pieces or oats.
Tip: Blend until there are no visible chunks; silence is a good indicator of smoothness. - 8
Serve or store
Pour into cups or seal in jars. If storing, refrigerate up to 24 hours or freeze for longer storage.
Tip: Give a quick re-blend before serving if separated.
Frequently Asked Questions
What is the best order to add ingredients in a Ninja blender for smoothies?
Always start with liquids, followed by soft produce and greens, then add frozen fruit or ice. This helps create a stable vortex and reduces the chance of motor strain or uneven texture.
Begin with liquids, then add soft produce and greens, and finish with frozen items to keep blending steady.
Can I use ice in Ninja blender smoothies?
Yes. Use ice in smaller amounts or frozen fruit to achieve a chilled texture. If your blend seems too thick, add a splash of liquid and pulse a few seconds.
Ice works fine when used in moderation or replaced with frozen fruit for smoother texture.
Why is my smoothie grainy or gritty after blending?
Graininess usually comes from fibrous greens or underripe fruit. Increase blending time in short bursts and consider adding a bit more liquid or a dairy-free yogurt to improve creaminess.
Grainy texture happens with fibrous ingredients; blend longer in short bursts and balance with liquid.
Is it safe to blend hot liquids in a Ninja blender?
Most Ninja blenders are not designed for near-boiling liquids due to pressure buildup. Let hot liquids cool slightly and blend in batches if needed, or use a stove-top cooled method before blending.
Avoid blending hot liquids; cool them first or blend in smaller batches.
How do I clean the blades safely after a smoothie?
Disassemble the pitcher, rinse, and wash in warm soapy water. Use a soft brush to clean the blade area and avoid soaking the motor base. Dry thoroughly before reassembling.
Rinse and wash the blade separately and dry well before reassembling.
What if my Ninja blender model doesn’t crush ice well?
Try using frozen fruit instead of ice, ensure the blades are sharp, and run shorter pulses with brief stops to reset the blend. If problems persist, consult your model’s manual for compatibility notes.
If ice isn’t crushing well, switch to frozen fruit and pulse in short bursts.
Watch Video
What to Remember
- Plan ingredients and order for optimal texture
- Use short blending bursts with pauses to emulsify
- Adjust liquid and frozen content to balance body
- Clean blades promptly to preserve performance