Blender Beauty: A Dual-Path How-To for Smoothies and Renders
Master blender beauty across the kitchen and Blender software with a practical, step-by-step guide for home cooks, hobbyists, and aspiring 3D artists. Learn how to plan, execute, and iterate for consistently beautiful results.

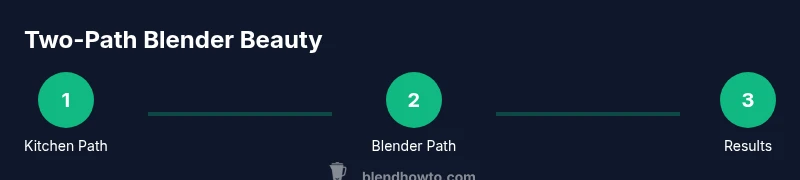
Blender beauty means mastering two intertwined skills: crafting nutrient-rich smoothies with a kitchen blender, and producing polished, photorealistic renders in Blender. This guide helps you choose your path or run both in parallel, then follow a clear, step-by-step workflow to get reliable results. You’ll learn practical ingredient choices, blending techniques, and basic Blender workflows for lighting, materials, and composition, all explained with actionable, home-friendly tips.
What blender beauty means in 2026
In BlendHowTo's view, blender beauty is a deliberate approach to blending that emphasizes consistency, balance, and aesthetics across two domains: everyday kitchen blending and digital visualization in Blender. For home cooks, it means smoothies that feel smooth, well-balanced, and visually appealing. For 3D artists, it means scenes and characters rendered with believable lighting, materials, and color harmony. By understanding both sides, you can transfer techniques—such as controlled textures, careful preparation, and mindful sequencing—from one domain to the other. The term also signals a mindset: plan first, measure results, and iterate until you achieve reliable, repeatable outcomes. Throughout this guide, expect practical steps, concrete examples, and clear checks that help you build confidence in your blender beauty skills, whether you're chasing a glossy glaze on a puree or a lifelike material with accurate reflections in a scene.
wordCount: 0
Tools & Materials
- Immersion blender(Essential for quick, smooth blends in a tall cup or pot)
- Stand blender or high-powered blender(Useful for thicker textures and batch prep)
- Blender jar or pitcher(Prefer 1.5 L capacity for comfort and air space)
- Fresh fruits and greens(Choose vibrant colors for photogenic results)
- Ice and liquid base (water, juice, or milk)(Liquid order affects texture and frostiness)
- Blender software (Blender 3D)(Free, open-source software for beauty renders)
- Computer capable of running Blender(A mid-range GPU helps with rendering speed)
Steps
Estimated time: 90-120 minutes
- 1
Define blender beauty path
Decide whether you’ll focus on kitchen blends, Blender renders, or both. Document a simple goal for each track to guide ingredient or asset choices and to set the pace for your practice sessions.
Tip: Write down 1-2 measurable goals for the week (e.g., perfect silky smoothie texture; render a clean scene with soft shadows). - 2
Gather essentials and assets
Collect ingredients and tools for the kitchen track, and assemble a basic Blender scene with a simple model and neutral lighting for the digital track. Use consistent naming for files and textures to keep your projects organized.
Tip: Create a shared mood board for color, lighting, and texture you want to emulate. - 3
Prep ingredients and assets
Wash, trim, and portion produce; pat dry to minimize water. In Blender, set up camera and a baseline lighting rig. Prepare reference images to guide texture and color decisions.
Tip: Pre-measure ingredients and reference materials to speed up iterations later. - 4
Blend for texture and color
Add liquids first, then soft fruits, then greens and ice. Pulse on low, then increase to high until the texture is smooth and glossy. In Blender, build a base material with realistic roughness and subtle translucency to mimic real surfaces.
Tip: Aim for a texture that photographs well—slightly viscous and glossy, not flat. - 5
Set up scene for beauty renders
Create a simple, clean scene in Blender: a neutral backdrop, a key light, and a fill light to reduce harsh shadows. Enable color management (Filmic) for natural contrast and tone.
Tip: Test render with a low sample rate first to check composition before high-res output. - 6
Refine materials and lighting
Tune shader roughness, specular highlights, and subtle subsurface scattering for a lifelike look. Adjust light color temperature to match the mood—warm for nutrition-focused visuals or cool for clinical accuracy.
Tip: Use a tiny amount of environment texture to improve reflections without overdoing realism. - 7
Render a test frame
Render a low-noise preview to verify composition, color balance, and texture fidelity. Iterate on lighting and material tweaks as needed before final render.
Tip: Compare your test render to a reference image and note at least 2 changes for improvement. - 8
Consolidate results and plan next runs
Save your best smoothie photo along with the Blender render, and document the settings that produced those results. Schedule a follow-up session to improve any weak areas.
Tip: Maintain a changelog to track what improves results over repeated trials.
Frequently Asked Questions
What is blender beauty?
Blender beauty combines practical kitchen blending with realistic 3D rendering. It emphasizes texture, color, and light quality to achieve visually appealing results in both domains.
Blender beauty is about making blends and renders look polished and cohesive by paying attention to texture, color, and lighting.
Do I need to be an expert to start?
No. Start with a simple smoothie and a basic Blender scene. Build fundamentals gradually, and scale up as you gain confidence.
You don’t need to be an expert—begin with basics and grow step by step.
Can I do both paths in parallel?
Yes. A light schedule that alternates between kitchen blending and Blender practice keeps skills balanced and reduces fatigue.
Yes—try alternating sessions to keep both skills fresh.
What ingredients create vibrant smoothie visuals?
Ingredients with natural color and glossy surfaces photograph well, such as berries, leafy greens, and citrus. Balance colors for appealing contrast.
Bright berries and greens photograph well and create a lively look.
Which Blender settings matter most for realism?
Color management (Filmic), material roughness, specular highlights, and proper lighting setup are crucial for believable renders.
Use Filmic color management and realistic materials for lifelike results.
How long does it take to master blender beauty?
Mastery takes consistent practice over weeks to months. Start with small, repeatable tasks and gradually increase complexity.
Expect a few weeks of steady practice to build solid fundamentals.
Watch Video
What to Remember
- Plan both paths before you start
- Gather essential tools for each track
- Document results and iterate
- Aim for cohesive color and lighting across both domains
- Practice in short, repeatable sessions