Blender Bottle Protein: A Practical How-To Guide
Learn how to use a blender bottle for protein shakes: choosing the right bottle, measuring ingredients, achieving smooth texture, on-the-go tips, cleaning, and safety. A practical, step-by-step guide from BlendHowTo.

This guide shows you how to craft smooth blender bottle protein shakes with the right bottle, ingredients, and technique. You’ll learn selecting the best shaker, correct liquid-to-powder ratios, and quick on-the-go tips, plus cleaning and safety pointers. Follow these steps to mix reliably, every time.
What makes blender bottle protein shakes convenient
According to BlendHowTo, a blender bottle protein shake becomes a reliable part of a busy routine when you pick the right bottle and follow a simple mixing ritual. The key advantages are quick setup, consistent texture, and portability for workouts, commutes, or office days. A good bottle minimizes powder clumps, reduces air bubbles, and seals securely to prevent leaks during transit. Understanding the basics—what to look for in a bottle, how to measure powder, and how to shake effectively—sets you up for smooth, satisfying shakes without wasted powder or frustration. This section anchors why the blender bottle approach is popular among home cooks, fitness enthusiasts, and aspiring 3D artists who need reliable nutrition on the go.
Choosing the right blender bottle and accessories
Selecting a blender bottle means focusing on lid reliability, mixing mechanism, capacity, and easy cleaning. Look for a leak-proof lid with a secure seal, a stainless steel or rounded mixing ball that fits inside, and a wide enough mouth for easy pouring and cleaning. Capacity matters: most protein powders mix well in 20–28 ounces of liquid, but you may prefer larger volumes for bulky add-ins like oats or frozen fruit. Accessories matter too: a built-in agitator, a flip cap, a non-slip base, and dishwasher-safe components save time. When shopping, consider the bottle’s material (bPA-free plastics are common) and whether the design supports blender bottle protein recipes beyond basic shakes. This practical approach helps you avoid clogs and ensure long-term reliability.
Mastering liquid-to-powder ratios for smooth texture
Texture fatigue is the biggest obstacle in blender bottle protein shakes. The general rule is 1 scoop (about 25–30 grams) of protein powder per 8–12 ounces of liquid, then adjust for your preferred thickness. Hard clumps usually mean powder-and-liquid contact happened too quickly or too late; layering liquids with powders and using shorter, choppy shakes can help. If you add oats, fruits, or nut butters, you’ll likely want to increase the liquid by 2–4 ounces per extra ingredient. For dairy-free options, plant milks often absorb the mix more slowly than dairy, so you might shake longer or use a thinner powder to achieve the same texture. BlendHowTo recommends starting with a small test batch to dial in your ratio.
Flavor ideas and add-ins for protein shakes
Flavor customization keeps blender bottle protein shakes enjoyable. Try mixing options like vanilla with frozen banana, cocoa with peanut butter, or cinnamon and almond milk for a cozy twist. Add-ins such as ground flaxseed, chia seeds, or Greek yogurt boost texture and nutrition. For post-workout recovery, consider adding a small amount of tart cherry juice or a pinch of sea salt for electrolyte balance. If you’re watching calories, use flavored protein powders and natural extracts instead of added sugars. Consistency benefits come from gradually increasing mix-ins and adjusting liquid volume to match your taste.
On-the-go tips: preparing and transporting
Prep your blender bottle protein shakes the night before for a quick morning routine. Pre-measure powder into small sandwich bags or reusable pods to speed up mixing. To avoid leaks in transit, keep the bottle upright in a dedicated bag or container, and double-check the lid before placing it in your gym bag. If you’re blending with ice, fill the bottle halfway and shake, then add ice as needed to reach your desired chill and texture. For office or travel, choose a bottle with a wide mouth for easier cleaning and a spill-safe cap that’s comfortable to open with one hand.
Cleaning, maintenance, and longevity
Cleaning immediately after use prevents protein residue from sticking and turning sour. Rinse with warm water, then wash with mild dish soap, using a bottle brush to reach all corners. For stubborn stains, a 15-minute soak in warm soapy water or a baking soda paste can help without harsh chemicals. Regular inspection for cracks or gasket wear is essential; replace parts as needed to maintain a tight seal and avoid leaks. Dry the bottle upside down with the cap off to ensure all moisture evaporates, reducing the risk of odor buildup. Routine care extends the life of your blender bottle and preserves flavor integrity for future shakes.
Troubleshooting: clumps, leakage, and odor
If you get clumps, try a two-step shake: a short, energetic burst to wet the powder, then a longer, slower shake for uniform distribution. If leakage occurs, inspect the O-ring or gasket and the cap’s seal; a dry gasket can shrink and cause leaks. Persistent odor can indicate residue buildup; a baking soda soak or a lemon-water rinse can help neutralize smells. Finally, always verify the bottle is properly sealed before transporting. These pragmatic checks keep your shaker reliable and enjoyable.
Safety and storage considerations
Avoid heating protein shakes directly in a blender bottle, as pressure can build and cause leaks when the cap is closed. Store your blender bottle protein shakes in a cool, dry place and refrigerate if you plan to drink later the same day. Inspect the bottle for wear, especially around the lid threads and seal. If you have skin sensitivities, choose BPA-free plastic and avoid harsh cleaners that could degrade materials. Adhering to these safety practices protects both your bottle and your nutrition plan.
Tools & Materials
- Blender bottle shaker (20 oz / 600 ml)(Leak-proof lid, metal whisk or solid agitator included)
- Protein powder(Choose a flavor you enjoy; check serving size on label)
- Liquid (water, dairy milk, or plant-based milk)(Cold is best for texture; adjust volume for thickness)
- Measuring scoop(Tightly scooped level to ensure accurate nutrition)
- Ice cubes (optional)(Adds chill and thickness if desired)
- Flavorings or add-ins (optional)(Banana, peanut butter, cocoa, or seeds can boost nutrition)
- Dish soap and bottle brush(Clean thoroughly after use to prevent odor)
Steps
Estimated time: 8-12 minutes
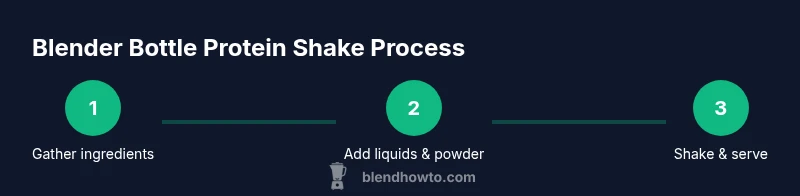
- 1
Gather ingredients
Collect your blender bottle, protein powder, chosen liquid, and any add-ins. Having everything at hand minimizes rushing and mistakes. This preparation saves time and reduces mess during the shaking phase.
Tip: Pre-measure powder into the bottle or a small container for quick mixing. - 2
Add liquid first
Pour cold liquid into the bottle before adding powder. Liquid-first prevents powder from clumping and helps achieve a smoother blend. This order is a simple habit that yields better texture.
Tip: If using frozen ingredients, start with liquid to prevent air pockets. - 3
Add protein powder and add-ins
Spoon in the protein powder, then add any extras like oats, peanut butter, or fruit. Avoid overfilling the bottle; too much powder can stall mixing and create clumps. A layered approach improves dissolution.
Tip: Keep add-ins small (bite-sized) to promote even distribution. - 4
Seal and shake
Secure the lid tightly and shake in short, firm bursts for 10–20 seconds. If your texture is still gritty, shake a few more seconds. Short bursts reduce air bubbles and promote thorough mixing.
Tip: If your bottle has a silicone gasket, ensure it is seated correctly to prevent leaks. - 5
Check texture and adjust
Open the bottle and check for clumps. If needed, shake a bit longer or add a splash of liquid to reach desired consistency. Texture adjustments are common and part of dialing in your personal preference.
Tip: For thicker shakes, blend with less liquid at first, then add small amounts to reach thickness you like. - 6
Clean after use
Rinse immediately, wash with soap, and scrub the bottle and cap. Dry thoroughly to prevent odor and mildew. Regular cleaning extends bottle life and keeps flavors true.
Tip: Turn the bottle upside down to dry completely; avoid leaving moisture in the cap seams.
Frequently Asked Questions
Is a blender bottle better than a regular bottle for protein shakes?
A blender bottle is specifically designed to mix powders with liquids smoothly using a built-in agitator or whisk. It reduces clumps and makes on-the-go preparation practical for busy schedules. However, for very thick shakes or heavy add-ins, you may still benefit from a blender or food processor at home.
A blender bottle mixes powders smoothly with a whisk inside, which helps with on-the-go shakes. For very thick shakes, you might still prefer a blender at home.
Can I use hot liquids in a blender bottle?
Hot liquids can create steam pressure inside a sealed bottle, increasing the risk of leaks or leaks. It’s safer to use cold or room-temperature liquids and refrigerate if you need to store the shake after mixing.
Hot liquids can cause pressure buildup, so it's safer to stick with cold or room-temperature liquids.
How long does a blender bottle last with regular use?
With proper care, a blender bottle can last several months to a few years. Inspect seals and gaskets regularly and replace any worn parts to maintain a tight seal and safe use.
With good care, your blender bottle lasts months to years. Check seals and replace worn parts as needed.
Why do shakes sometimes clump in a blender bottle?
Clumps usually form when powder hits the liquid too quickly or when the shaker isn’t shaken long enough. Pour liquid first, add powder slowly, and shake in short bursts, then longer shakes as needed.
Clumps happen when powder meets liquid too fast or you don’t shake enough. Pour liquid first, add powder slowly, and shake in short bursts.
Are dishwasher-safe blender bottles safe to clean in the dishwasher?
Many blender bottles are dishwasher-safe, but check the manufacturer’s guidance for heat tolerance and gasket integrity. If you’re unsure, hand wash to preserve seals and prolong life.
Most are dishwasher-safe, but check the label. If unsure, hand wash to protect seals.
Watch Video
What to Remember
- Choose a reliable blender bottle with a good seal.
- Dial in liquid-to-powder ratios for your preferred texture.
- Add-ins should be measured and small for smooth blending.
- Clean promptly to prevent odors and extend bottle life.
- Shake in short bursts for best uniformity.