Blender Brushes in Procreate: A Practical Guide
Learn how to translate Blender textures into Procreate brushes, create custom brush packs, and optimize your workflow with practical steps, tips, and troubleshooting for artists.

This guide shows how to create Procreate brushes inspired by Blender textures and shading, starting from Blender assets and ending with custom Procreate brushes. You’ll export textures, convert them into brush maps, and fine‑tune brush settings for clean strokes. Follow the steps to blend 3D texture detail with 2D brush control.
Understanding the Blender-Procreate Bridge
Blender and Procreate sit at two ends of a common creative workflow: Blender is a powerhouse for crafting 3D textures, while Procreate excels at expressive 2D brushwork. The goal of this guide is not to replicate Blender in Procreate word-for-word, but to bridge the two by using Blender-created textures as inputs for Procreate brushes. Think of Blender textures as the grain, pattern, or surface detail that you carry into Procreate to add texture fidelity to 2D artwork. You’ll bake or export texture maps from Blender, convert them into brush maps, and then tweak Procreate brush settings to preserve Blender-like detail at different scales.
BlendHowTo’s approach here emphasizes practicality: start with a simple texture from Blender, verify its tileability or repeatability, and then translate that texture into a brush that performs reliably on iPad screens. Along the way you’ll encounter considerations around resolution, color space, alpha channels, and how Procreate’s brush engine handles grain vs. shape. By the end, you’ll have a reproducible workflow for generating Procreate brushes that retain Blender’s texture feel.
While this guide concentrates on texture-based brushes, you can extend the method to materials like wood, metal, or fabric by preserving their characteristic grain or patina in Procreate’s grain and shape settings. The techniques here apply to artists who want to bring 3D texture detail into a 2D sketching or painting workflow, whether you’re character concepting or product visualization.
Tools & Materials
- Blender (any recent version)(Have a texture asset ready (or create a simple one) to export as an image texture.)
- Procreate (iPad)(Used to create and edit brushes in Brush Studio.)
- Image editing software (optional)(GIMP, Photoshop, or Affinity can help resize and tile textures.)
- High-resolution textures(Aim for 2048x2048 or 4096x4096 for best brush fidelity.)
- Export format (PNG recommended)(Preserves transparency and alpha channels when needed.)
- Cloud storage or USB drive(For transferring assets between computer and iPad.)
Steps
Estimated time: 60-90 minutes
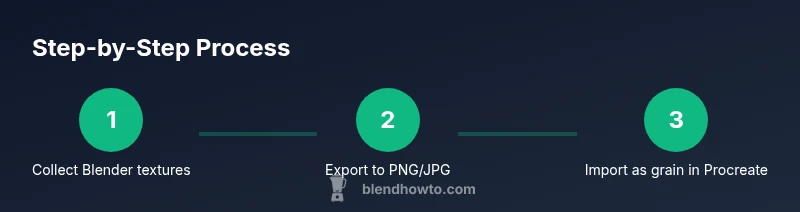
- 1
Gather Blender textures and choose a target brush type
Identify which Blender texture you want to translate into Procreate (e.g., a wood grain, metal grain, or noise texture). Decide whether you’ll use the texture as a grain (for shape-based brushes) or as a pattern for the brush’s stamp (for more tileable textures). This upfront planning saves time later by aligning your export settings with Procreate’s brush Engine.
Tip: Plan for tileability; textures that tile cleanly will yield fewer seams in Procreate. - 2
Export textures from Blender with alpha where needed
In Blender, bake or export the texture map as a PNG or TIFF with an alpha channel if your texture relies on transparency. Use RGBA color with a high color depth to preserve detail. If you’re exporting a normal or roughness map, you’ll later reinterpret it as a grayscale grain in Procreate.
Tip: Keep a copy of the original texture in case you need to adjust contrast later. - 3
Prepare textures in an image editor
Open the exported texture in an editor and resize to a power-of-two dimension (e.g., 2048x2048 or 4096x4096). Ensure the texture is tileable or crop to a square if needed. Export a seamless tile if you plan to wrap it around brush strokes, and save a grayscale mask if you intend to control opacity via grayscale values.
Tip: Test tiling by duplicating the texture in a grid to spot seams before Procreate import. - 4
Create a new brush in Procreate and import the texture
In Procreate, go to Brush Library > + > New Brush. Choose Grain for texture-rich brushes or Shape for a stamp-like effect. Import the texture as the grain map (and use the alpha as needed), then adjust the brush’s spacing and jitter to suit the texture scale.
Tip: Start with a moderate grain scale and test at 12pt to 400px brush sizes. - 5
Fine-tune brush settings for Blender-like strokes
Tweak grain scale, grain opacity, jitter, and stroke smoothing to balance Blender-like texture detail with comfortable drawing. Calibrate pressure response so heavier strokes reveal more texture without overpowering line quality. Run iterative tests across multiple brush sizes and canvases.
Tip: Keep a separate brush for testing; small adjustments can have big effects on large strokes.
Frequently Asked Questions
Can I use any Blender texture in Procreate brush creation?
Most Blender textures can be repurposed as Procreate brush textures, provided you export them as image textures (PNG/JPEG) with proper alpha where needed. Some textures may require pre-processing (tiling, grayscale conversion) to work well as grain maps.
Most Blender textures can be used, with some prep like tiling or grayscale conversion.
What resolution should I use for brush textures?
Aim for 2048x2048 or 4096x4096 textures to balance detail and performance. Higher resolutions yield crisper strokes on large canvases but require more memory, so test on your typical working size.
Use 2K or 4K textures to keep detail without overloading memory.
How do I stop seams when tiling textures in Procreate brushes?
Ensure your Blender texture is truly tileable, or create a seamless tile using clone stamping or offset techniques in an image editor. In Procreate, test brush strokes across large areas to reveal any seams and adjust the tiling accordingly.
Make sure the texture tiles cleanly before importing into Procreate.
Do I need extra software beyond Blender and Procreate?
Optional image editors (like Photoshop or GIMP) help you pre-process textures—crop, tile, adjust levels, or convert to grayscale. They streamline the prep, but aren’t strictly required if you’re comfortable with Blender’s bake workflows.
A photo editor helps, but you can do it with Blender and Procreate alone if you’re careful.
How can I share my Blender-to-Procreate brush workflow with others?
Export your brush as a Procreate brush set via Procreate’s Brush Library. Document the texture names and export steps so others can reproduce your results, ensuring the texture fidelity remains consistent.
You can package your brush set and export a short how-to for others.
Watch Video
What to Remember
- Turn Blender textures into Procreate brush grains for richer 2D work
- Test tileability and scale to avoid seams and blurry strokes
- Use grayscale maps to control opacity and texture strength
- Iterate brush settings to preserve Blender-like detail at multiple sizes
- Organize assets for a smoother workflow across apps