Blender on iPad: Practical Remote Workflows for 2026
Learn how to run Blender workflows on iPad using remote desktop, cloud sessions, and browser access. This guide covers setup, workflows, tips, and common pitfalls for modeling, shading, and exporting from your tablet.

Blender on iPad refers to running Blender workflows through remote desktop, cloud-based sessions, or browser access, since there is no native iPad app. This guide outlines practical setups, expected performance, and step-by-step workflows to model, shade, and export projects from an iPad.
What Blender on iPad Means in 2026
In 2026, Blender on iPad typically refers to using Blender workflows through remote desktop access, cloud-based sessions, or browser-based interfaces because there is no native iPad app. According to BlendHowTo, this approach empowers home cooks turned 3D hobbyists and aspiring artists to leverage iPad portability without sacrificing desktop power. You’ll connect your iPad to a workstation somewhere else, or to a cloud instance, and interact with Blender as if you were sitting at a full desktop. While this setup introduces latency and input-lag compared with a desktop, it also unlocks flexibility and on-the-go learning. The BlendHowTo team found that the most reliable pipelines combine a solid internet connection with a prepared file structure and clear export targets. This article is designed for home cooks, hobbyists, and aspiring 3D artists who want to experiment on iPad with practical steps and safe expectations.
Native Support Status and Realistic Workflows
Blender has no official native iPad app as of 2026. That means most iPad users rely on external hardware or remote services. The most common workflows are: 1) remote desktop into a desktop Blender session, 2) cloud-based Blender sessions accessible through a browser, 3) lighter alternatives on iPad that mimic Blender-like workflows such as sculpting or modeling apps. For many, this is a trade-off between portability and performance. In practice, you’ll prepare your Blender project on a desktop and then continue refining, shading, and exporting via iPad. This yields a workable pipeline for concepting on the couch, teaching sessions, or on-site quick iterations. BlendHowTo notes that tangible results depend on network stability and the complexity of the model.
Hardware and Software Requirements for iPad Blender Workflows
To get started, you’ll want a recent iPad model with a stable internet connection, a keyboard and/or Apple Pencil for precise control, and access to either a desktop Blender session or a cloud-based Blender service. You may also need a cloud storage account to keep files in sync between devices. At minimum, ensure your workspace includes a reliable power source and a backup connectivity option in case your primary connection drops. Keeping project files organized in folders with clear naming helps when you switch between desktop and tablet views.
Access Methods: Remote Desktop, Cloud, or Browser
There are three practical access methods: (1) remote desktop into a desktop Blender session using a protocol such as Moonlight or Parsec, (2) a cloud-based workstation running Blender accessible through the iPad browser, and (3) browser-based services that offer Blender-like interfaces. Each method has trade-offs: remote desktops may add latency, cloud sessions provide consistent hardware but require a subscription, and browser options can be convenient but limit some advanced features. Choose the method that aligns with your typical project complexity and internet reliability.
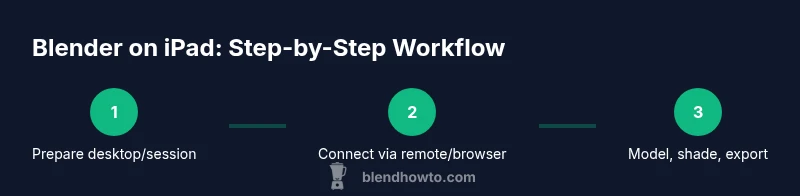
Step-by-Step Workflow Overview
This overview sets the stage for the nested STEP-BY-STEP block. You’ll prepare your hardware, establish a connection to Blender, load or create a project, and begin modeling, shading, and exporting through the iPad. The key is to keep session data in sync with your desktop environment and to verify assets (textures, meshes, and scene files) before switching devices. The following step-by-step section expands on each action in detail.
Input, UI, and Navigation on iPad
Interacting with Blender on iPad hinges on input methods that differ from desktop workflows. External keyboards speed up hotkeys, while the Apple Pencil excels for precise selection and sculpting when a compatible tablet interface is available. In remote or browser contexts, you’ll rely on touch gestures for panning and orbiting, but most advanced operations benefit from keyboard/mouse or a tethered stylus. Setting up a compact workspace with the onscreen keyboard stowed away helps you focus on models.
File Management and Exporting from iPad
File management matters when crossing between desktop and iPad. Use cloud storage or a shared project directory so changes propagate reliably. Keep texture libraries organized and reference files with unique, versioned names. For exporting, render settings may differ between desktop and iPad sessions; verify export formats and ensure assets are correctly linked in your project before final delivery.
A Practical Mini Project: Box Model Workflow
A practical exercise is to model a simple box with beveled edges, add a base material, and export to a common file format. Start by creating a cube, scale to the desired dimensions, apply a bevel modifier, and assign a basic material. Use the iPad session to refine proportions and test lighting. This small project helps you get comfortable with toolbar layouts, navigation, and the data flow between devices.
Troubleshooting and Common Issues
Latency spikes, input lag, or missing textures are the most common pain points when using Blender on iPad. Verify your network stability, minimize scene complexity for mobile sessions, and ensure textures are cached properly on the cloud or remote desktop. If you encounter disconnections, switch to a wired or higher-bandwidth connection, save frequently, and keep backups in cloud storage.
Next Steps and Learning Resources
Once you’ve established a reliable workflow, consider practicing with short, focused projects that reinforce key Blender skills on iPad. Join online tutorials, participate in community forums, and track your progress with a simple project log. As you grow more confident, you can tackle more advanced modeling, shading, and animation tasks and gradually expand your device-agnostic pipeline.
Tools & Materials
- iPad (recent model)(Ensure iPadOS is up to date and has good battery life for long sessions.)
- Apple Pencil (2nd generation)(Helpful for precise sculpting and selection.)
- External keyboard(Speeds up keyboard shortcuts during Blender work.)
- Stable internet connection(Low latency is essential for a smooth experience.)
- Remote desktop app or cloud service(Choose one access method: remote desktop or cloud session.)
- Cloud storage account(Useful for syncing files between devices.)
Steps
Estimated time: 60-120 minutes
- 1
Prepare your workspace
Charge the iPad, connect to a reliable power source, and verify your internet connection. Open your chosen Blender access method (remote desktop or browser) and log in to the session. Having a dedicated project folder helps keep assets organized across devices.
Tip: Test the connection with a quick cube scene to gauge latency before starting a real project. - 2
Choose and set up your access method
Decide between remote desktop and cloud/browser access. Install any required apps on your iPad, sign in, and configure display and input preferences to balance performance and usability.
Tip: If latency is high, reduce viewport resolution to smooth interactions. - 3
Load or create a Blender project
Open your Blender file on the desktop/cloud session or start a new project. Ensure the project directory is accessible from the iPad session to keep assets in sync.
Tip: Save increments with versioned filenames (e.g., scene_v01.blend). - 4
Model basic shapes and layout
Use the iPad or external input to create basic geometry. Keep your scene organized with collections and naming conventions for easy navigation on a smaller screen.
Tip: Use simple shapes first; add detail in subsequent passes to stay efficient. - 5
Apply materials and lighting
Assign basic materials and set up lighting in a way that transfers well when exporting. Use the iPad session to preview on smaller screen and adjust as needed.
Tip: Keep shader complexity modest to avoid performance bottlenecks. - 6
Save, export, and sync
Save your work frequently, export to common formats, and sync with cloud storage if you’re using multiple devices. Verify exports in the destination app or platform.
Tip: Test an export on the target device to ensure compatibility.
Frequently Asked Questions
Is Blender officially available as an iPad app in 2026?
No, Blender does not have a native iPad app as of 2026. Users typically access Blender on iPad via remote desktop, cloud-based sessions, or browser interfaces. These approaches preserve desktop capabilities while enabling mobile portability.
Blender isn’t native to iPad yet, so you work through remote or cloud options rather than a dedicated iPad app.
What are the best practices for iPad Blender workflows?
Choose a reliable access method, optimize scene complexity for mobile sessions, and keep files synced through a cloud service. Regularly save and test exports to ensure compatibility across devices.
Pick a solid remote or cloud setup, keep scenes simple for mobile use, and sync files so you can pick up where you left off on any device.
Can I model complex scenes on iPad, or should I keep it simple?
While you can model complex scenes via remote sessions, performance depends on the server hardware and network. For best results, model simpler components on the iPad and assemble them in the desktop or cloud session.
You can, but keep complexity in check to avoid slowdowns on mobile connections.
Which file formats work best for exporting from iPad Blender sessions?
Common formats like OBJ, FBX, and GLTF are widely supported and work well for cross-device workflows. Check your target application’s import capabilities before exporting.
Export in widely supported formats like OBJ, FBX, or GLTF to ensure compatibility across devices.
Are there alternative iPad apps that feel like Blender?
Yes, there are iPad apps for modeling and sculpting that offer Blender-like workflows. These can complement Blender sessions by handling quick ideation or concepting on the go.
There are Blender-inspired apps on iPad that can help with quick ideation, but they’re not full Blender replacements.
Watch Video
What to Remember
- Blender on iPad relies on remote or cloud workflows rather than native apps.
- Choose a workflow that matches your project complexity and network quality.
- Prepare, save, and sync files frequently to avoid data loss.
- Leverage external input devices to improve speed and accuracy on iPad.
- Practice with small projects to build comfort before tackling complex scenes.