Blender: How to Move the Camera
Learn how to move the camera in Blender with clear, step-by-step instructions, practical tips, and real-world examples for confident 3D work.

With Blender, moving the camera means adjusting its position and orientation to frame your scene precisely. This quick answer highlights how to use hotkeys, the viewport gizmo, and common movement modes—Orbit, Pan, and Dolly—to frame shots quickly, set keyframes, and maintain clean motion paths. No plugins are required, and you can work from any perspective once you learn the basics.
Understanding Blender's Camera System
Blender uses a dedicated camera object to determine what your scene renders. The camera has a position, rotation, lens settings, and clipping distances. Understanding the basics helps with the question blender how to move camera: you are not moving the viewport; you are adjusting the camera object in 3D space. In practice, you usually align the camera to the scene's main subject, then adjust focal length to control perspective. The camera can be animated, constrained, or driven along a path, giving you multiple ways to achieve professional framing. This foundation sets up efficient workflows for both still renders and animations, whether you’re a home cook exploring 3D visuals or a hobbyist practicing cinematic moves.
Preparing Your Scene for Camera Movement
Before you begin the actual camera gymnastics, prepare a clean workspace. Ensure there is a camera object in the scene, or create one with Shift-A > Camera. Confirm the camera is the active camera (the one used for render) by selecting it and pressing Ctrl-0 in the 3D viewport, or by choosing View > Cameras > Set Active. Check that the scene scale aligns with your intended output; inconsistent scale can distort motion in animation. If you plan to animate, enable keyframe insertion and decide on a consistent frame rate. Organize your Outliner so the camera sits above other objects, and consider parenting non-essential objects to a null or empty to simplify movement. Finally, decide your preferred framing method: a direct camera transform, a constraint-based approach, or a path-based motion. This preparation paves the way for smooth, repeatable camera movement.
Move the Camera with Keyboard Shortcuts
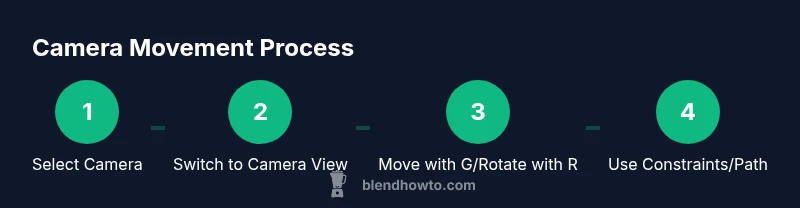
To move a camera efficiently, learn the core keyboard controls. Start by selecting the camera (click the camera in the viewport or click the camera name in the Outliner). Enter Camera View with Numpad 0 so you can see how your framing changes in real time. Then translate the camera using G to grab, followed by X, Y, or Z to constrain the direction. For example, G + X moves the camera along its local X axis; G + Y moves laterally; Rotating uses R; R + X, R + Y restricts rotation. You can also use the 3D Viewport's gizmo to drag the camera along axes for quick, visual positioning. If you prefer to move in world space, use Alt+G to reset location and Alt+R to reset rotation. Ensure to frequently switch back to the camera view to verify framing as you adjust. This practical mix of keyboard and gizmo techniques is central to the blender how to move camera workflow.
Orbit, Pan, and Dolly: Fundamental Movements
Camera movement is not just moving the camera object; it's about controlling the viewer's trajectory. Orbit (rotate) around the scene by dragging with the viewport gizmo or using the middle mouse button in Camera View, which rotates the camera's view. Pan shifts the frame horizontally or vertically; in the viewport, hold Shift and drag with the middle mouse button. Dolly (zoom in and out) moves the camera closer or farther; use the scroll wheel or Ctrl+MMB in the viewport to dolly. When you work in camera mode, consider enabling Lock Camera to View for quick framing while you scrub through frames. Anchor framing by using an empty as a focal point to keep the shot stable. These techniques improve your ability to quickly frame shots in a blender how to move camera scenario.
Using Constraints and Targets for Smooth Motion
Constraints can stabilize camera motion and keep framing consistent across shots. Use Track To or Look At constraints to keep the camera oriented toward a subject, like a product or character, while you move. The Follow Path constraint is ideal for moving the camera along a predefined curve; you can control speed by keyframing the offset parameter. To set this up, create a curve (Shift-A > Curve > Bezier), align the camera to the start of the path, then add a Follow Path constraint to the camera with the curve as the target. You can also combine constraints: Track To to keep the subject in frame, and Follow Path to drive travel along a path. These techniques are especially useful for product renders or cinematic shots where consistent alignment matters. For the blender how to move camera, constraints are a powerful ally for repeatable motion.
Animate Camera Paths and Keyframes: A Practical Guide
Animation is where you can realize complex camera movement. Start by enabling auto keyframes or adding a keyframe manually at your chosen frame. Move the camera to its next pose, then press I to insert a location and rotation keyframe. If you used a path, adjust the path's evaluation time or the camera's offset to control pacing. Use a curve for a smooth, natural arc, and avoid abrupt turns by easing keyframes with the Graph Editor. You can also bake camera motion into a motion path for preview; this helps detect issues like sudden acceleration or parallax shifts. Finally, scrub and render test frames to confirm that the motion feels intuitive and aligns with narrative intent. With these steps, you realize a robust blender how to move camera workflow that supports storytelling and accurate framing.
Common Pitfalls and Troubleshooting
Even experienced users hit friction when moving cameras. Clipping occurs when the camera's near clip or far clip distances clash with scene depth; adjust Clip Start and End in the camera properties. A too-tight field of view can exaggerate perspective or cause distortion; tweak the focal length or sensor size for a more natural look. If the camera unexpectedly shifts while animating, check for parent relationships or conflicting constraints. Another frequent issue is camera shake or jitter due to keyframe pacing; ensure consistent frame pacing and consider adding easing to keyframes in the Graph Editor. Finally, ensure your scene's origin and camera's origin align; misalignment can create odd parallax effects that break immersion. Following these checks helps you troubleshoot efficiently in the blender how to move camera context.
Tools & Materials
- Blender software (any recent version)(Ensure the latest camera features are available.)
- Computer with adequate specs(A capable GPU helps with real-time previews.)
- 3-button mouse (recommended)(Middle mouse button makes orbiting easy; use emulation if needed.)
- Sample Blender project file(Use a simple scene to practice framing.)
- Reference images or storyboard(Helps plan camera angles and timing.)
Steps
Estimated time: 40-60 minutes
- 1
Select the Camera
Click the camera in the 3D Viewport or choose it from the Outliner to ensure subsequent moves affect the camera rather than other objects.
Tip: Use the Outliner for precise selection when the viewport is cluttered. - 2
Switch to Camera View
Press Numpad 0 to enter Camera View so you can immediately see framing as you adjust the camera.
Tip: Toggle back and forth often to confirm framing accuracy. - 3
Translate the Camera
Press G to grab, then constrain with X, Y, or Z to move along a specific axis. Use G + X for forward/backward motion depending on the camera's local axis.
Tip: For global movement, use Alt+G to reset position quickly. - 4
Rotate the Camera
Press R to rotate, then constrain with X, Y, or Z. Rotating around the Z axis is common for pan shots.
Tip: Hold Shift while rotating for finer control. - 5
Use the Gizmo for Quick Positioning
Drag the camera along the on-screen gizmo to reposition along a chosen axis without memorizing hotkeys.
Tip: Enable Lock Camera to View to frame while scrubbing frames. - 6
Set Up a Simple Path (Optional)
Create a Curve (Shift-A > Curve > Bezier), then add Follow Path to the camera and keyframe the offset to drive motion.
Tip: Keep the path smooth by using a gentle curve; avoid sharp bends. - 7
Animate with Keyframes
Move to a new frame, adjust the camera pose, and press I to insert Location and Rotation keyframes. Use the Graph Editor to ease timing.
Tip: Preview motion frequently to catch pacing issues early. - 8
Review and Refine
Scrub through the animation, adjust keyframe timing, and ensure the shot remains visually clear and cinematic.
Tip: If a shot feels jerky, adjust easing curves or add more keyframes for smoother transitions.
Frequently Asked Questions
What is the difference between moving the camera and moving objects?
Moving the camera changes the viewer's perspective, while moving objects changes their positions within the scene. Both affect composition, but camera movement specifically controls what is rendered.
Moving the camera decides what you see; moving objects changes what’s in the frame.
How do I orbit around a target in Blender?
In Camera View, use the viewport gizmo to rotate or drag with the middle mouse button to orbit. You can also set an empty as a focus target to simplify orbiting.
Use the gizmo or middle mouse drag to orbit around your focus.
Can I animate the camera along a path?
Yes. Create a curve, add a Follow Path constraint to the camera, and keyframe the offset to control timing and speed.
Absolutely—let the camera follow a curve with keyframes.
How can I prevent clipping or parallax issues?
Adjust the camera's clipping range and focal length, ensure objects stay within view, and use depth of field conservatively to avoid distortion.
Increase clipping and fine-tune focal length to reduce clipping and parallax.
Are constraints necessary for all shots?
Not always, but constraints like Track To and Follow Path help keep framing consistent, especially in complex scenes.
Constraints are helpful but not required for every shot.
Where are camera options located?
Camera options live in the Properties panel under the Camera tab, where you adjust lens, depth of field, and clipping.
Look under the Camera tab in the Properties panel for key settings.
Watch Video
What to Remember
- Move the camera with translate/rotate using clear axis constraints
- Verify framing in Camera View (Numpad 0) frequently
- Leverage constraints and paths for repeatable shots
- Animate with keyframes and Graph Editor to refine timing