How to Fix Blender Camera: A Practical Troubleshooting Guide
Learn to diagnose and fix common Blender camera issues—from active camera misconfigurations to clipping and animation drift. This comprehensive guide offers step-by-step actions, practical tips, and best practices to restore reliable camera behavior in Blender 3.x for home cooks of 3D art and Blender enthusiasts.

You will fix Blender camera issues by verifying the active camera, resetting transforms, and tuning clipping and lens settings. This steps-based guide covers problems like the camera not moving, wrong framing, or animation drift, and shows practical actions to restore a stable view. Ensure you have a recent Blender project, access to the camera object, and a workstation with reliable hardware.
Contextual overview: why Blender camera issues happen
Camera problems are among the most frequent headaches for Blender artists, especially when starting a scene, rendering, or animating. Before diving into complex re-rigs, take a step back and verify the basics. According to BlendHowTo, many camera issues stem from a mismatch between the viewport camera and the render camera, an inactive camera in the scene, or accidental changes to the camera's parent or constraints. A healthy workflow starts with a clean camera asset, a clearly defined active camera, and a predictable projection setup. In this section we outline how to diagnose the root cause by systematically checking the camera object, its relationship to the scene, and its view settings. We’ll also distinguish common misfires, such as an active viewport camera that isn’t the one Blender uses for rendering, or a camera shifted off its intended origin during animation. By focusing on structure first, you can avoid chasing symptoms and preserve time for higher-value tasks like lighting and composition. The goal is a stable foundation you can build on for shots, walkthroughs, and final renders.
BlendHowTo’s perspective emphasizes reproducible setups: name your camera clearly, lock essential transforms when appropriate, and use a dedicated camera layer or collection to prevent accidental changes during edits.
Verify the active camera and scene setup
Before anything else, confirm you’re looking through the same camera Blender will render from. In the 3D View, press Numpad 0 to view through the camera and inspect the framing. In the Outliner or Properties > Scene > Camera, ensure the intended camera object is selected and set as the active camera. If needed, select the camera and press Ctrl-0 to make it the active camera, then re-check the viewport. Finally, compare the viewport view to the camera’s output in the Render Properties to verify alignment. This small check prevents chasing failures that stem from a mismatched camera.
BlendHowTo notes that a mismatch between the viewport camera and the render camera is a frequent source of confusion; establishing a single, clearly named camera for the scene reduces drift when you later adjust lights or animation.
Reset transforms and apply scales carefully
Select the camera object and apply its current scale with Ctrl-A > Scale to freeze any non-uniform scaling that could skew transforms in relation to constraints or parent objects. Then reset location and rotation to default via Alt-G and Alt-R, respectively. After resetting, re-check the camera’s position and orientation in the scene view and ensure its local axes align with your intended forward direction. If the camera was scaled down or up inconsistently, re-scale using a uniform value and re-parent if necessary.
Apply the transforms before adjusting any constraints or tracking targets to prevent compounding errors. Once the camera has a clean transform, you’ll notice more predictable movement and easier framing across renders.
Tackle clipping planes and lens settings
Open the camera properties and inspect the Clip Start and Clip End values; set them so your scene elements are within range while avoiding clipping artifacts near the camera. Then review the lens settings: adjust the focal length and, if needed, the sensor size to approximate the desired field of view. A common pitfall is oversimplifying the lens workflow—remember that changing focal length without updating sensor size can distort perspective. Use the camera view to compare expected framing with the rendered result and iterate.
The goal is consistent visibility of scene objects during animation and rendering. Small tweaks to clipping and lens values often resolve many issues without touching object-level transformations.
Check camera constraints and parenting
Navigate to the Constraints tab and review any active constraints on the camera, such as Track To, Follow Path, or Copy Location. Misapplied constraints can override manual transforms and produce drifting or unexpected framing. If a constraint is unnecessary or misconfigured, disable it or remove it. Also verify parenting: if the camera is parented to a moving object, ensure the parent’s motion is intentional and does not drive unintended camera motion. Clear confusing parents to regain independent control when needed.
A clean constraint setup makes animation predictable and helps you diagnose whether the issue originates from constraints or from transforms themselves.
Inspect animation data on the camera
Open the Dope Sheet or Graph Editor and search for keyframes on the camera’s location and rotation. Unexpected or extra keyframes can cause jitter or drift, especially when multiple editors or constraints are involved. If you find stray keys, delete or adjust them and consider baking the camera motion to simplify the animation curve. Ensure the Auto Keyframe feature isn’t creating unintended keys during edits.
After cleaning up animation data, scrub the timeline to verify the camera movement is smooth and consistent with the scene’s action. This step often reveals hidden keys or curve issues that aren’t obvious in the 3D view.
Validate scene view and render camera alignment
Make sure the camera that appears in your viewport corresponds to what the Render Properties will output. Confirm there’s no alternate camera selected per scene or per layer. Render a quick frame or a short test sequence to observe if the final frames align with your expected framing. If inconsistencies remain, consider creating a new camera and re-assigning scene references to isolate the problem.
Double-check the render resolution, output path, and engine settings, as these can exaggerate minor framing errors into noticeable issues in the final render.
Common pitfalls and quick-fix checklist
- Camera not moving: check keyframes and constraints; verify the active camera.
- Wrong framing: adjust focal length and sensor size; re-frame using the camera view.
- Persistent drift after edits: review parenting and constraints; reset transforms if needed.
- Render mismatch: confirm the active camera in render settings and the frame path.
- Animation conflicts: clean up keyframes and re-test motion in a fresh scene.
A structured checklist quickens troubleshooting and reduces back-and-forth between edits and renders.
When issues persist: incremental troubleshooting strategies
If basic fixes don’t resolve the problem, isolate the camera in a fresh scene. Create a new camera, place it in a simple position, and confirm that basic movement and framing work as expected. If the new camera behaves correctly, compare its setup with the original to identify the root cause—be it constraints, parenting, or a corrupted scene reference. Consider disabling non-essential add-ons or using a clean startup file to test.
Document each change you make so you can revert safely if needed. This incremental approach prevents convoluted fixes and helps you pinpoint the exact trigger for the issue.
Best practices to avoid future camera problems
Develop a repeatable camera workflow: name cameras clearly, keep a dedicated camera collection, and document camera settings per project. Maintain a per-project camera baseline—an ideal default camera with proper distance, framing, and constraints—that you can duplicate for new scenes. Regularly back up scenes and perform quick sanity checks after major edits to ensure camera behavior remains stable across renders.
BlendHowTo recommends adopting a consistent tracking approach for animation and using scene references to minimize unintended changes during large edits. With these habits, future Blender camera problems become predictable and manageable.
Tools & Materials
- Blender software (latest stable release)(Ensure you’re on a recent 3.x release for camera features and stability.)
- Project file or scene ready for testing(Use a copy or backup when experimenting with fixes.)
- Screen capture or notes for reference(Helpful for documenting changes and settings.)
- Reference images of expected framing(Helps compare before/after results.)
Steps
Estimated time: 20-45 minutes
- 1
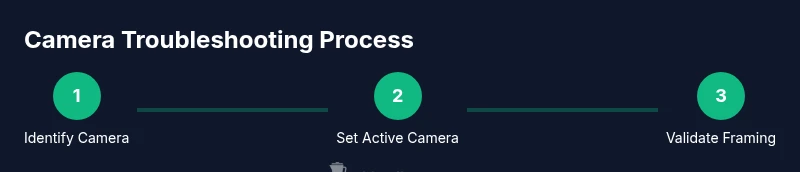
Locate and select the camera
Identify the camera you want to fix in the Outliner and 3D View. Ensure you are working with the correct camera by matching its name to your planned shot. This step prevents edits on the wrong camera and reduces confusion later.
Tip: Use the search bar in the Outliner to quickly locate the camera by name. - 2
Set the active camera
With the intended camera selected, press Ctrl-0 to set it as the active camera for rendering. Confirm in the Render Properties that this camera is selected as the scene camera. This ensures Blender renders from the correct perspective.
Tip: If Ctrl-0 doesn’t work, switch to the camera in the viewport and use the “Set Active Object as Camera” option. - 3
Apply the camera transforms
Apply any nonuniform scale to the camera (Ctrl-A > Scale) and reset location/rotation (Alt-G, Alt-R). This yields predictable transforms and prevents drift when constraints or parents move the camera.
Tip: Apply transforms before tweaking constraints to avoid conflicting data. - 4
Adjust clipping and lens
Open the camera properties and set Clip Start/End to fit your scene range. Tweak focal length and sensor size to achieve the desired framing without distorting perspective.
Tip: Use the camera view (Numpad 0) to verify framing with the target shot. - 5
Review constraints and parenting
Check for Track To, Follow Path, or Copy Location constraints that might override user edits. If a parent is unnecessary, Clear Parent or Exclude the camera from that parent group to regain control.
Tip: Disable constraints temporarily to test if they’re causing the issue. - 6
Inspect animation data
Open the Dope Sheet/Graph Editor and scan for unexpected keyframes on location/rotation. Remove stray keys and consider baking motion for stability.
Tip: Limit edits to essential channels to minimize curve quirks. - 7
Test in a clean scene
Create a new blender file or a simple scene with a fresh camera to verify fundamental camera behavior. If the new scene works, compare configurations to identify the root cause in the original project.
Tip: If the issue persists, the problem may be global in the project rather than camera-specific. - 8
Document and save changes
Record what you changed and why. Save a versioned backup of the project to ensure you can roll back if needed and to facilitate future fixes.
Tip: Create a dedicated changelog for camera-related edits.
Frequently Asked Questions
What is the difference between the viewport camera and the render camera in Blender?
Blender uses a camera object to define rendering perspective, while the viewport can show any viewpoint. The active render camera determines the final image, and mismatches between these can cause framing or motion issues. Always verify which camera Blender renders from.
The render camera is the one Blender uses for output, while the viewport camera is for navigation. Make sure the correct camera is active for rendering.
Why isn’t my camera moving even after I adjust transforms?
If transforms don’t move the camera, check for active constraints or a parent relationship that overrides direct transforms. Disable or adjust constraints, and clear any unintended parenting before re-testing movement.
If the camera won’t move, look for constraints or parents that override transforms and fix those first.
How do I reset a camera to its default position without losing my scene?
Select the camera, use Alt-G and Alt-R to reset location and rotation, and then re-check framing. If needed, reapply a known good transform from your baseline camera.
Reset the camera’s position and rotation, then re-check the view to restore proper framing.
Can animation keyframes cause camera drift even after edits?
Yes. Hidden or unintended keyframes can move the camera unexpectedly. Inspect with Dope Sheet/Graph Editor, delete stray keys, and consider baking motion for stability.
Hidden keys can drift the camera; remove stray keys and bake motion if needed.
Should I always bake camera motion for complex scenes?
Baking can simplify complex animation curves and prevent runtime errors. Bake after finalizing constraints and keyframes to ensure smooth playback in all editors.
Baking helps stabilize the camera motion once you’re happy with the setup.
What steps if the issue persists after trying these fixes?
Create a new scene and camera to compare behavior, disable non-essential add-ons, and review the project for corrupted data or overarching settings. If needed, revert to a clean startup file to isolate the problem.
If it still fails, test with a fresh scene and fewer variables to identify the root cause.
Watch Video
What to Remember
- Verify the active camera first
- Reset transforms before adjusting constraints
- Check clipping and lens for correct framing
- Inspect animation data for unintended keys
- Test changes in a clean scene for accurate diagnosis