Blender Lightroom Post-Processing Workflow
Learn a practical blender lightroom workflow to post-process Blender renders: color management, export choices, Lightroom adjustments, and tips for consistent results across web and print.

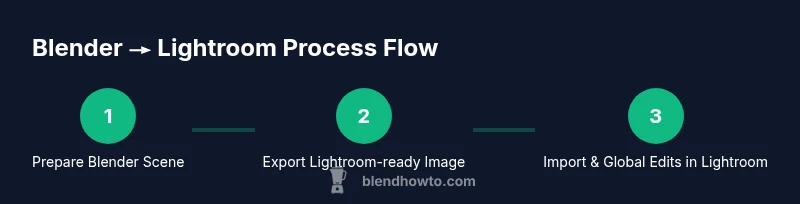
By the end of this guide you will implement a practical blender lightroom workflow for post-processing renders. Start in Blender with proper color management, export a Lightroom-friendly image, then import into Lightroom for color grading, exposure tweaks, and final touches. This step-by-step path emphasizes consistency, quality, and repeatable results. You'll learn where to adjust settings, which exports preserve color, and how to troubleshoot mismatches between programs.
Why Blender Lightroom Workflow Matters
In creative pipelines, the renders you produce in Blender are only as good as the post-processing you apply. A well-aligned blender lightroom workflow ensures color consistency from render to display, reduces guesswork during grading, and makes it easier to reproduce a specific look across projects. By coordinating Blender's color management with Lightroom's editing toolkit, you maintain tonal accuracy and avoid common pitfalls like color shifts, blown highlights, or muddy shadows. This approach also speeds up publishing workflows for portfolios, client previews, or social media. Throughout this section we’ll reference practical steps you can apply today, with an eye toward repeatability and long-term quality. The BlendHowTo team emphasizes a disciplined workflow to minimize guesswork and maximize speed.
- Color consistency is built, not hunted.
- A predictable export path reduces rework.
- Documentation of settings helps teammates reproduce results.
Core Concepts: Color, Tone, and Color Management
Before touching a render, it’s crucial to understand the core ideas that drive blender lightroom workflows. Color management defines how colors travel from Blender to Lightroom, and how devices interpret them. In Blender, you’ll typically use Filmic Color Management to preserve highlight detail and maintain natural contrast. In Lightroom, you’ll work within an sRGB/Rec.709 environment for consistency on most displays. The two programs must share a common color space to avoid mismatches. Tone mapping, exposure, and white balance become the language you use to translate the initial render into a final image that looks correct on monitors, phones, and prints. In practice, this means planning your look first in Blender and then refining it with Lightroom’s global and local tools.
- Filmic in Blender helps retain detail in shadows and highlights.
- Lightroom’s tone curves shape mood and depth.
- Consistency across devices is achieved with calibrated workflows.
Preparing Blender Renders for Lightroom
The blender lightroom workflow begins with a render that is easy to refine in Lightroom. Start by finalizing your scene lighting, materials, and camera settings. Use a high dynamic range-friendly export so you don’t lose details in bright or dark regions. For Lightroom compatibility, prefer a flat, linear render encoded as a TIFF or a high-quality PNG, avoiding heavy compression. In Blender, enable a linear workflow when saving files, and select a color management View Transform that preserves real-world brightness. If you intend to post-process multiple frames, render a representative set that captures a wide range of light levels. This helps you build reliable presets you can reuse later.
- Choose a format that preserves tone: TIFF or PNG.
- Enable Filmic and a linear workflow for best results.
- Save multiple frames for a consistent look across a sequence.
Export Settings and Color Space
Exporting from Blender to Lightroom requires careful attention to color space and bit depth. Set the View Transform to Filmic, with the Display Device as sRGB for consistent viewing. Export at least 16-bit depth to preserve gradient detail; avoid 8-bit PNGs when you plan heavy color grading. Use TIFF if possible for its lossless quality, or a high-bit-depth PNG if TIFF is unavailable. Ensure the color profile embedded in the file matches Lightroom’s working space (sRGB or Adobe RGB, depending on your project). If you’re working with HDR content, consider tonemapping during export so Lightroom receives a balanced image. Finally, name files systematically to simplify bulk imports.
- Filmic View Transform is recommended in Blender.
- Prefer TIFF or high-bit-depth PNG for grading.
- Embed a consistent color profile and naming convention.
Importing into Lightroom: Organization and Setup
Once your Blender render lands in Lightroom, organization is the first step toward a smooth blender lightroom workflow. Create a dedicated collection or collection set for Blender renders, and apply metadata that identifies project, version, and camera settings. In Lightroom Classic, enable color management by ensuring the Develop module uses the same working space as Blender (often sRGB). Import the image without applying automatic post-processing, so you can build an intentional workflow from the start. Use flags, ratings, and color labels to sort frames that will become the final composite or sequence. If batch-processing, you’ll want to apply the same starting point across all images for consistency.
- Use a project-specific collection for Blender renders.
- Sync color space between Blender and Lightroom.
- Apply consistent naming, metadata, and ratings for easy retrieval.
Global Adjustments: Exposure, White Balance, and Contrast
With Blender and Lightroom aligned, begin global edits to establish baseline mood. In Lightroom, start with White Balance to correct color casts introduced during rendering. Use Exposure and Contrast to bring tonal range into a pleasing range without washing highlights or crushing shadows. The HSL panel helps you fine-tune specific color channels that appear in your render (skin tones, foliage, sky). Global adjustments should aim for a neutral baseline that remains flexible for look development. A good practice is to compare the adjusted image to your original Blender render by toggling side-by-side and ensuring there’s no unexpected shift in brightness or hue across different parts of the image.
- Establish a neutral baseline before local edits.
- Use HSL to target specific colors without affecting others.
- Regularly compare with the original render to avoid drift.
Local Adjustments and Creative Grading
Local adjustments let you sculpt mood without changing the entire image. Use Lightroom’s adjustment brush, radial, and graduated tools to selectively enhance lights, shadows, or color regions. For a cinematic look, perform subtle color grading by balancing midtones and highlights with color grading wheels. This is where you translate Blender’s lighting into the final aesthetic. Experiment with split toning, clarity, dehaze, and texture, staying mindful of how these edits interact with the global base. Always save a preset of your go-to grading recipe so you can reproduce the look on future renders.
- Apply targeted edits to highlight important features.
- Use color grading to craft mood while preserving realism.
- Save and reuse grading presets for consistency.
Common Pitfalls and Troubleshooting
Even seasoned artists face common blender lightroom workflow issues. A frequent problem is color-shifted previews due to mismatched color spaces; recheck the Blender Export Color Space and Lightroom working space. Another pitfall is over-sharpening or heavy noise reduction that destroys detail after grading; apply sharpening cautiously after all color and tonal work. If highlights clip, adjust exposure before grading or consider lowering light values in Blender. Finally, avoid upscaling low-resolution renders; render at higher resolution in Blender and limit post-processing to avoid interpolation artifacts. When in doubt, revert to a calibrated baseline and re-build the look incrementally.
- Re-check color spaces if colors look off between apps.
- Be careful with sharpening after grading.
- Always render at sufficient resolution for your target output.
Quick-start Checklist for Blender to Lightroom
- Confirm Blender color management is set to Filmic and linear workflow.
- Export TIFF or high-bit-depth PNG with sRGB if possible.
- Import into Lightroom and apply a neutral global baseline.
- Use Lightroom’s HSL and Tone Curve to define color relationships.
- Save a grading preset for future renders.
- Export final from Lightroom with the appropriate file type for your medium.
Tools & Materials
- Blender (latest version)(Ensure Color Management is set to Filmic and sRGB-compatible export.)
- Adobe Lightroom Classic or Lightroom (cloud)(Any edition with color grading and local adjustment tools.)
- Calibrated monitor(For accurate color grading across devices.)
- TIFF or high-bit-depth PNG export from Blender(Preserves more color data for Lightroom editing.)
- Color profiles and working space set to sRGB/Rec.709(Keep colors consistent across apps.)
- Optional: presets for Lightroom(Speed up look development by saving common grade recipes.)
Steps
Estimated time: 60-90 minutes
- 1
Prepare Blender scene for post-processing
Finalize lighting, materials, and camera. Enable Filmic color management to protect highlights. Do a quick test render to check exposure and shadows before committing to a full-res output.
Tip: Render a test frame to verify lighting balance and color intuition. - 2
Render with a Lightroom-friendly export
Choose TIFF if possible or a high-bit-depth PNG. Use a linear workflow and a Filmic View Transform to preserve detail across luminance ranges.
Tip: Avoid aggressive compression that degrades color gradients. - 3
Export and label for Lightroom
Name the file with a project and frame index. Include metadata like camera setup and render pass. Export with sRGB embedded for Lightroom compatibility.
Tip: Keep a consistent naming convention to ease bulk imports. - 4
Import into Lightroom and set baseline
Import without auto enhancements. Apply a neutral baseline and organize using a project-specific collection. Ensure Lightroom’s Working Space matches Blender’s color space.
Tip: Toggle before/after to catch unintended shifts. - 5
Global adjustments
Adjust exposure, white balance, and contrast to establish mood. Use the HSL panel to constrain color edits to specific channels without affecting others.
Tip: Make small, incremental changes; big changes are hard to reverse. - 6
Local grading and export
Apply targeted edits with brushes, gradients, and calibration. Save a preset for future renders. Export final in the required format for web or print.
Tip: Document your final export settings for consistent downstream use.
Frequently Asked Questions
Can I edit HDR renders in Lightroom?
Lightroom can handle high dynamic range through suitable file formats like 16-bit TIFFs. If Blender renders HDR data, tonemap before export or use a linear workflow to avoid clipping. Always test on your target display.
Yes, as long as you export a compatible HDR-friendly format and manage tonal range before editing.
What file formats should I export from Blender for Lightroom?
TIFF is the preferred lossless option for color fidelity. PNG is acceptable for web-facing work, but avoid heavy compression that reduces color detail. JPEG can be used for quick previews but may degrade quality.
Export TIFF for the best color fidelity in Lightroom.
Does Filmic color management in Blender affect Lightroom edits?
Filmic sets a wider, more natural dynamic range in Blender, which helps Lightroom edits look more predictable. Consistency between Blender's output and Lightroom’s working space is key.
Filmic ensures your Blender renders behave predictably in Lightroom.
Should I do all color grading in Blender or Lightroom?
A pragmatic approach is to grade lighting and look in Blender, then fine-tune color and mood in Lightroom. Blender handles lighting realism; Lightroom refines color and tonality for the final output.
Blend the strengths: Blender for lighting, Lightroom for color grading.
Can I use LUTs in Lightroom?
Lightroom doesn’t apply LUTs directly. You can simulate LUT-style looks with presets and the HSL/Color Grading controls, then save those settings as a preset for future renders.
LUTs aren’t native to Lightroom, but presets mimic LUT effects.
How do I optimize export for web vs print?
For web, export at 72-150 PPI with JPEG or PNG; for print, use TIFF or high-bit-depth PNG, and ensure color profiles match the printer’s workflow. Resize and sharpen appropriately for the destination.
Choose file type and resolution based on final output.
Watch Video
What to Remember
- Plan color management first; align Blender and Lightroom spaces.
- Export TIFF/PNG with minimal compression for best grading results.
- Use global edits as a baseline before local adjustments.
- Create and reuse Lightroom presets to speed up workflows.
- Maintain a calibrated workflow for consistent results across devices.