Mastering Light in Blender: A Practical Guide for 3D Artists
A practical, step-by-step guide to lighting in Blender, covering HDRIs, area lights, shadows, color management, and rendering workflows for convincing results.

Light in Blender is the creative engine behind mood, depth, and realism. This guide teaches you to balance HDRI ambient lighting with artificial lights, tune color and exposure, and use post-processing to polish renders. Follow the steps to build repeatable lighting workflows that elevate your scenes.
Understanding light in blender and why it matters
According to BlendHowTo, light in blender is not just brightness; it's the primary sculptor of mood, depth, and realism. The phrase light in blender captures how illumination interacts with materials, geometry, and camera viewpoints to shape perception. Good lighting reveals texture, suggests scale, and guides the viewer's eye through a scene. Without thoughtful lighting, even the most detailed models can look flat or artificial. This section explains the role of light in Blender, how different light types work, and how you can start thinking about lighting as a creative tool rather than a mere technical step. By the end, you will start to see scenes in terms of light directions, shadow quality, color balance, and how post-processing can accentuate what you’ve lit.
Core lighting concepts in blender you should know
Light in blender operates across several core concepts that affect every render. First, intensity governs how bright a light is; second, color temperature influences warmth or coolness; third, shadows define depth and separation. Understanding how light falls on surfaces requires thinking in terms of roughness, specular reflection, and the physics of light, without getting lost in jargon. The goal is to create believable illumination that matches your scene's context. Practice by isolating a single light and observing how its angle, distance, and type alter shadows, color tint, and highlight edges. Keeping a mental map of these ideas helps you plan scenes quickly and adjust on the fly during a render pass.
Setting up a basic scene: adding lamps and HDRI
A solid first step in light in blender is to lay out your basic scene and establish a working light plan. Start with an HDRI environment texture to provide ambient light and reflections. Then add a few artificial lights—an area light for soft, broad illumination, a sun light for directional shadows, and a point light for accent highlights. Position lights to sculpt the subject's form and separate it from the background. Don’t forget to enable shadows and set an appropriate shadow softness. Finally, check your camera angle and ensure the light pattern complements the composition rather than fighting it. This baseline setup gives you a reliable starting point for refinement.
Balancing exposure: intensity, color temperature, and shadows
Exposure in light in blender is a balancing act. Adjust the overall brightness so the most important areas read clearly without washing out details. Use color temperature to convey mood: warmer tones for cozy scenes, cooler tones for clinical or futuristic looks. Shadows should be visible enough to ground the subject but not so harsh that texture is lost. If highlights clip, reduce light intensity or add fill light from a different angle. If shadows look muddy, tweak the light angle or introduce a secondary light to restore separation. Test renders under consistent white balance to ensure color fidelity across the scene, and consider a filmic color management setting to maintain natural contrast.
HDRI vs artificial lights in blender: choosing the right mix
HDRI provides a quick, realistic base illumination and convincing environmental reflections, but it often lacks strong directional control. Artificial lights give you precise control over intensity, color, and shadow shape. The best results usually come from a thoughtful mix: use HDRI for ambient light and reflections, then add one or two directed lights to sculpt the subject, fill shadows, and punch color in key areas. Learn to swap HDRIs that match your mood and switch off or down individual lights to compare effects. Keep in mind that excessive brightness from HDRIs can reduce contrast, so balance them with shadowy regions to retain depth.
Materials, reflections, and how light interacts with surfaces
Light in blender reveals a material's true character. Rough, matte surfaces scatter light, while glossy, metallic materials create strong highlights and reflect the surroundings. The interplay between roughness, specular parameters, and the lighting setup determines how realistic a material looks. For accurate results, test with a few reference shots and observe how edges soften at grazing angles. Use the viewport shading to preview reflections, and consider enabling screen-space reflections if your renderer supports it. Remember that translucent materials (like glass or wax) let light pass and refract, influencing color and brightness in unexpected ways.
Practical examples: realistic indoor and outdoor scenes
To illustrate light in blender in action, consider two common cases. In a cozy kitchen, combine warm key lighting with a cool bounce from windows, balancing depths with careful shadow management. In a dusk exterior, rely on a blue-hour ambiance from a low sun and an ambient HDRI for subtle fill. In both cases, pay attention to color consistency across materials, avoid unnatural hotspots, and verify your results by rendering at multiple sample levels. Real-world practice means adjusting light placement while watching how materials respond to light and how shadows sculpt the geometry.
Troubleshooting: common lighting issues and fixes
Lighting practice often encounters issues such as blown-out highlights, flat shadows, or color casts. If highlights blow out, reduce the intensity or raise the ambient fill. If shadows look too harsh, soften the light or add a bounce fill. If colors feel off, calibrate color management and test with neutral reference materials. Be wary of overly bright HDRIs that wash out contrast, and check for inconsistent exposure between different passes. Finally, keep render times reasonable by balancing sample counts with denoising and light path settings to maintain image quality without excessive rendering.
A practical workflow: from concept to render using light in blender
A reliable workflow starts with planning, moves through setup, iteration, and final polish. Begin by defining the mood and choosing a base HDRI plus one or two directional lights. Create a quick test render to verify exposure and color balance, then adjust shadows and reflections to enhance texture. Iterate with alternate light angles and intensities until the subject reads clearly. Finally, render a higher-quality pass, then perform post-processing to fine-tune contrast, color balance, and sharpness. This workflow helps you keep lighting organized and repeatable, turning light in blender into a repeatable creative tool.
Tools & Materials
- Computer with Blender installed(Latest stable release)
- HDRI environment texture(Useful for ambient lighting and reflections)
- Area lights (rectangular, disk, or sphere)(Soft shadows and broad illumination)
- Sun light (directional)(For strong, directional shadows)
- Color reference images or color checker(For color accuracy)
- Render settings profile (samples, denoising)(Expose quality vs time)
Steps
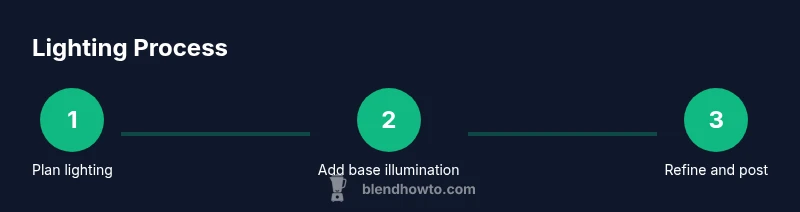
Estimated time: 60-90 minutes
- 1
Prepare your scene and references
Define the mood of your shot and gather reference images. This step creates a plan for light placement and color balance, reducing trial-and-error time during rendering.
Tip: Use real-world references to guide lighting placement and camera angles. - 2
Add base lighting and HDRI
Set up an HDRI for ambient illumination and reflections, then add a key artificial light to define the main shape of the subject.
Tip: Start with HDRI at moderate strength, then introduce directional light to sculpt form. - 3
Adjust exposure and color temperature
Balance overall brightness and choose color temperatures that fit the scene’s mood. Warmer tones work well for cozy interiors; cooler tones suit modern looks.
Tip: Set white balance early and compare renders against a neutral gray reference. - 4
Refine shadows and reflections
Tweak light angles to shape shadows and control how reflections interact with materials. Add a fill light if shadows are too severe.
Tip: Angle changes often produce the most noticeable improvements in depth. - 5
Render test frame and evaluate
Run a quick render to evaluate exposure, color, and shadow quality. Adjust passes and materials as needed before committing to a final render.
Tip: Render at a smaller resolution to iterate quickly. - 6
Polish with post-processing
Use the compositor to refine contrast, color grading, and sharpness. Small adjustments here can dramatically improve perceived lighting.
Tip: Apply subtle color grading to unify mood across the scene.
Frequently Asked Questions
What is light in blender?
Light in blender refers to how Blender uses lights and shading to illuminate scenes, affecting mood, depth, and realism.
Light in Blender is how illumination shapes mood and realism in your scene.
Should I use HDRI lighting or artificial lights first?
Begin with an HDRI to establish ambient light and reflections, then add artificial lights to sculpt the subject and create contrast.
Start with HDRI for ambiance, then place directional and fill lights for shape.
How can I avoid noisy renders when lighting?
Increase render samples as needed, enable denoising, and optimize light paths to reduce noise while keeping render times reasonable.
Raise samples and use denoising to reduce noise when lighting scenes.
What color temperature should I use for indoor scenes?
Indoors typically favor warmer tones to feel cozy; adjust color temperature toward warmer whites for a natural look, or cooler tones for modern scenes.
Warmer whites for cozy indoor lighting; cooler tones for a modern aesthetic.
Which render engine is best for lighting experiments?
Cycles is physically based and excellent for realistic lighting; Eevee is faster for quick tests, with post-processing used to achieve realism.
Cycles for realism, Eevee for speed when testing lighting.
How can I test lighting color accuracy?
Use neutral reference materials, check white balance, and compare renders against a known reference to ensure consistent color across lighting conditions.
Use neutral references and white balance to test color accuracy.
Watch Video
What to Remember
- Plan lighting around mood before placement
- Use HDRI for ambient light with targeted lights for shape
- Balance exposure, shadows, and color temperature
- Preview in post-processing for final polish