Complete Guide to Blender Graphics
A practical, step-by-step guide to Blender graphics for hobbyists and aspiring 3D artists. Learn planning, modeling, shading, lighting, rendering, and post-processing to produce professional visuals.

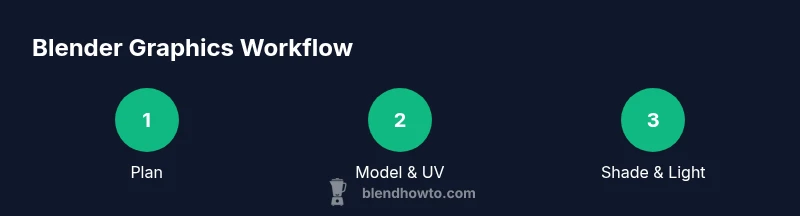
Goal: Learn a complete workflow for Blender graphics that takes you from concept to finished render. This guide covers planning, modeling, UVs, shading, lighting, animation basics, rendering, and post-processing. You’ll get practical, repeatable steps, recommended settings, and tips to optimize performance for home workstation GPUs. By the end you can produce polished visuals for portfolios, tutorials, or client work.
What Blender graphics encompasses
According to BlendHowTo, Blender graphics is a broad discipline that spans 3D modeling, texture mapping, shader creation, lighting, camera setup, animation basics, render engines, and post-processing. The complete guide to blender graphics explains how these elements fit together in a repeatable workflow. You’ll begin with a clear project brief, gather references, and outline a pipeline that keeps assets consistent across scenes. This section establishes the foundation: understanding the scope, the tools, and the expected deliverables, whether you’re producing a still image, an animated sequence, or a series of product renderings for a portfolio. Throughout, you’ll see how to translate a concept into clean topology, efficient materials, and a render that communicates your idea clearly.
The guidance here emphasizes practical steps over abstract theory, with concrete tips you can apply in your next Blender project. You’ll learn how to balance fidelity with performance, choose the right render engine, and manage color workflows to keep your visuals cohesive. The goal is to empower you to start small, iterate quickly, and scale complexity as your skills grow. This approach aligns with BlendHowTo’s philosophy: practical, repeatable techniques that produce reliable results for home studios and hobbyist studios alike.
Core concepts: geometry, topology, UV mapping
Understanding geometry is the first pillar of Blender graphics. Clean geometry with well-placed edge loops supports predictable shading, reliable UVs, and easier rigging or animation later. Topology matters for deformation, texture painting, and efficient rendering. Practice maintaining quads where possible, minimize poles, and keep edge flow logical with your model’s silhouette. A solid topology also helps with texture baking and normal maps, reducing artifacts in final renders. UV mapping is the bridge between 3D models and texture applications. Plan seams strategically to minimize distortion and make painting intuitive. Always test UVs by applying a neutral checker texture to reveal stretching or stretching artifacts. In this guide, you’ll be guided through a simple workflow: model a basic asset, unwrap UVs with seams placed along natural boundaries, and check how textures lay out on the final form. Keep your asset’s scale consistent with your scene to avoid surprises during lighting and rendering.
Shading and materials in Blender (Cycles & Eevee)
Materials form the surface language of Blender graphics. The Principled BSDF shader is your primary tool for PBR workflows, offering a single node to simulate realistic skin, metal, plastic, and more. In Cycles, you’ll rely on physically-based calculations, while Eevee handles real-time preview with clever approximations. A key practice is using texture maps for base color, roughness, normal, and metallic properties to achieve believable surfaces without excessive geometry. You’ll also learn to build simple node trees that respond to light in predictable ways. This section explains how to separate color data from texture maps, set up a clean color management workflow, and keep materials consistent across your scene. You’ll see real-world examples of metal, glass, wood, and fabric shaders, with tips for avoiding common shading artifacts such as splotching, overly dark shadows, and banding.
We’ll also cover asset organization: naming conventions, texture packing, and efficient reuse of materials across multiple objects to accelerate your workflow. The aim is to give you a practical, modular shading system you can adapt to different scenes without reinventing the wheel each time. By the end of this section, you’ll be able to build materials that respond well under both Cycles and Eevee rendering environments, giving you flexibility for previews and final outputs.
Lighting techniques and scene composition
Lighting is what transforms a dull render into a compelling image. Start with a basic three-point lighting setup to define the model and establish mood, then layer in environment lighting for realism. High-dynamic-range imaging (HDRI) provides natural reflections and ambient illumination that can dramatically improve the sense of depth. Learn to balance key, fill, and rim lights to control contrast and silhouette. Composition rules, such as the rule of thirds, leading lines, and negative space, guide the viewer’s eye. You’ll experiment with camera angles, focal length, and depth of field to emphasize the object’s form and texture. This section includes practical tips for staging a product render, a character portrait, or a still-life composition. You’ll also discover quick checks for color harmony and shadow quality, ensuring your lighting supports the scene’s narrative while remaining computationally efficient for your hardware.
Blending practical lighting with creative intent yields images that communicate the desired mood without sacrificing realism. The techniques here apply whether you’re crafting a still frame for a portfolio or a sequence for an animation reel.
Rendering pipelines and optimization
Choosing the right render engine is essential for Blender graphics. Cycles offers physically accurate lighting and material behavior, while Eevee delivers real-time preview and fast iterations. This section walks through engine selection based on project goals: photo-real product shots might benefit from Cycles, while quick concept visuals may rely on Eevee. You’ll learn about sampling, denoising, and light bounces, with practical guidelines to reduce render times without compromising quality. We’ll cover viewport performance tips, memory management, and scene organization techniques to keep your projects responsive as assets grow. You’ll also see how to set up render layers and compositing nodes to produce final images with color corrections and effects without re-rendering the whole scene.
We’ll include a note on color management, color spaces, and export formats, ensuring your renders look consistent across devices and media. The goal is to help you make informed trade-offs between speed and fidelity, so you can hit deadlines and maintain creative momentum.
Animation basics and motion graphics in Blender
Animation in Blender brings static concepts to life. Start with keyframes to define pose and timing, then refine motion curves in the Graph Editor for smoother transitions. This section covers fundamental principles such as anticipation, follow-through, easing, and looping, applying them to both character animation and motion graphics. You’ll learn to synchronize movement with audio, set up simple rigs, and use constraints to simplify complex interactions. We’ll discuss using the NLA editor for combining actions and creating reusable animation blocks, which is particularly useful for product demos or rotating product spins. Practical examples include a rotating logo, camera moves across a product, and basic character lip-sync workflows, all designed to be accessible for beginners while still useful for intermediate users.
The aim is to give you a solid foundation you can build on, then expand with more advanced techniques like particle animation, fluid simulations, or geometry nodes for procedural motion.
Post-processing and export for different outputs
Post-processing completes Blender graphics work by layering color corrections, bloom, vignette, and depth of field effects. The Compositor lets you stitch renders into a cohesive final image with node-based adjustments, while the Video Sequence Editor handles simple cuts and transitions for small animations. This section covers color grading basics, LUTs, and how to maintain a consistent look across a project. You’ll also explore output formats, resolution choices, and compression settings for web, print, and broadcast. Finally, we’ll discuss archiving projects, including asset management, backups, and version control practices to safeguard your work and maintain a smooth workflow as your library grows. The emphasis remains on practical steps you can apply immediately to deliver professional results.
Tools & Materials
- Blender software (latest stable release)(Install from blender.org; includes Cycles & Eevee)
- A capable desktop or laptop(Prefer a dedicated GPU for rendering; ensure drivers are up to date)
- Color-calibrated display(Calibrate colors for accurate shading and texturing)
- Graphics tablet (optional)(Helpful for sculpting, texture painting, and precise workflows)
- External storage(Back up project files and assets)
Steps
Estimated time: Estimated total time: 3-5 hours
- 1
Define project scope
Decide the final deliverable (static image, storyboard, or short animation) and gather reference materials. Create a simple brief with intent, mood, and required outputs. This keeps the project focused and makes asset reuse easier later.
Tip: Write the brief in one page and pin it to your Blender workspace as a reminder. - 2
Set up Blender workspace and project file
Open a new project, set up unit scale, and organize your folders for textures, renders, and backups. Establish a naming convention for objects, materials, and textures to keep the scene maintainable.
Tip: Enable Save as Default after setting your preferred layout to speed future projects. - 3
Model or import base geometry
Create or import the core geometry, ensuring clean topology and logical edge flow. Add modifiers like Subdivision or Mirror where appropriate to save time and maintain symmetry.
Tip: Work in a low-poly proxy first, then subdivide or refine only where necessary. - 4
Unwrap UVs and create base materials
Unwrap UVs with careful seams, then build base materials using the Principled BSDF shader. Apply texture maps for base color, roughness, normal, and metallic properties to achieve realistic surfaces.
Tip: Check UVs with a checker texture to catch distortion early. - 5
Set up lighting and camera
Create a lighting setup that matches your intended mood; add an HDRI for realistic reflections and ambient light. Position the camera to emphasize shape, depth, and focal length that suits the scene.
Tip: Lock the camera to view for precise framing and rule-of-thirds composition. - 6
Render and refine
Render a test pass, evaluate shadows, reflections, and color balance. Tweak sampling, denoise settings, and material roughness to achieve a clean final render. Iterate until you’re satisfied.
Tip: Use a low sample count for quick previews and increase for the final pass.
Frequently Asked Questions
What is Blender rendering and how does it differ between Cycles and Eevee?
Cycles is a physically-based path tracer that delivers higher realism at the cost of render times. Eevee is a real-time engine ideal for quick previews and concept art, offering faster renders with stylized accuracy. Choose based on your needs: realism with Cycles or speed with Eevee.
Cycles provides realistic lighting at longer render times, while Eevee offers fast previews for concept work. Pick Cycles for realism, Eevee for speed.
Do I need advanced hardware to start Blender graphics?
You can begin with a modest setup; Blender scales with your hardware. Start with a current CPU and GPU, enabling Eevee for fast feedback. Upgrade your GPU or RAM as your scenes grow in complexity.
A modest computer works to start; use Eevee for speed and upgrade later as needed.
Can Blender be used for 2D graphics or is it all 3D?
Blender supports 2D work via Grease Pencil for stylized 2D art and animation, alongside full 3D workflows. You can blend 2D elements with 3D scenes for hybrid visuals.
Yes, Blender can do 2D with Grease Pencil and mix it with 3D elements.
How should I manage textures for a large scene?
Organize textures with a clear folder structure, use packing only when necessary, and reuse materials to minimize memory usage. Consider baking textures for complex shading and reuse.
Keep textures organized, reuse materials, and bake when appropriate.
What are best practices for exporting final renders to web and print?
Export in common formats like PNG or EXR for high quality. For web, compress as needed without losing critical detail; for print, render at higher resolution and use color-managed workflows to ensure accuracy.
Export PNG/EXR for quality; use high-res settings for print and color management for accuracy.
Is it worth learning geometry nodes for Blender graphics?
Geometry Nodes unlock procedural workflows, enabling complex, repeatable structures without manual modeling. It’s a valuable skill for scalable, dynamic scenes and motion graphics.
Geometry Nodes enable scalable, procedural workflows, which is very useful for complex scenes.
Watch Video
What to Remember
- Plan before you model to streamline the pipeline.
- Use clean topology and UVs for predictable results.
- Choose Cycles or Eevee based on project needs and optimize accordingly.
- Master shading with Principled BSDF for versatile materials.
- Render, then refine in post-processing for a polished result.