Mastering 3D Blender: A Practical Starter Guide
Learn a practical, step-by-step workflow in 3D Blender for beginners and hobbyists. From setup to render, you’ll master modeling, shading, lighting, and animation basics, with a concrete practice project.

With this guide, you'll master a practical 3d blender workflow from setup to render. You'll configure the interface, organize projects, model a simple object, sculpt, shade, light, and render a polished scene. Expect clear steps, pro tips, and add-ons that speed work—perfect for hobbyists learning 3d blender.
What is 3d blender and why learn it now
Blender is a free, open-source 3D application that covers modeling, sculpting, shading, animation, and rendering. For home cooks and hobbyists alike, learning 3D Blender opens doors to visualizing ideas, prototyping concepts, and creating shareable art. According to BlendHowTo, adopting a structured workflow helps beginners stay organized and learn faster. This guide focuses on practical steps you can apply to real projects, with a balanced mix of theory and hands-on practice. You’ll see how a simple scene evolves from a loose concept into a polished render, and you’ll build habits that scale to more complex projects.
Getting started: installation and interface basics
To begin, download Blender from blender.org and install on your computer. Launch the program and start with a minimal layout: 3D Viewport for modeling, Outliner for scene management, and Properties for materials and render settings. The default shortcuts are workflow-friendly, but you can customize them later. Save a startup file to preserve your preferred layout. If you’re new, begin with a small scene and a single object to learn navigation: rotate the view with middle-click, pan with shift+middle-click, zoom with the wheel. As you grow, you’ll reorganize the interface to match your project flow.
Core workflow: modeling to render a simple scene
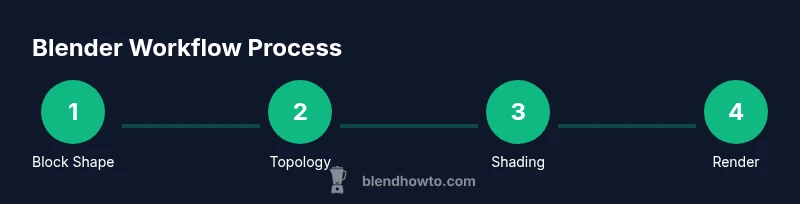
Blender’s non-destructive workflow lets you add modifiers and adjustments without permanently changing geometry. Start with a rough block shape, then refine topology to improve deformation and edge flow. Apply materials, lighting, and a camera to create a final render. Iterate by rendering test frames frequently to check proportion, shading, and lighting. Throughout, keep your project files organized in a dedicated folder with separate subfolders for textures, meshes, and renders. This slow, deliberate approach saves time later when you scale up to complex scenes.
Modeling fundamentals: meshes, topology, and edge flow
Modeling starts with a clean mesh. Learn to add and move vertices, edges, and faces, and use merge, extrude, and loop-cut tools to shape your object. Good topology means clean edge loops and predictable shading. Avoid ngons in important deformation regions and keep quads where possible. Use reference images to guide proportion and silhouette. Non-destructive modifiers like Mirror and Subdivision Surface help you prototype quickly while preserving symmetry and smoothness.
Shading, textures, and materials
Materials define how surfaces respond to light. In Blender, the Principled BSDF shader is the workhorse for most projects. Start with a base color, adjust roughness for reflectivity, and add subtle subsurface scattering if needed. Use image textures sparingly and pack textures into your project folder to keep assets organized. In the nodal editor, connect nodes logically: texture coordinates → image texture → color ramp → base color. This chain yields predictability and easier tweaking later.
Lighting and camera setup
Lighting sets mood and defines depth. Begin with a three-point lighting setup: key, fill, and rim lights, then adjust intensity and color temperature to suit the scene. The camera should be framed to tell the story of your subject; consider focal length and depth of field for cinematic impact. Use viewport render previews to check shadows, bounce, and highlight areas. When ready, position the camera, lock it to the scene, and save camera presets for future projects.
Rendering engines: Eevee vs Cycles
Eevee provides fast real-time previews and can produce convincing results with proper settings, while Cycles simulates real-world light transport for higher fidelity. For practice, start with Eevee to iterate quickly, then switch to Cycles for the final render when you need more realism. Adjust sampling, use denoising, and enable ambient occlusion and screen-space reflections where appropriate. Remember to compare output between engines to understand their strengths and limitations.
Animation basics and timelines
Blender’s animation workspace includes a timeline, graphs, and a dope sheet. Start with simple keyframes: move, rotate, or scale an object at different frames, then play back to see motion. Use the graph editor to smooth curves and avoid sudden jumps. For a beginner project, animate a basic object (e.g., a rotating cup) and export a short video to see how timing and easing work in practice.
Tips for speed, organization, and non-destructive workflows
Pro tip: use multi-object editing and parenting to keep complex scenes manageable. Create a clear asset library with naming conventions and consistent textures. Save frequently and use incremental file names. Use non-destructive modifiers and quick presets for materials to accelerate iteration. BlendHowTo analysis shows that beginners who standardize their workflows maintain momentum and reduce confusion.
Practice project plan: build a tiny studio scene
Set a clear goal: a small desk setup with a monitor, keyboard, and mug. Build simple geometry first, then apply materials, textures, lighting, and a final render. Keep a project log with screenshots at each milestone. Finally, export your render and share it with peers for critique to accelerate improvement.
Tools & Materials
- Blender software(Latest stable release from blender.org)
- A capable computer(Ensure sufficient RAM and a modern GPU if possible)
- Mouse with middle-click / scroll wheel(Eases navigation in the 3D viewport)
- Reference images or concept art(Ground the design in reality and proportions)
- Optional: Graphics tablet(Helpful for sculpting and nuanced shading)
Steps
Estimated time: 2-3 hours
- 1
Install Blender and set up your workspace
Download Blender from the official site, install, and launch. Reset to a simple layout by removing unnecessary panels, then save a startup file you can reuse. This creates a consistent starting point for every project.
Tip: Create a dedicated project folder structure before you begin. - 2
Familiarize the interface and navigation
Rotate, pan, and zoom in the 3D Viewport to explore. Identify the major regions: 3D View, Outliner, and Properties. Customize the layout gradually as you gain confidence.
Tip: Label panels or save a custom layout for quick access next time. - 3
Create a simple base mesh
Add a primitive shape (cube or cylinder) and adjust scale to approximate your target. Use move/scale/rotate tools to block the silhouette. Apply a Subdivision Surface modifier for smoothness if needed.
Tip: Block major proportions first, refine later. - 4
Refine topology with loop cuts
Enter edit mode, add loop cuts to define edge loops, and adjust vertices to improve silhouette. Ensure quad topology where possible for predictable shading.
Tip: Use wireframe view to inspect edge flow before adding detail. - 5
Basic shading with Principled BSDF
Create a new material, choose Principled BSDF, and connect base color, roughness, and metallic values. Assign textures if available and test how light interacts with the surface.
Tip: Start with a neutral roughness, then tweak for realism. - 6
Set up lighting
Place a key light to define form, a fill light to soften shadows, and a rim light for separation. Adjust color temperature to set mood and ensure the scene reads clearly.
Tip: Keep light counts minimal to avoid overcomplication. - 7
Position a camera and render a draft
Add a camera, frame the subject, and perform a quick render. Check composition, shadows, and noise levels. Make small adjustments before a final render.
Tip: Use a low sample count for drafts to speed iteration. - 8
Experiment with Eevee and Cycles
Test both render engines: Eevee for speed and Cycles for realism. Compare results and decide which fits your project needs.
Tip: Enable denoising to reduce noise in both engines. - 9
Save, export, and document
Save the project with incremental versions. Export to common formats (OBJ/FBX/GLTF) for sharing or use in other tools.
Tip: Maintain a simple changelog for your own learning. - 10
Review and iterate
Solicit feedback from peers, incorporate suggested tweaks, and iterate on materials, lighting, and camera angles.
Tip: Create a small critique loop to accelerate improvement. - 11
Tighten the final render
Increase render samples selectively, enable post-processing effects, and confirm final output looks right at target resolution.
Tip: Render a few variants to compare lighting and color accuracy. - 12
Backup and archive
Archive textures, models, and project files with clear naming. Backups prevent loss from crashes or disk issues.
Tip: Store copies in a cloud drive or external disk as a safety net.
Frequently Asked Questions
What is 3D Blender used for?
Blender is a versatile 3D software used for modeling, sculpting, texturing, lighting, rendering, and animation. It supports both real-time and offline workflows and is widely used in art, design, and game development.
Blender covers modeling, shading, lighting, and animation.
Is Blender easy for beginners?
Blender has a learning curve, but a structured workflow, patient practice, and small projects help beginners gain confidence quickly.
It’s challenging at first, but approachable with steady practice.
Do I need a powerful computer to use Blender?
Blender runs on many machines, but smoother performance comes from a capable GPU and adequate RAM. Start on a modest setup and scale up as needed.
A mid-range computer suffices for learning and basic renders.
Which render engine should beginners use?
For beginners, Cycles and Eevee are accessible. Eevee offers fast previews, while Cycles delivers physically-based results for final renders.
Use Eevee for speed, Cycles for realism when ready.
Can Blender be used for animation?
Yes. Blender includes a full animation suite with timelines, keyframes, and graph editor to create motion and storytelling.
Absolutely. It’s built for animation work.
What file formats can Blender export?
Blender can export many formats, including OBJ, FBX, GLTF, and STL, depending on your target workflow.
It supports common formats for 3D pipelines.
Watch Video
What to Remember
- Learn the Blender basics and UI navigation.
- Plan projects with a clear asset structure.
- Work non-destructively using modifiers.
- Render iterations frequently to test ideas.
- Organize assets with consistent naming.