Blender Lessons: A Practical Beginner's Guide for 3D
Master Blender with a practical, project-based path. This guide covers setup, UI, modeling, shading, lighting, and rendering to build solid Blender skills for beginners.

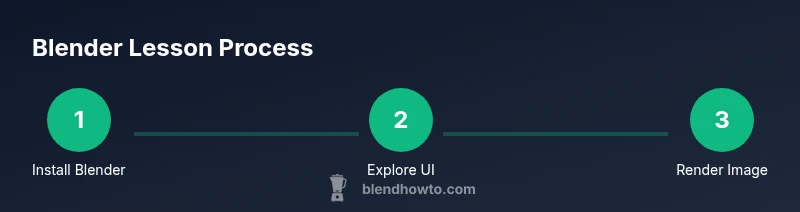
Blender lessons for beginners guide you from installation to a finished render using a structured, project-based path. This concise line invites you to view the full step-by-step guide for hands-on learning.
Blender Lessons: Building a Solid Foundation for 3D
Blender lessons are more than a collection of tricks; they form a structured path for turning ideas into 3D reality. In this guide you’ll start with core concepts and progressively build up to a complete render. The emphasis is on hands-on practice and small, achievable projects that reinforce each concept. By following a project-based path, you’ll develop intuition with essential tools such as move, rotate, scale, extrude, and loop cut. The term blender lessons here signals a practical, repeatable workflow that translates across styles—from product visuals to character concepts. As you progress, you’ll notice how seemingly separate tasks (modeling, shading, lighting, rendering) actually reinforce one another when done in logical order.
Throughout these lessons, consistency matters more than speed. Skipping steps or rushing through tutorials leads to gaps in understanding. Treat each project as a mini-portfolio item you can revisit and improve. Blend learning with experimentation: reproduce the results, then push a small variation to see how the changes ripple through the scene. That iterative habit will cement the fundamentals and prepare you for more advanced topics in later blender lessons.
Blender Setup and Environment: Ready to Learn
Before you dive into modeling, ensure your environment is prepared for efficient learning. Install the latest stable Blender from the official Blender website and confirm you can launch the Layout workspace without errors. Use a computer setup that aligns with Blender's general recommendations: a reasonably modern CPU, sufficient RAM, and a GPU capable of accelerating renders if available. Keep your software up to date to access the newest features and bug fixes. Create a dedicated project folder to store your .blend files, textures, and renders in one place. Having a consistent file structure reduces friction when you start new projects and helps you track progress over time. For reference materials, gather sketches, concept art, or quick thumbnails to guide your modeling decisions. The goal is to start strong and maintain a clean, organized workspace as you progress through the blender lessons.
Blender UI Essentials: The Core Workspace
The Blender interface can feel overwhelming at first, but it breaks down into repeatable sections that you’ll rely on in every blender lesson. The 3D Viewport is where you’ll sculpt, model, and arrange objects. The Outliner lists all objects in the scene, while the Properties panel holds material, render, and world settings. The Timeline helps you work with animation, and the Shader Editor reveals node-based shading control. Learn a few core hotkeys: A to select all, G to grab/move, R to rotate, S to scale, and Z to toggle wireframe view. Switch between layouts to focus on modeling, shading, or animation, and save custom presets for common tasks. Mastery comes from repeated, mindful practice: build a small scene, tweak it, and compare before/after versions to observe progress.
As you work through blender lessons, take time to annotate why you choose a specific tool or approach. This self-questioning builds a robust mental model you can reuse in new projects. Practice naming conventions for objects, organizing the scene with collections, and using the 3D Viewport shading modes to inspect form and topology. Remember: clarity in your setup saves time later in a project and makes collaboration smoother.
Modeling Basics: From Box to Basic Object
Modeling is the foundational skill you’ll use in every blender lesson. Start with a simple primitive (such as a cube), then adjust scale to match your reference, and apply a few key operations to reveal the form. Use Extrude to extend geometry, Loop Cut to add more geometry where detail is needed, and Bevel to soften edges for realism. When you’re ready, mirror symmetry can speed up work by duplicating the other side of an object. The learning objective in blender lessons is not to create a perfect model immediately but to understand how topology influences shape and deformation.
A practical starter project could involve turning a cube into a small bottle or cup. Build the base shape with a few extrusions, refine the silhouette with loop cuts, and arrest stray vertices that could cause shading issues. Always check for non-manifold geometry (holes or isolated edges) and clean topology. This mindful approach to modeling fosters reliable results as you progress through deeper blender lessons.
Materials, Shading, and Textures: The Look of Realism
After you have a basic model, apply materials to define how it interacts with light. In Blender, most materials start with a Principled BSDF shader, which is a versatile starting point for many blender lessons. Create a new material, adjust base color, roughness, and metallic values, and observe how light interacts with the surface. For textures, you can add simple image textures or procedural textures to vary surface detail. The node editor lets you connect texture maps to the shader, creating more complex appearances without needing external software.
As you practice blender lessons, experiment with different material setups on the same object. Compare glossy vs. rough surfaces, or tune translucency for materials like frosted glass. The goal is to understand how material choices affect mood, depth, and perceived realism. Keep your shader nodes organized, name your sockets, and group frequently used node networks to reuse in future projects.
Lighting, Camera, and Rendering Basics: From Scene to Image
Lighting is often the quickest way to transform a scene in blender lessons. Use a mix of light types—area lights for soft reflections, a sun for consistent directional light, and accent lights to highlight key forms. Position your camera to frame the subject and set a focal length that matches your intended look. When you’re ready to render, choose Eevee for fast previews or Cycles for more physically accurate results. Tweak exposure, color management, and render resolution to match your goals. Practice saving renders with different lighting setups to compare outcomes and build a mental library of effective looks.
This stage of blender lessons closes with a polished render you can save as a final image or use as part of a portfolio. Rendering is where theory meets output, so compare several iterations, track what changed, and note what adjustments yield the most noticeable improvements. If you run into noise or artifacts, adjust sampling, denoising, or a light path setting to achieve cleaner results.
Practice Plans and Progressive Projects: A Pathway to Mastery
Consistent practice accelerates learning in blender lessons. Start with small, focused projects that target one skill at a time: a basic model, a simple material, a lighting pass, then a combined render. As confidence grows, add more complexity: introduce basic animation, UV unwrapping, or texture painting. A practical approach is to maintain a learning log: document what you tried, what worked, and what didn’t. Use incremental file versions so you can trace decisions and revert if needed. Build a tiny portfolio piece after each project, even if it’s just a single object with setup, materials, and a render. Over time, these accumulate into a cohesive set of blender lessons that demonstrate your capability to create, iterate, and finish.
Final Note: Keeping the Momentum in Blender Lessons
The journey through blender lessons is ongoing. Each completed project reveals new questions and opportunities to refine technique. Stay curious, experiment with different styles, and revisit earlier scenes to apply improved skills. By committing to regular practice and a clear progression path, you’ll lay a strong foundation that scales with your goals, whether you aim to craft product visuals, character concepts, or architectural renders.
Tools & Materials
- A computer capable of running Blender(Recommended 8 GB RAM minimum; SSD preferred)
- Blender software (latest stable release)(Download from blender.org)
- Reliable internet connection(For downloads, updates, and assets)
- Reference images or concept art(Guides modeling decisions and proportions)
- Mouse with a scroll wheel(Faster navigation and selection)
- External drive or cloud storage(Backup assets and project files)
Steps
Estimated time: 60-90 minutes
- 1
Install Blender
Download the latest stable Blender from blender.org and run the installer. This step provides the base environment for all lessons. After installation, launch Blender to verify the setup.
Tip: Keep the installer in a dedicated folder for quick re-install if needed. - 2
Open the Layout workspace
Switch to the Layout workspace to access the 3D Viewport, Outliner, and Properties panels. This layout is your primary Blender workspace for most blender lessons and projects.
Tip: Learn the hotkeys: A for select all, G to move, R to rotate, S to scale. - 3
Create your first mesh
Add a simple mesh (e.g., cube) and use basic transforms to position it. Explore extrude and bevel to form a basic object related to your project.
Tip: Always check for clean topology and avoid creating non-manifold geometry early on. - 4
Add a basic material
Create a new material, apply a Principled BSDF shader, and adjust base color and roughness. Observe how material changes affect the object’s appearance under lighting.
Tip: Name materials clearly to stay organized during blender lessons. - 5
Set up lighting and camera
Add an area or sun light, position the camera, and frame the subject. Keep a simple three-point lighting setup to start.
Tip: Use a separate layer or collection to manage lights without clutter. - 6
Render and save
Select Eevee for quick previews or Cycles for realism. Adjust render settings and save your first render with a descriptive filename.
Tip: Always save a copy of the .blend file before major changes.
Frequently Asked Questions
What Blender version should I use as a beginner?
Use the latest stable release from Blender.org. It includes current features and bug fixes and is supported for beginners. If you encounter issues, check for a known bug and consider updating.
Use the latest stable Blender release from blender.org for beginners.
Do I need a powerful GPU to start?
No, you can begin on a modest system. Blender runs on CPU and basic scenes render quickly. A mid-range GPU helps later, but don’t delay starting Blender lessons because of hardware.
A mid-range GPU helps, but you can start with a basic setup and progress as you practice.
Can Blender be used for game asset creation?
Yes. Blender is widely used to model and texture assets for games. Keep a consistent scale and export to common formats suitable for your game engine.
Blender is great for modeling game assets; export in common formats for your engine.
How long does it take to learn Blender?
Learning is ongoing. With steady practice, you’ll gain basic proficiency in a matter of weeks, and more complex skills will develop over months of blender lessons.
It varies, but with regular practice you’ll reach basic proficiency in weeks.
Is Blender suitable for 2D animation?
Yes. Blender offers Grease Pencil for 2D animation inside a 3D app, allowing mixed-media workflows and lightweight animation exercises.
Absolutely, Blender supports 2D animation via Grease Pencil.
Watch Video
What to Remember
- Master the UI basics before modeling.
- Complete a simple project to reinforce concepts.
- Practice shading, lighting, and rendering in small steps.
- Save every stage with incremental versions.