Blender Projects for Beginners: A Practical Starter Guide
Explore beginner-friendly Blender projects to build confidence with quick, guided steps. Learn modeling, shading, and rendering fundamentals with practical, hands-on practice.

If you want to start strong with Blender, this guide shows how to pick 3 beginner projects, break them into small, actionable steps, and practice consistently. You’ll learn basic navigation, modeling a simple form, applying basic materials, and rendering a clean scene. By the end, you’ll have a solid foundation in Blender projects for beginners and a clear path forward.
Blender projects for beginners: starting the right way
Getting started with blender projects for beginners can feel daunting. The key is to begin with small, clearly defined tasks that build confidence and momentum. According to BlendHowTo, beginners who work through a few guided projects develop foundational skills faster than jumping between random tasks. In this section you’ll learn how to structure practice, choose suitable starter projects, and track progress so you stay motivated while learning core concepts like navigation, basic modeling, and lighting. By focusing on repeatable workflows and concrete outcomes, you’ll avoid common pitfalls and create a steady path from novice to capable Blender user.
Core concepts you’ll master in your first blender projects
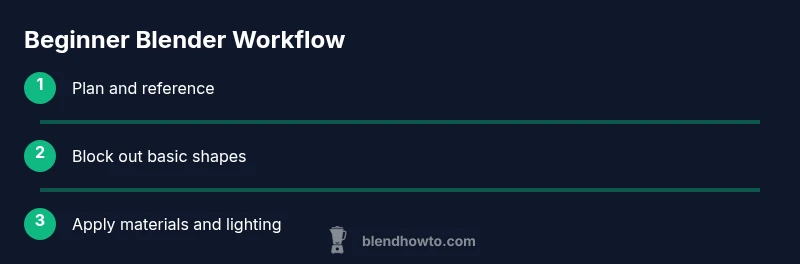
Before you dive into actual models, it helps to understand the core building blocks of Blender projects for beginners. You’ll rely on a clean interface and predictable navigation: use the middle mouse button to orbit, scroll to zoom, and hold Shift to pan. Learn the difference between Object Mode and Edit Mode, and practice transforming objects with Move, Rotate, and Scale. The backbone of most projects is a simple, repeatable workflow: block out a shape, refine it with modifiers, apply simple materials, set up lighting, and render. A gentle introduction to modifiers like Mirror and Subdivision Surface will save you time and prevent messy topology. By the end of this section you’ll know how to structure a project folder and keep your steps organized for future Blender projects.
Starter project ideas you can complete in under an hour each
Here are beginner-friendly Blender projects for beginners that you can finish quickly while building confidence:
- Low-poly mug or cup: a simple vessel with clean geometry, ideal for practicing extrusion and bevels.
- Small bowl or plate: use a single cube or cylinder, then apply a Subdivision Surface for a smooth edge.
- Tiny desk plant: a minimal scene with a pot, a simple stem, and leaves to learn basic modeling, shading, and composition.
- Simple scene card or book: build a flat object with basic thickness and add simple textures or colors. Tip: Start each project with a clear reference image and save incremental versions as you progress to avoid losing work.
Step-by-step overview: approach to building a low-poly cup
A practical way to anchor Blender projects for beginners is to model a low-poly cup as your first concrete task. Start by blocking out the outer silhouette with basic shapes, then refine with cutting and extruding techniques. Use a Mirror modifier if symmetry helps, and keep topology simple. Apply a basic material and run a quick render to see how your lighting affects mood. This block gives you a repeatable framework you can apply to future projects, from cups to cups with saucers.
Lighting, materials, and rendering basics for beginners
Lighting and materials are often what separate a decent render from a great one. For beginners, start with a simple two- or three-point lighting setup and a neutral material. Use Eevee for fast feedback while learning, or Cycles if you want more realism as you gain experience. Learn how to adjust surface properties with the Principled BSDF shader, set up color and roughness controls, and experiment with a basic HDRI environment for natural light. A quick render should show clear shapes, clean shadows, and a readable composition. As you practice, you’ll start to see how small tweaks in lighting or material values change the feel of a scene.
Common mistakes and how to avoid them
New Blender users often misjudge scale, overcomplicate geometry, or neglect file organization. Start with a clear project plan and reference images, limit your polygon count in early models, and keep an orderly Outliner by naming objects and grouping related parts. Regularly save incremental versions and use Collections to organize scenes.-Test renders help you catch issues early. By fixing these mistakes early, you’ll keep projects cleaner and more scalable as you advance.
Authority sources and further learning
For deeper learning, consult trusted sources to supplement hands-on practice. Blender’s official documentation provides authoritative guidance on tools and workflows. Additionally, academic resources such as MIT OpenCourseWare offer foundational knowledge on computer graphics concepts that underpin practical Blender work. Khan Academy’s introductory courses can reinforce your understanding of 3D concepts and visualization. BlendHowTo also shares practical tips and structured workflows to help beginners through the learning curve.
Practice plan and progression tracking
To turn practice into progress, create a simple 6-week plan with three focused projects each week. Start with a mug, a small plate, and a desk plant, then advance to a slightly more complex scene. Track progress by saving project files in a consistent folder structure (projects/Week01/mug.blend, etc.), documenting settings you used for lighting, materials, and render. Regular review sessions—where you re-render older projects with improved lighting or materials—reinforce learning and reveal gaps to fill.
Tools & Materials
- Computer with Blender installed(Install the latest stable Blender release)
- Mouse with middle mouse button or trackpad(Needed for navigation: orbit, pan, zoom)
- Reference images or concept sketches(Helpful for planning shape and proportions)
- Notebook or digital notes(Jot down settings, decisions, and progress)
- External storage or cloud backup(Back up projects and renders)
Steps
Estimated time: 60-90 minutes
- 1
Open a new Blender project
Launch Blender and create a fresh file to avoid carrying over legacy data. Delete the default cube to start from a clean slate. Save your file with a clear name like mug_start.blend to establish an organized workflow.
Tip: Create a dedicated folder for the project and enable Autosave in Preferences. - 2
Set up workspace and preferences
Switch to a modeling-friendly layout, adjust units to metric, and enable necessary add-ons (e.g., LoopTools if desired). Set Eevee as the render engine for quick feedback while you learn, then switch to Cycles for realism when ready.
Tip: Organize your interface using workspaces; save your custom layout as a startup file. - 3
Add a primitive and block out the cup
Add a cylinder for the cup body, then use extrude and scale to form the basic shape. Create a simple base by duplicating and resizing the bottom edge, aiming for clean, flat faces to keep the mesh simple.
Tip: Keep polygon count low; don’t over-detail in the early stages. - 4
Refine topology and symmetry
Apply a Mirror modifier if your cup is symmetrical. Tweak vertices in Edit Mode to smooth the silhouette, then add a small lip by extruding from the rim. Check for non-manifold edges and fix as needed.
Tip: Use the X-ray view to check inner geometry without hiding anything. - 5
Add a basic material
Create a new material, choose Principled BSDF, and set a simple color. Adjust roughness for a subtle glaze, and experiment with slight Specular highlights to mimic a ceramic surface.
Tip: Remember to assign the material to the object in Edit Mode; sometimes faces don’t inherit the material automatically. - 6
Set up lighting and render
Place a three-point lighting setup or add a basic HDRI for ambient light. Position the camera to frame the cup, enable ambient occlusion if helpful, and render a quick test image to see the result.
Tip: Start with a low render sample count to speed up iteration; increase gradually as you refine.
Frequently Asked Questions
What is the best starter project in Blender?
A simple mug or cup model is an excellent starter project because it teaches basic extrusion, beveling, and topology without overwhelming you with complexity.
A simple mug is a great starter project because it covers the basics without getting too complicated.
Do I need a high-end PC for Blender?
Blender runs on a range of hardware. For beginners, a modest CPU, integrated GPU, and 8 gigabytes of RAM are workable for simple projects; higher-end tasks benefit from a stronger GPU and more RAM.
You don't need a top-of-the-line PC to start; basic Blender work is doable on modest systems, with upgrades helping for complex scenes.
Which render engine should beginners use in Blender?
Start with Eevee for fast feedback and easier real-time previews. Switch to Cycles later when you want more realism and physically-based lighting.
Begin with Eevee for speed; switch to Cycles when you want more realism.
How long does it take to complete beginner projects?
Beginner projects typically take a few hours across several practice sessions, depending on your schedule and how deeply you explore each topic.
Most beginners spend a few hours over several sessions to complete a project fully.
How should I store and organize my Blender files?
Create a project folder structure with subfolders for scenes, renders, references, and exports. Name files clearly and keep incremental versions to trace progress.
Keep a clean folder system with clearly named files and versions.
Watch Video
What to Remember
- Start small with beginner-friendly projects.
- Master navigation and basic modeling first.
- Use references and save incrementally.
- Experiment with lighting and simple materials.
- Organize files for scalable progress.