How to Blender 3D: A Practical Beginner's Guide
A comprehensive, step-by-step guide to Blender 3D for beginners. Learn modeling, shading, lighting, and rendering with hands-on projects and practical tips.

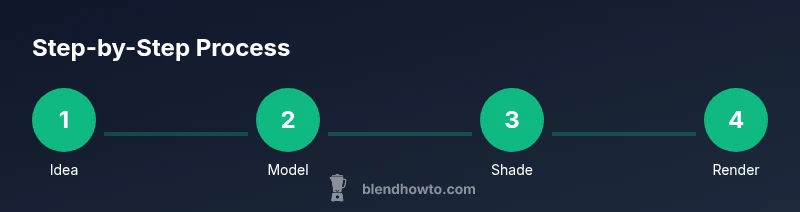
This guide shows you how to Blender 3D from a blank scene: install Blender, model a simple object, apply materials, light the scene, and render a final image. Follow a beginner-friendly, project-based workflow. According to BlendHowTo, starting with a small, well-defined project builds confidence quickly.
Why Blender 3D matters for creators
Blender 3D is a powerful, open-source tool that covers the entire pipeline from concept to render. For home cooks exploring 3D food visuals or hobbyists building quick product renders, Blender offers cost-effective, professional-grade capabilities without the licensing constraints of commercial software. This guide aligns with BlendHowTo's mission to demystify 3D creation, showing you practical, project-based steps that build confidence while teaching core concepts like modeling, shading, lighting, and rendering. By starting with a small, repeatable project, you’ll develop muscle memory for Blender’s interface, learn how to interpret tooltips, and begin to form efficient workflows that scale to bigger projects over time.
Core concepts you'll master
To learn how to Blender 3D effectively, you need a solid grasp of a few core concepts: objects, meshes, and modifiers. Objects are the containers that hold geometry, location, rotation, and scale. Meshes are the actual geometry you manipulate—vertices, edges, and faces. Modifiers are non-destructive operations that alter geometry without permanently changing it. UV mapping is the bridge between 3D forms and 2D textures. Shading and materials define how surfaces look under light, while lighting and rendering determine what your final image conveys. Throughout this journey, you’ll practice iterative, project-based learning that reinforces these essentials and keeps you moving forward, just as BlendHowTo emphasizes in practical Blender tutorials.
Setting up Blender: your workspace
Begin by installing the latest stable Blender and configuring a comfortable workspace. Learn to navigate with the mouse or trackpad (rotate with middle mouse drag or Alt+Left, pan with Shift+Middle click, zoom with scroll). Set up a default scene with a camera and light so you can immediately see results as you model. Customize the layout by splitting the screen into a 3D Viewport, Shader Editor, and UV/Image Editor to accelerate your workflow. By organizing your workspace, you’ll reduce cognitive load and keep your attention on the modeling task at hand, which is a key step in any beginner-friendly Blender course.
A hands-on modeling project: a mug
A simple mug is an excellent starting project because it covers basic modeling, subdivision, and symmetry. Start with a cylinder, add a mirror modifier for symmetry, and use the Boolean modifier for any openings or handles. Use loop cuts to refine the lip and the bottom, then apply a bevel to smooth edges. Practice precise vertex placement and proportional editing to shape the form. This hands-on exercise introduces you to Blender’s non-destructive workflows and helps you see how a real project unfolds from concept to geometry.
Materials, textures, and basic shading
Materials in Blender can be simple or complex. Start with a basic Principled BSDF shader for a clean, realistic look. Experiment with color, roughness, and metallic values to achieve different surfaces—ceramic, glass, metal, or plastic. Texture mapping adds detail; basic textures can be created in Blender or imported. As you grow, you’ll explore more advanced shading networks, including image textures, normal maps, and roughness maps. Remember to keep materials organized by object and use slots to avoid overcomplicating the viewport.
Lighting and rendering essentials
Lighting is the painter’s brush for your 3D scene. Start with a three-point lighting setup: key light, fill light, and back light to sculpt form and mood. Blender’s Eevee offers fast, real-time rendering, while Cycles provides physically based rendering for higher realism. Practice adjusting light color temperature, intensity, and shadow softness to achieve the desired atmosphere. Rendering a test image frequently helps you validate shading and lighting choices and reduces iteration time. BlendHowTo’s guidance encourages you to iterate quickly with small, repeatable steps to build competence.
UV mapping and texturing basics
UV mapping is the process of laying a 2D texture over a 3D surface. Start with unwrapping the mug’s body, lid, and handle, then arrange the UV islands to minimize stretching. A good UV layout makes textures consistent and predictable when you paint or apply image textures. Don’t fear seams—strategic placement can hide them. Practice confirmations by checking textures in the 3D View and adjusting seams for clean mapping. This skill is foundational for any Blender artist who wants reliable texturing results.
Non-destructive workflows: modifiers, collections, and proxies
Modifiers let you change geometry non-destructively. Use Mirror for symmetry, Subdivision Surface for smoothing, and Bevel to soften edges without altering the base mesh. Organize your scene with Collections so you can isolate, hide, or render subsets of your model. Proxies allow you to work with simplified versions of high-poly assets, speeding up viewport performance. Embracing non-destructive workflows early saves time and frustration as your projects scale.
Next steps and learning paths
Once you have the basics, pick a small project that excites you (a kitchen gadget, a cup, or a fruit bowl) and extend it with UVs, textures, and lighting. Explore Blender’s animation and rendering capabilities, and gradually experiment with advanced topics like sculpting, particle systems, and physics simulations. Regular practice, plus reviewing community-made tutorials and documentation, will accelerate your progress. The BlendHowTo team recommends building a personal mini-portfolio of 3–5 completed projects to demonstrate your growing skill set.
Verdict
The BlendHowTo team recommends a structured, project-based approach to learning Blender 3D. Start small, iterate often, and keep your files organized using a clear naming convention and collections. Practicing weekly on a consistent project cycle yields the best long-term results. By combining modeling practice with basic shading, lighting, and rendering, you’ll build confidence and gradually tackle more complex scenes.
Tools & Materials
- Computer with 64-bit OS and 8GB RAM (16GB+ recommended)(Blender runs well on mid-range systems; more RAM improves viewport performance when shading or texturing complex scenes)
- Blender software (latest stable release)(Download from blender.org; ensure you have the appropriate graphics drivers)
- Mouse with middle mouse button or trackpad with emulation(Navigation in 3D space is essential; enable navigation options in Preferences if using a trackpad)
- Reference images for modeling(Helpful for proportions and accuracy; organize images in a reference folder)
- Optional drawing tablet(Can improve sculpting and painting workflows but is not required for beginners)
- Backup storage or cloud sync(Regular backups prevent data loss during experiments)
Steps
Estimated time: 1-2 hours
- 1
Install Blender and set preferences
Download the latest stable Blender from blender.org and install it. Open Blender and customize basic preferences such as unit system, theme, and autosave interval to fit your workflow.
Tip: Enable autosave and set a short interval to safeguard work. - 2
Create a new project and save early
Start with a fresh project and save it with a clear name. Create a dedicated folder for the project and import reference images if needed.
Tip: Use Save As to create incremental versions (e.g., mug_v01.blend). - 3
Add a base mesh for your object
Add a cylinder as the mug body and adjust its radius and height to match your reference. Apply the Mirror modifier for symmetry so you only model half.
Tip: Enable real-time mirroring to reduce modeling steps. - 4
Enter Edit Mode and shape vertices
Switch to Edit Mode and select vertices to refine proportions. Use loop cuts to add geometry where you need more detail, then scale and move vertices for curvature.
Tip: Use proportional editing for smooth, natural shaping. - 5
Apply bevels and subdivisions
Add Bevel to edges to soften corners and apply a Subdivision Surface modifier for a smoother profile. Keep geometry clean to avoid shading artifacts.
Tip: Keep bevels tight and avoid over-subdividing in early stages. - 6
UV unwrap for textures
Mark seams and unwrap the mug body, lid, and handle. Arrange UV islands efficiently to maximize texture resolution and minimize stretching.
Tip: Check for overlapping UVs and correct them before painting. - 7
Create and assign basic materials
Set up a Principled BSDF shader, adjust base color, roughness, and specular highlights. Assign materials to separate parts to enable texture variations.
Tip: Test materials under different lighting to verify realism. - 8
Set up lighting and camera
Place a simple three-point light rig and position a camera to frame the mug. Adjust exposure and white balance to achieve the desired mood.
Tip: Use a backlight to separate edge highlights and reduce flat shading. - 9
Render a test image
Switch to Eevee for fast previews, then render with Cycles for realism if needed. Tweak samples, denoising, and shadows for clean results.
Tip: Render at a lower resolution first to iterate quickly. - 10
Export for use in other projects
Export the model to OBJ or FBX for use in other apps (or STL for 3D printing). Ensure textures and materials are embedded or accompanied by texture files.
Tip: Check export options for path mode and smoothing groups.
Frequently Asked Questions
What is Blender used for?
Blender is a versatile 3D suite used for modeling, texturing, lighting, rendering, animation, and even game design. It supports a complete pipeline from concept to final output and is widely used by hobbyists and professionals alike.
Blender is a complete 3D tool for modeling, texturing, lighting, rendering, and animation.
Is Blender free to use?
Yes. Blender is open-source and free to download and use. You can access a wide range of features without licensing costs and contribute to the project if you wish.
Blender is free and open-source.
Eevee vs Cycles: which should I choose?
Eevee is real-time and great for previews and fast renders, while Cycles provides physically accurate rendering with more realistic lighting. Start with Eevee for quick iterations and switch to Cycles for final renders when you need higher realism.
Start with Eevee for speed, move to Cycles for realism when needed.
Do I need powerful hardware to learn Blender?
A mid-range computer with a solid GPU handles Blender well. You don’t need top-tier hardware to begin, but you’ll benefit from more RAM and a capable graphics card as you tackle complex scenes.
A mid-range PC can start learning Blender; upgrade as you work on bigger projects.
Can Blender export models to other formats?
Yes. Blender can export to OBJ, FBX, STL, and many other formats suitable for 3D printing, game engines, or other software. Check export settings to ensure textures and maps export correctly.
Blender exports to OBJ, FBX, STL, and more; check export options.
How long does it take to learn Blender?
Learning Blender is a gradual process. With consistent practice using project-based tutorials, you can reach a solid foundational level within a few weeks to a few months depending on commitment.
Consistent, project-based practice helps you learn Blender in weeks to months.
Watch Video
What to Remember
- Start with a small, well-defined project.
- Master modeling basics and basic shading first.
- Use non-destructive modifiers to stay flexible.
- Organize your scene with collections and clear names.
- Render frequently to validate progress and iterate.