Learn Blender 3D: A Practical Beginner's Guide
A practical, step-by-step guide to learning Blender 3D. Start with setup, navigation, modeling, materials, lighting, rendering, and exporting your first scene—designed for home cooks, hobbyists, and aspiring 3D artists.

By the end of this guide, you’ll be able to launch Blender, navigate the interface, model a simple object, apply materials, light for rendering, and export your first project. No prior experience required; you only need a computer with Blender installed and a willingness to practice. This steps-driven plan keeps learning practical and fun.
Why Blender 3D is a Valuable Skill
Blender 3D is a free, open-source tool that empowers you to model, shade, light, animate, and render three-dimensional scenes. For home cooks, hobbyists, and aspiring artists, learning Blender creates a practical path from idea to a tangible digital creation. According to BlendHowTo, starting with a clear, hands-on plan reduces overwhelm and builds confidence quickly. Blender’s all-in-one workflow—modeling, sculpting, UV mapping, shading, simulation, and rendering—lets you complete end-to-end projects without leaving the program. As a beginner, you can start with simple projects and gradually tackle more complex tasks, which makes Blender an excellent long-term investment of time. In practice, a focused, survival-guide approach means you learn what matters most first: navigation, basic modeling, and a few core materials. In the following sections, you’ll see how to structure practice, pick small projects, and layer skills so each session delivers visible progress. The emphasis is on steady momentum, not perfection, so you’ll stay motivated while you learn.
Core Blender Concepts You Need to Know
Before you dive in, familiarize yourself with the core ideas that underpin Blender workflows: the 3D Viewport for scene composition, the Outliner for organizing objects, and the Properties panel for materials and modifiers. Navigation basics (middle mouse button to rotate, mouse wheel to zoom, Shift to pan) unlock the rest of the interface quickly. Understanding the difference between object mode and edit mode is essential for manipulating geometry. The concept of non-destructive workflows—using modifiers, collections, and linked data—lets you explore ideas without breaking your model. In addition, a quick primer on shading and materials (Principled BSDF, textures, and UV mapping) sets you up for convincing renders. For credibility, MIT OpenCourseWare offers graphics fundamentals that complement hands-on Blender tutorials. BlendHowTo’s approach emphasizes practical steps over theory, keeping learning approachable for beginners. Authority sources are listed below for reference.
Authority Sources
- https://ocw.mit.edu/courses/electrical-engineering-and-computer-science/6-837-computer-graphics-fall-2013/
- https://www.nist.gov/topics/3d-printing
- https://tog.acm.org/
Setting Up Your Workspace and Preferences
Starting with a clean workspace reduces confusion. Download the latest Blender from blender.org and install it. On first launch, reset to the default layout, then customize your preferences to suit your hardware: reduce undo steps if you’re memory-constrained, enable GPU rendering if you have a capable graphics card, and set up a comfortable UI scale. Enable a few essential add-ons (like LoopTools or Bool Tool) from Preferences > Add-ons to speed up common tasks. Create a dedicated project folder with subfolders for renders, exports, and references. This setup keeps your workflow tidy and learnable, so you can focus on building skills rather than fighting the interface.
Your First Simple Project: A Simple Vase
Begin with a basic object to ground your learning. In Blender, add a cylinder and scale it to resemble a small vase. Use the Edit mode to extrude the rim slightly and taper the body for a natural look. Add a base plate with a circle and adjust bevels for smoother edges. Practice simple symmetry by duplicating and mirroring shapes if you want a balanced form. This project introduces core modeling tools without overwhelming you with features. Remember to save versions as you go so you can revert to earlier ideas easily.
Modeling Techniques: Extrude, Subdivide, and Sculpt
Modeling in Blender blends precise geometry with creative iteration. Start with Extrude (E) to extend faces from a base shape, then use Loop Cut (Ctrl+R) to add edge loops for sharper transitions. Subdivide to add detail gradually and avoid over- tessellating early. If you want more organic forms, try Sculpt mode with a light touch and dynamic topology turned on. For precision parts, use snapping (Shift-S) to align vertices to grids or other objects. Regularly switch between Object and Edit modes to compare your changes and ensure your object remains manifold and printable if you plan to export later.
Materials, Lighting, and Rendering Basics
Materials give your model color, texture, and surface properties. Start with a Principled BSDF shader and connect a few textures (albedo, roughness, normal map) to create realistic surfaces. Lighting is essential for believable renders: combine area lights with a subtle HDRI environment map to illuminate your scene evenly. Choose Eevee for fast previews and Cycles for more physically accurate results. Set camera angles that frame the object attractively, then render a test image to adjust exposure, shadows, and material strength. As you refine materials and lighting, compare renders from different angles to understand how light interacts with form.
Animation Basics and Saving Your Work
Animation introduces motion to your Blender projects. Start simple: set keyframes on location, rotation, or scale and scrub the timeline to review movement. Use a small number of keyframes and avoid overdetailed motion during early practice. Learn to reuse animation curves and modify timing with the Dope Sheet and Graph Editor for smoother motion. Finally, save renders in standard formats (PNG sequences or MP4) and back up your work regularly. Animation skills grow naturally from disciplined practice and consistent demo projects.
Tools & Materials
- Blender (latest stable release)(Download from blender.org and install)
- A computer with internet access(Windows/macOS/Linux; ensure at least 4GB RAM)
- Mouse with scroll wheel (recommended)(For precise navigation and selection)
- Optional drawing tablet(Helpful for sculpting and concept art)
- Reference images or sketches(Speed up modeling and proportion checks)
- Backup storage (external drive or cloud)(Protect your work with revisions)
Steps
Estimated time: Total time: 60-90 minutes
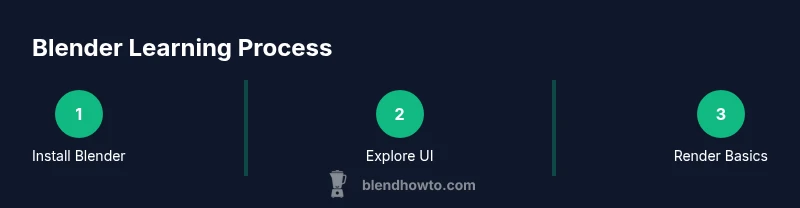
- 1
Install Blender
Download the latest Blender from blender.org and install it following the on-screen prompts. This step prepares your workspace and confirms Blender runs correctly on your system, which is essential before practicing. If the installer asks for permissions, grant them to complete the setup.
Tip: Keep the installer in a known folder and create a dedicated Blender projects directory afterward. - 2
Open Blender and reset layout
Launch Blender and reset to the default layout to avoid clutter from previous sessions. This keeps your learning environment clean and predictable while you focus on core tools. Take a moment to locate the 3D Viewport, Outliner, and Properties panels.
Tip: If the interface feels crowded, drag panels to create a minimal, focused workspace. - 3
Learn viewport navigation
Practice rotating the view with the middle mouse button, zooming with the scroll wheel, and panning with Shift plus the middle mouse button. These basics unlock exploration and quick adjustments to any project. Switch between Object and Edit modes to see how geometry changes in real time.
Tip: Use a simple cube to practice edits before attempting more complex forms. - 4
Create a simple vase
Add a cylinder and scale it to form the body. Enter Edit mode to extrude the rim, taper the body, and shape a stable base. Save intermediate versions to capture design choices as you refine the silhouette.
Tip: Enable symmetry or use a mirror modifier if your vase has a mirrored axis. - 5
Apply a basic material
Switch to the Shading workspace and add a Principled BSDF shader to your vase. Adjust roughness and color to get the desired surface look. Use a simple texture if you have one handy to see how textures influence realism.
Tip: Keep changes incremental; small tweaks often have the strongest visual impact. - 6
Render and export
Set up a camera angle and a light source, then render a test image using Eevee for speed or Cycles for realism. Save your render as PNG or a short video if you’re experimenting with animation. Export your project if you plan to share or print.
Tip: Render at a modest resolution during practice to speed up iterations.
Frequently Asked Questions
Is Blender free to use?
Yes. Blender is free and open-source, with no required licenses for personal or commercial projects.
Blender is free to use for anything you want, including commercial work.
Do I need a powerful computer to learn Blender?
You can start on a mid-range setup; as you progress, more demanding projects will benefit from a capable GPU and sufficient RAM.
You don't need a top-tier PC to start, but a better GPU helps for complex scenes.
What is the best way to learn Blender quickly?
Follow structured tutorials and build small, complete projects to reinforce concepts.
Structured practice with small projects helps you learn faster.
Can Blender be used for 3D printing?
Yes. You can model objects suitable for 3D printing and export formats like STL.
Blender supports 3D printing workflows with STL export.
Which Blender version should I install?
Install the latest stable release to access current features and fixes.
Go with the latest stable Blender release for best results.
Watch Video
What to Remember
- Start with a clear plan and a simple project.
- Master viewport navigation and essential modeling tools.
- Experiment with basic materials and lighting to improve renders.
- Render often to evaluate progress and adjust approaches.
- Save incremental versions to protect work.