Tutorial on Blender: A Practical Guide for Beginners
Learn Blender basics with a step-by-step guide covering interface, modeling, shading, lighting, and rendering. Perfect for home hobbyists and aspiring 3D artists seeking practical Blender guidance in a structured, learn-by-doing format.

Achieve a solid start in Blender by following a structured, beginner-friendly tutorial. You will install Blender, explore the interface, model a simple object, apply basic materials, set up lighting, and render your first scene. This guide emphasizes hands-on practice, clear visuals, and practical tips to avoid common pitfalls. No prior 3D experience required—just curiosity and a computer with Blender installed.
What is Blender and why follow a tutorial on blender
Blender is a free, open‑source 3D creation suite that covers modelling, sculpting, texturing, animation, rendering, compositing, and video editing. Whether you’re dreaming up characters for games or visualizing ideas for projects, Blender provides a complete workflow in a single tool. This article presents a practical tutorial on blender that starts from the basics and builds toward a finished render. According to BlendHowTo, a structured tutorial helps you build a reliable mental model, reduces frustration, and speeds up progress. In this section you’ll get an overview of Blender’s strengths and a plan for learning effectively.
Getting started: Install and set up
To begin, download Blender from the official site and install the latest stable release for your operating system. Verify that your hardware meets the minimum requirements and consider enabling a light aliasing option if your GPU is modest. Create a dedicated project folder and set a sensible file naming convention. In the BlendHowTo approach, you’ll follow a clear learning path, so keep a simple starter project folder and reference images to guide your modeling and texturing work.
Interface essentials and navigation
Blender’s interface can be overwhelming at first. Start in the default Layout, identify the 3D Viewport, Outliner, and Properties panels, and learn the basic navigation: middle‑mouse pan, scroll to zoom, and the numpad for view presets. Familiarize yourself with the different workspaces (Layout, Modeling, Shading, Rendering) to switch contexts quickly. A few keyboard shortcuts (G to move, R to rotate, S to scale) will save you dozens of minutes per session and help you focus on creative decisions rather than mouse clicks.
Modeling basics: Your first scene
Begin with a simple object, such as a cube, to learn essential editing tools. Enter Edit Mode, switch to vertex/edge/face selection, and practice basic operations like Extrude (E), Bevel (Ctrl+B), and Loop Cut (Ctrl+R). Keep changes non‑destructive here by using modifiers later. The goal is to understand topology enough to adjust shapes quickly, not to create perfect geometry on the first attempt.
Materials and shading: Basic setup
Create a new material and assign it to your object, then explore the Principled BSDF shader for straightforward, believable results. Adjust base color, roughness, metallic, and specular highlights to see how light interacts with the surface. In a real project, you’ll often mix materials using nodes, but starting with a simple material helps you grasp the fundamentals without getting lost in complexity.
Lighting and camera: Framing your shot
Good lighting makes or breaks a render. Start with a basic three‑point lighting setup: key light, fill light, and back light to separate your subject from the background. Position your camera to frame the scene, then test different focal lengths to see how perspective changes the mood. Small adjustments to light color temperature and intensity can dramatically alter the scene’s feel.
Rendering: Cycles vs Eevee and setup
Blender offers multiple render engines; Eevee is fast and great for previews, while Cycles provides more realism through ray tracing. For beginners, start with Eevee to iterate quickly, then switch to Cycles for higher realism if needed. Set a reasonable sample count, enable denoising, and consider output resolution and file format before rendering. This helps you balance speed and quality as you practice.
Non-destructive workflows and modifiers
Plan a non‑destructive workflow using modifiers such as Subdivision Surface, Mirror, and Bevel. These tools let you refine your model without permanently altering the base geometry. Group related objects into Collections, so you can hide, lock, or reuse assets in future scenes. A non‑destructive mindset keeps your project flexible as you experiment.
Practice projects and next steps
Finish with small, repeatable practice projects like a mug, a low‑poly chair, or a simple character bust. Each project reinforces a core skill: modeling, shading, lighting, and rendering. After this tutorial on blender, explore more advanced topics in segments (texturing, animation, and physics) and gradually tackle open projects from BlendHowTo’s library to accelerate your learning.
Tools & Materials
- Computer with internet access(Stable connection for downloads and tutorials; minimum 4 GB RAM recommended.)
- Blender software (latest version)(Download from blender.org; no license needed for basic use.)
- Reference images or concept art(Helpful for modeling and proportion guidance.)
- Mouse or drawing tablet(Mouse is fine; tablet can improve precision for modeling.)
- Notepad or digital notes(Jot down shortcuts and workflow tips for quick recall.)
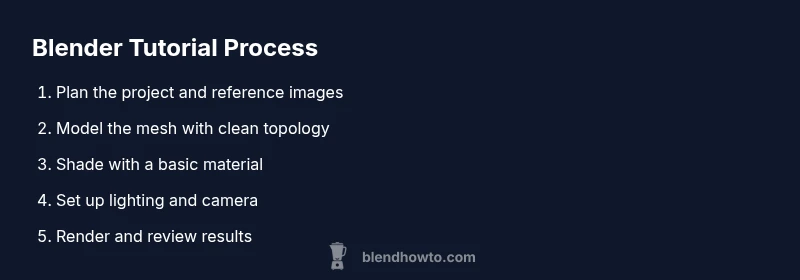
Steps
Estimated time: 2-3 hours
- 1
Install Blender and verify setup
Download Blender from the official site and install it on your computer. Open the program and confirm the UI loads without errors. Create a dedicated project folder to keep assets organized and set a simple autosave interval.
Tip: Use the installer’s default options, then customize later if you need to adjust performance. - 2
Navigate the interface
Familiarize yourself with the 3D Viewport, Outliner, and Properties. Switch workspaces to Modeling, Shading, and Rendering as you progress. Practice basic navigation (G to move, R to rotate, S to scale).
Tip: Customize the layout by docking panels you use most; it saves time on every project. - 3
Create your first object and edit it
Add a cube, enter Edit Mode, and experiment with selecting vertices, edges, and faces. Use Extrude (E) to form new geometry and Bevel (Ctrl+B) to smooth edges. Observe how topology changes affect shading.
Tip: Start with a simple model to avoid topology confusion; you can always subdivide later. - 4
Assign a basic material
Create a new material and assign it to your object. Adjust base color and roughness to see how lighting interacts with the surface. Save the material as a preset for reuse.
Tip: Keep your first material simple; complex node graphs can come later. - 5
Set up lighting and camera
Add a key light, fill light, and back light to establish depth. Place the camera to frame the subject, then test different focal lengths. Tweak light temperature to influence mood.
Tip: Use a three‑point setup to quickly produce a balanced look. - 6
Render a test image
Switch to Eevee for quick previews, then try Cycles for realism. Adjust sample rate, enable denoising, and set output resolution. Do a quick render to see how materials and lighting read on screen.
Tip: Render at a smaller size first to iterate quickly. - 7
Refine with non‑destructive edits
Add modifiers like Subdivision Surface for smoother shapes or Mirror for symmetric designs. Organize objects with Collections for easy management. Non‑destructive tweaks keep your options open.
Tip: Always apply modifiers at the end of the workflow to preserve editability. - 8
Export and document your project
Save your Blender file and export a preview render in PNG. Write a few notes describing the steps you took and the decisions behind materials and lighting. This practice helps future you reproduce results quickly.
Tip: Create a short project log with starter ideas for next sessions.
Frequently Asked Questions
What is Blender best used for?
Blender is versatile for modeling, sculpting, shading, animation, rendering, and even video editing. It’s suitable for hobbyists and professionals alike because it provides a complete end-to-end workflow in a single free tool.
Blender is a versatile all‑in‑one tool for modeling, shading, lighting, animation, and rendering.
Do I need a powerful PC to start?
You can begin on mid‑range hardware. Start with simple scenes and use Eevee for real‑time previews. As your projects grow complex, consider upgrading RAM or using GPU rendering to speed up renders.
Begin with modest hardware and Eevee; upgrade only if you hit performance limits.
Which render engine should I learn first?
Start with Eevee for fast iteration and immediate feedback. Move to Cycles when you want more realistic lighting and materials and are comfortable with the node editor.
Begin with Eevee for quick results, then try Cycles for realism.
Are there official Blender tutorials?
Yes. Blender Foundation and community contributors publish official and community tutorials covering basics to advanced topics. Use them alongside practical guides like this one for a balanced learning path.
There are official Blender tutorials from the Blender Foundation and community creators.
What should I learn next after this tutorial?
After grasping basics, explore intermediate topics such as UV mapping, advanced materials, and animation. Practice with small projects and review other BlendHowTo guides to reinforce skills.
Move on to UVs, materials, and animation with small, focused projects.
Is Blender free for commercial work?
Yes. Blender is free to use for commercial and personal projects under the terms of its open-source license, with no royalty or subscription required.
Blender is free for commercial use with no licensing fees.
Watch Video
What to Remember
- Learn Blender fundamentals before advanced features.
- Master navigation, modeling basics, and shading first.
- Practice with simple projects to build confidence.
- Adopt a non-destructive workflow and organize assets.