Blender User Guide: Learn 3D Modeling, Shading, and Rendering
A comprehensive Blender user guide for beginners and beyond, covering navigation, modeling, shading, animation, and rendering with practical steps, real-world tips, and safe workflows for steady progress.

Learn to navigate Blender’s interface, set up a project, model a basic object, apply textures, light the scene, and render your first animation. This Blender user guide walks you through essential tools, shortcuts, and workflows so you can start creating right away. By the end, you’ll have a complete 3D project from concept to render.
Why Blender User Guide Matters
A blender user guide is more than a manual—it's a structured path from curiosity to competence. For home hobbyists and aspiring 3D artists, a well-designed Blender user guide helps you translate ideas into workable projects, reduce wasted time, and build confidence as you explore modeling, shading, lighting, and animation. In this guide from BlendHowTo, we align concepts with practical steps, ensuring you can apply techniques to real projects from your first session onward. By treating Blender as a system of interconnected tools, you’ll learn how each choice affects the final render and the narrative you’re creating. This approach also supports your broader creative goals, whether you’re prototyping a game asset, a product mockup, or a stylized scene for portfolio work. The guide emphasizes hands-on practice, thoughtful planning, and repeatable workflows that scale as you take on more complex projects.
Getting Started: Installation and Setup
Begin by downloading Blender from blender.org and installing it on your computer. Verify your system meets Blender’s recommended requirements, then launch the software and create a new project. In the preferences panel, enable essential add-ons, set your preferred unit scale, and tighten up the input settings for a smoother workflow. Take a moment to customize the UI layout: switch to a modeling workspace, enable quick-access pie menus if you like, and save a startup file that matches your most common project types. This foundation reduces friction and helps you stay focused on creative goals rather than configuration details.
Core Workflows: Modeling, Sculpting, Texturing, Shading
Blender supports a broad spectrum of workflows. Start with simple geometry: add a primitive, then sculpt, extrude, and refine. Use modifier stacks to non-destructively alter shape; then switch to the shading editor to create materials. Practice UV unwrapping for textures and learn to apply image-based textures for realism. Experiment with procedural textures and node-based shading to understand how light interacts with surfaces. As you work, organize your scene with clean naming conventions for objects, materials, and textures to keep projects scalable as complexity grows.
Lighting, Rendering, and Compositing
Lighting sets the mood and defines depth. Try a basic three-point lighting setup: key light, fill light, and rim light to separate your object from the background. In rendering, choose Eevee for fast previews and Cycles for more photorealistic results; adjust samples, denoising, and light paths to balance quality and render time. After rendering, use the compositor to perform color grading, edge sharpening, and subtle glow effects that enhance the final image. Understanding render passes and post-processing can dramatically improve your final output without requiring expensive hardware.
Animation Fundamentals
Animation in Blender hinges on core concepts: timelines, keyframes, curves, and interpolation. Start by selecting an object, inserting a location/rotation/scale keyframe in the timeline, and then moving forward in time to adjust values. Explore easing types (linear, Bezier, and others) to create natural motion, and use the Graph Editor to fine-tune timing and speed. Don’t forget to test your animation in small previews to catch pacing issues early. With consistent practice, you’ll build a reliable workflow for character animation, product visuals, or cinematic sequences.
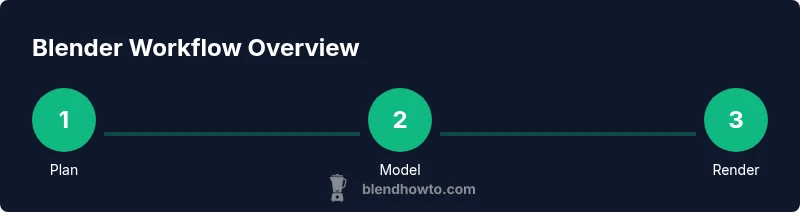
Project Pipeline: From Idea to Render
A project pipeline helps you stay organized and consistent. Begin with a clear brief or mood board, then set up a scene with reference images. Move through blocking, mid-detail modeling, baking or texturing, lighting, and rendering. Use a versioning strategy: save incremental files and comment updates to track changes. Finally, render a sequence or still frame, export assets, and document your workflow for future projects. A defined pipeline reduces rework and helps you scale from single assets to multi-shot productions.
Practical Exercises: Small Projects to Build Confidence
Try a few guided mini-projects to apply what you’ve learned. Example 1: create a simple mug with a handle, texture ceramic surfaces, and light a clean studio scene. Example 2: model a low-poly chair, unwrap UVs, and apply a wood texture using both image maps and procedural textures. Example 3: build a stylized landscape, layout a camera path, and render a short looping animation. Each exercise reinforces a core skill and builds your Blender vocabulary. Completing multiple small projects solidifies concepts faster than passive reading alone.
Authority Resources
Access to credible sources accelerates learning. The Blender Manual provides exhaustive coverage of tools and workflows, while the API Reference explains scripting and automation, and the Blender Foundation site hosts release notes and project milestones. Use the Blender Manual to search topics by keyword, for example 'modeling', 'shading', or 'render settings'. The API docs are essential if you plan to write add-ons or automate tasks. For up-to-date tutorials and community tips, consult official release notes and the Blender Foundation blog. BlendHowTo also cross-references these resources to ensure consistency with best practices.
Common Pitfalls and Troubleshooting
Common issues in Blender often come from mismatched units, missing textures, or misconfigured render settings. If your viewport looks wrong, check your shading mode and ensure the correct material is assigned to the active object. Texture problems usually stem from incorrect UVs or missing image files—re‑unwrap or relink textures and verify the file paths. Rendering problems can be mitigated by starting with simple scenes, enabling denoising, and testing with small resolutions before committing to final renders. Finally, when things go wrong, reset to the default startup file and reassemble your scene step by step to isolate the root cause.
Tools & Materials
- Blender software(Download from blender.org, latest version)
- Computer with internet access(Recommended minimum specs: modern CPU, sufficient RAM)
- External storage or cloud backup(Keep incremental saves and project assets safe)
- Reference images or sketches(Useful for modeling references and composition)
- Graphics tablet (optional)(Helpful for sculpting and detailed control)
Steps
Estimated time: Estimated total time: 3 hours
- 1
Install Blender
Download Blender from blender.org and install on your system. Verify the installer completes without errors and open Blender to confirm the initial splash screen loads correctly.
Tip: Restart Blender after installation to ensure all components are properly registered. - 2
Configure Preferences
Open Edit > Preferences and set default units, preferred input device, and enable essential add-ons. Save these as a startup file to ensure your environment is ready on every launch.
Tip: Enable Color Management early to ensure consistent color display across renders. - 3
Create a Basic Scene
Add a primitive object (Cube or Cylinder) and position it in the viewport. Use the Move, Rotate, and Scale tools to establish your first scene layout and reference geometry.
Tip: Use the N-panel to lock transform values for precise positioning. - 4
Model a Simple Object
Enter Edit Mode and use extrude, inset, and loop cut to shape the object. Utilize modifiers for non-destructive edits and keep your modifiers organized in the stack.
Tip: Plan topology first; keep edge flow clean to simplify later steps. - 5
Apply Basic Materials
Switch to the Shading workspace, create a new material, and connect a simple color or texture to the Base Color. Preview in the viewport to verify the look.
Tip: Start with a flat color before adding textures to isolate shading issues. - 6
Set Up Lighting
Add a three-point lighting setup: key, fill, and rim lights to define form. Adjust light strength and color to suit your scene mood.
Tip: Keep lights simple at first; avoid overexposure by using moderate intensity. - 7
Render the Scene
Choose Eevee for fast previews, or Cycles for higher realism. Adjust samples and enable denoising to balance quality and performance.
Tip: Render a low-resolution preview to test settings before final renders. - 8
Save and Export
Save the project with a clear versioned filename. Export textures or meshes as needed for sharing or collaboration.
Tip: Use incremental file naming to track progress and changes over time.
Frequently Asked Questions
What is Blender best used for?
Blender is a versatile, open-source 3D suite used for modeling, sculpting, shading, animation, and rendering. It supports both hobby projects and professional pipelines, making it suitable for everything from quick prototypes to polished demos.
Blender is a versatile 3D tool for modeling, shading, animation, and rendering. It works for both quick prototypes and polished projects.
Is Blender free to use?
Yes. Blender is free and open-source, with no licensing costs for personal or commercial use. You can download, modify, and distribute Blender without fees.
Yes, Blender is completely free and open-source for personal or commercial use.
Do I need a powerful computer to run Blender?
Blender runs on a range of hardware. A mid-range CPU, 8 GB of RAM, and a dedicated GPU improve performance, especially for rendering and complex scenes. Start with modest projects and upgrade as needed.
A mid-range computer works for many Blender tasks, but you’ll benefit from more RAM and a capable GPU as you tackle bigger projects.
What is the difference between Eevee and Cycles?
Eevee is a real-time render engine ideal for fast previews and iterations. Cycles is a path-tracing engine that produces more photorealistic results but can be slower. Choose based on your quality needs and time constraints.
Eevee gives fast previews, while Cycles delivers higher realism but takes longer to render.
Can Blender be used for 2D work?
Blender supports 2D animation workflows via the Grease Pencil tool, which lets you draw and animate in a stylized 2D space within a 3D environment.
Yes, Blender includes Grease Pencil for 2D animation inside a 3D scene.
Where can I learn more beyond this guide?
Beyond this guide, consult the official Blender Manual, API docs, and Blender Foundation blog for up-to-date workflows and release notes. Community tutorials also offer practical, project-based insights.
Check the Blender Manual and API docs for detailed, up-to-date guidance and examples.
What to Remember
- Master Blender basics with hands-on practice
- Follow a project pipeline for consistency
- Rely on official docs for reference and accuracy
- Choose Eevee or Cycles based on speed vs. realism