Blender App: Step-by-Step Guide for Beginners
A practical, step-by-step guide to using the blender app for 3D modeling, texturing, lighting, and rendering. Learn setup, interface basics, your first project, and beginner-friendly workflows with tips from BlendHowTo.

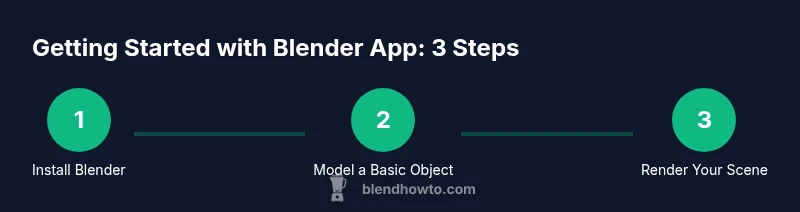
With Blender app, you can model, texture, animate, and render 3D scenes for games, films, or visual art. This guide walks you through setting up Blender, customizing the interface for beginners, building a simple scene, applying materials, and producing your first render. Follow a step by step approach to build confidence quickly.
What is the Blender app and why use it?
The blender app is a free, open-source 3D creation suite that combines modeling, sculpting, texturing, animation, and rendering in a single package. It is used by hobbyists, students, indie artists, and professionals alike to prototype ideas, create visual effects, or produce art and product renders. According to BlendHowTo, its versatility and zero-cost barrier make it an ideal starting point for anyone curious about 3D. The blender app supports a wide range of workflows, from hard-surface modeling to character animation, and it integrates with many external tools and file formats. If you’re learning 3D, this is exactly the kind of tool that grows with your skills—from quick concepts to polished projects. As you grow, you can explore addons that extend functionality while keeping the core app accessible to beginners.
Throughout this guide you’ll see practical steps, visuals, and tips tailored for beginners who want to learn by doing. You’ll practice with a simple project and gradually introduce lighting, materials, and rendering to complete a tiny, real-world result. If you’re coming from a kitchen-hobby mindset, you’ll appreciate Blender app’s balance of depth and approachability. The BlendHowTo team emphasizes practical, hands-on practice to build muscle memory and confidence as you start creating in 3D.
Installing and configuring Blender for beginners
Getting Blender up and running on your computer is the first hurdle—and it’s easier than you might think. Start by visiting blender.org and downloading the latest stable release for your operating system. The installer is straightforward, and Blender runs on Windows, macOS, and Linux. After installation, launch Blender and take a moment to confirm your graphics drivers are up to date, as this improves viewport performance and rendering stability. In this section you’ll configure a beginner-friendly layout: set a modest startup scene, enable autosave with a reasonable interval, and adjust the interface to prefer larger icons and simple controls. The blender app thrives on incremental learning, so don’t rush setups—make small changes and test how they affect your workflow. BlendHowTo recommends starting with a clean slate and a minimal scene to minimize distractions as you learn.
Once configured, save a baseline file named with your initials and date (for example: BK_2026-03-20.blend). This practice prevents accidental data loss and makes it easier to track progress over time. If you’re sharing work or collaborating later, enabling the file path options and basic versioning from Preferences will save you headaches down the line.
Navigating the default interface
The blender app interface can feel overwhelming at first, but it’s designed to be modular. The main areas you’ll use are:
- 3D Viewport: where you model and manipulate objects
- Outliner: a hierarchical list of all scene objects
- Properties Editor: materials, modifiers, render settings
- Timeline/Animation Editor: for keyframes and timing
A few starter tips: learn the basic navigation—middle mouse button to orbit, scroll to zoom, and Shift+Middle-Click for pan. Use the N and T keys to toggle side panels for quick access to tools and panels. In the blender app, most tasks are accomplished by selecting an object and then using the toolbar or hotkeys. The more you practice with common commands (G for grab, S for scale, R for rotate), the faster you’ll work. Over time, you’ll likely customize the workspace with a couple of saved layouts that suit your preferred workflow. BlendHowTo’s guidance points out that consistent, small experiments with beginner-friendly scenes build lasting familiarity.
Your first project: modeling a simple object
A practical first project is to model a small mug. Start by deleting or keeping the default cube based on your preference, then add a cylinder or a mesh primitive to form the mug body. Use Edit Mode to refine the shape: select faces, extrude to create a handle, and adjust vertices to smooth the silhouette. Apply a basic bevel to soften edges. This is a low-poly exercise that teaches you how to navigate the Edit tools, use transforms, and understand edge flow. Keep the object simple; complexity can come later as you master the core operations. By the end, you’ll have a tangible result—a mug you can texture and render in the blender app.
Pro tip: Make frequent saves and use the Undo history to experiment without fear. This practice reduces frustration and deepens learning through trial and error.
Materials, lighting, and rendering basics
Once your mug model is ready, you’ll want to explore materials, lighting, and a quick render. In the Materials tab, add a new material and adjust the base color, roughness, and metallic values to achieve a believable surface. For lighting, a simple three-point setup (key light, fill light, back light) offers good depth and form. In the blender app, you can switch the render engine between Eevee (fast, real-time) and Cycles (physically based, higher quality). If you’re just starting, begin with Eevee to iterate quickly, then switch to Cycles for more realism as needed. For rendering, set a reasonable output size (for example, 1080p) and configure sampling to balance quality and time. Save a test render and evaluate the result, then refine materials and lighting accordingly.
Common workflows: from scene to render
A typical beginner workflow in the blender app follows a simple, repeatable sequence. Start with a plan: sketch your idea, gather primitive shapes, and establish a basic layout using collections for organization. Model your shapes with clean topology, then apply modifiers like Subdivision Surface for smoothness, or Mirror for symmetry. Add simple materials, a neutral environment, and a camera. When you’re ready, render a draft to evaluate lighting and color balance. This approach emphasizes iteration: you adjust, render, evaluate, and refine. Clear naming conventions and structured layers help you manage larger projects and accelerate learning. BlendHowTo emphasizes maintaining a habit of frequent, focused practice sessions to steadily improve proficiency in the blender app.
Troubleshooting and learning resources
Even experienced users encounter hiccups. If the viewport is blank, check that you selected the correct camera or object, ensure you’re in the right shading mode, and verify that the layer isn’t hidden. Render times can be influenced by scene complexity, sampling, and hardware; start with low samples and incrementally increase as needed. If you’re stuck, official Blender documentation is a rich resource for troubleshooting, and community forums can offer quick tips. For structured guidance, follow curated tutorials from reputable sources and practice with small, repeatable projects. BlendHowTo highlights that consistent practice with short, focused lessons yields the fastest improvement, so don’t wait for the perfect project—start with small exercises and build on them.
Tools & Materials
- Blender app (latest stable release)(Download from blender.org; ensure compatibility with your OS.)
- Computer with 8 GB RAM (16 GB recommended)(Adequate RAM helps viewport performance and rendering.)
- Graphics hardware with current drivers(GPU acceleration improves rendering and viewport responsiveness.)
- Mouse or trackpad for navigation(Helpful for orbit/pan/zoom in the 3D Viewport.)
- External storage or cloud backup(Useful for project archives and larger assets.)
Steps
Estimated time: 60-90 minutes
- 1
Install Blender app
Download the latest stable Blender app from blender.org and run the installer. Complete any OS prompts and confirm the installation finished successfully. This initial setup ensures you can launch Blender without errors.
Tip: Check that your graphics drivers are up to date before opening Blender. - 2
Open a new project and adjust preferences
Launch Blender and create a new project. In Preferences, enable Autosave, set a comfortable autosave interval, and choose a simple startup layout that highlights the 3D Viewport.
Tip: Set a short autosave interval (e.g., 5 minutes) to guard against data loss. - 3
Familiarize yourself with the interface
Spend a few minutes identifying the 3D Viewport, Outliner, Properties, and Timeline. Use the N and T keys to toggle panels; customizing your workspace helps reduce clutter as you learn.
Tip: Practice using the basic transform hotkeys (G, S, R) to move, scale, and rotate objects. - 4
Create your first primitive
Add a primitive shape (e.g., a cube or cylinder). Enter Edit Mode and use extrude, scale, and move to form a simple object. Save once you reach a stable shape.
Tip: Keep the topology simple to avoid confusion as you learn more advanced tools. - 5
Apply a basic material
In the Materials tab, create a new material and adjust color and roughness. View the result in the viewport with different lighting to understand how materials respond to light.
Tip: Use a neutral gray base to better judge shading and reflections. - 6
Set up a basic light and camera
Add a light source (area or point) and place a camera to frame your object. Preview your scene using a quick render to gauge lighting and composition.
Tip: Position the camera slightly above and to the side for a natural look. - 7
Render a test image
Choose Eevee for fast previews or Cycles for realism. Set a reasonable resolution and sampling, then render. Save the image to your preferred location.
Tip: Start with low samples (e.g., 32) and increase only if needed for quality. - 8
Review and refine
Evaluate the render for material, lighting, and composition. Return to the model or materials to refine details and re-render until satisfied.
Tip: Iterate in small steps to avoid overwhelming complexity. - 9
Organize and save your project
Name your files consistently, use collections to organize objects, and save regularly. Create a simple backup plan to protect your work.
Tip: Adopt a versioning habit (e.g., scene_v01.blend, scene_v02.blend).
Frequently Asked Questions
What is Blender app used for?
The blender app is a free, open-source 3D creation suite used for modeling, sculpting, texturing, animation, and rendering. It supports a wide range of workflows from simple concepts to complex scenes, making it suitable for beginners and professionals alike. BlendHowTo emphasizes its versatility and community resources.
Blender app is a free, open source 3D tool for modeling, texturing, animation, and rendering. It works for both beginners and professionals, with lots of learning resources available.
Is Blender app free?
Yes. Blender app is completely free to download and use. It is open-source, with no license fees, and supported by a large community of developers and users. This accessibility is a key reason many beginners start with Blender app.
Yes, Blender app is free to download and use.
What are the system requirements for Blender app?
Blender app runs on modest hardware, but performance improves with more RAM and a capable GPU. A modern multi-core CPU, 8 GB RAM as a minimum, and a GPU with up-to-date drivers provide a comfortable baseline for learning. For more complex scenes, 16 GB RAM or more is recommended.
A decently recent computer with at least 8 GB RAM and updated drivers will run Blender app well for beginners.
What is the best beginner workflow in Blender app?
Start simple: model a basic object, apply a basic material, set up a light and camera, and render. Learn by repeating this loop while gradually adding complexity—add modifiers, UV mapping, sculpting, or more advanced materials as you grow more confident.
Begin with a simple object, add materials and lighting, then render. Gradually add more features as you gain confidence.
How do I render in Blender app?
Choose a render engine (Eevee for speed or Cycles for realism), set your output resolution, and adjust sampling. Press render to view results, then tweak lighting and materials before saving the final image.
Set the render engine, adjust samples, render a test image, and refine as needed.
Where can I learn more about Blender app?
Official Blender documentation, community tutorials, and the BlendHowTo learning guides offer structured, beginner-friendly paths. Start with fundamentals and build a project portfolio as you learn. The Blender community also provides forums and feedback for continuous improvement.
Check the official Blender docs and BlendHowTo’s guides for beginner-friendly lessons.
Watch Video
What to Remember
- Install Blender app and customize for beginners.
- Model basic shapes and practice transforms.
- Apply simple materials and lighting before rendering.
- Learn keyboard shortcuts to speed up work.
- Save and organize projects with consistent naming.