Edge Loop Select in Blender: Practical Step-by-Step Guide
Learn to edge loop select in Blender with clear steps, shortcuts, and tips to improve topology and speed up modeling. Includes practical examples, common pitfalls, and best practices for clean, quad-dominant meshes.

Edge loop selection in Blender lets you grab a continuous edge chain quickly, speeding topology edits. In Edit Mode, Alt+Click an edge to select the loop, or use the menu Edge > Edge Loop for precision. Mastering these shortcuts saves time and keeps topology clean.
What edge loop selection is and where it shines
In Blender, edge loop selection is the foundational technique used to grab a continuous chain of edges around a mesh. It keeps topology coherent when adding detail, extruding, or smoothing surfaces. For many tutorials and workflows, you’ll see the phrase edge loop select blender used as shorthand for triggering this exact behavior. Understanding how loops form on different topologies—quads versus tris—helps you predict how edits propagate along a surface. When you select an edge loop, the surrounding geometry naturally follows, so you can adjust vertices, edges, or faces with a single, consistent pass. This is especially valuable for character modeling, mechanical parts, and any topology-sensitive work where consistent edge spacing matters. Practically, you’ll rely on a few core actions in Edit Mode: switching selection mode, choosing an edge, and invoking the loop selection command. With these basics, you’ll unlock faster iteration and cleaner topology.
Keyboard shortcuts and modes
Blender provides quick ways to jump into edge loop selection. The primary method is Alt+Click on an edge in Edge Select mode to grab the entire loop. This shortcut dramatically reduces the number of clicks needed when refining silhouettes, rims, or cut lines. If you prefer a menu-based approach, you can always go to Select > Edge Loop. In addition, toggling between Vertex, Edge, and Face select modes using the number keys (1, 2, 3) helps you target the exact topology you want to edit. Keeping the keyboard habits consistent makes edge loop selection almost automatic as you model.
Edge loop selection across different mesh topologies
Quad-dominated meshes behave predictably with edge loops, maintaining uniform topology along the surface. Triangles or ngons can break loop definitions, causing unexpected edits or poles. When you work with quads, edge loops wrap cleanly around cylindrical or planar forms, which is essential for character bottoms, sleeves, or armor plates. In meshes with mixed topology, you may see loops terminate or branch; in these cases, plan your edge flow in advance and use edge looping selectively to preserve deformation and smoothing results.
Practical workflow: modeling a simple cylinder
To put edge loop selection into practice, start with a cylinder and a few subdivisions. Enter Edit Mode and switch to Edge Select. Pick an edge on the side and press Alt+Click to select the loop around the cylinder. You can extrude that loop to add detail or scale it to tighten the edge spacing. If you need a second loop, Alt+Click on another edge to grab a second loop and align it with your intended topology. This workflow is common in foundational modeling and scales to architectural or mechanical shapes when you maintain quad topology and even edge spacing.
Common pitfalls and fixes
One frequent pitfall is selecting a loop that crosses a triangulated area, which can create uneven topology after editing. To avoid this, keep your base topology quad-dominated, add loops only where needed, and use the Edge > Edge Loop command when you require a precise loop around a feature. Another issue is accidentally selecting multiple, undesired loops; practice using deselect methods (Alt+Click on a selected edge to toggle off) and the A key to toggle selection states. Regularly check your topology with a simple subdivision to spot issues early.
How to deselect and manage multiple loops
Deselecting edge loops is as important as selecting them. In Edit Mode, Alt+Click on a selected edge to toggle the loop off. You can also hold Shift while Alt+Click to adjust the current selection, adding or removing loops as needed. For complex models, use the Select menu options to refine your selection, such as Select > Linked to grab all connected geometry or Select > More/Less to adjust scope. These approaches help you manage multiple loops without accidentally breaking edge flow.
Advanced technique: selecting multiple edge loops and edge rings
When you need to pattern topology across several regions, you can select multiple loops by chaining Alt+Click selections or using the menu-based tools to add loops to the current selection. Edge rings (perpendicular cuts) can also be helpful for creating uniform slots or interruptions in the mesh. Use these techniques to create clean, repeatable topology across repeated features, like spokes on a wheel or detents on a mechanical part. Remember to check edge continuity after each edit to maintain predictability in deformations.
Performance tips: viewport, preferences, and customization
To speed up edge loop workflows, tailor Blender preferences for faster navigation and selection. Enable 'Emulate 3 Button Mouse' if you’re using a two-button mouse, customize the left-click select behavior, and consider saving a small selection cheat sheet for quick reference. In the viewport, keeping a moderate level of subdivision and enabling backface culling can help you spot topology issues sooner. Finally, consider creating a simple hotkey layout for edge loop selection tasks to reduce context switching during modeling.
Next steps: practice project and references
Practice makes edge loop selection second nature. Start with a simple character head or a mechanical housing, apply edge loop edits around the silhouette, and compare with reference topology guides. As you grow more confident, move to more complex surfaces and practice maintaining even edge spacing across multiple loops. For deeper exploration, review Blender's official documentation and tutorials focused on topology and edge loops.
Tools & Materials
- Blender software (latest stable release)(Open Blender; ensure Edit Mode is active on a mesh object)
- Mesh object to edit(Prefer quad-based topology for clean edge loop behavior)
- Mouse and keyboard(Alt+Click for edge loop, plus standard navigation keys)
- Reference mesh topology guide(Optional for planning edge flow before editing)
- Backup of the .blend file(Always good practice before large edits)
Steps
Estimated time: 20-35 minutes
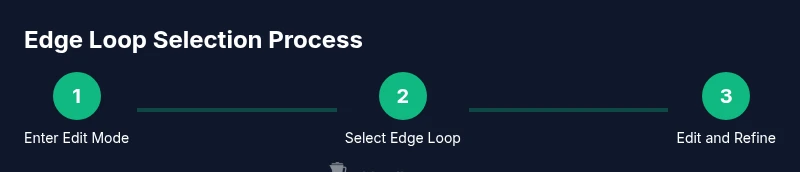
- 1
Enter Edit Mode
Select a mesh and press Tab to enter Edit Mode. This prepares the model for vertex, edge, or face edits. See diagram edge_loop_diagram_step1.png for a visual reference.
Tip: Switch to Edge Select (2) to focus on edge-based edits quickly. - 2
Switch to Edge Select
Press 2 to switch the selection mode to edges. This step ensures that Alt+Click targets edge loops rather than individual edges.
Tip: Consistent mode reduces accidental selections and speeds workflow. - 3
Select a starting edge
Click an edge to set the initial reference for the loop you want to select. The loop is defined as the surrounding edges that form a continuous path.
Tip: Choose an edge that lies on the silhouette or a feature edge for dramatic effect. - 4
Select the edge loop with Alt+Click
Press Alt+Click on the chosen edge to grab the full edge loop around your mesh. If the loop doesn’t cover the area you expect, try a different edge within the same feature. See edge_loop_diagram_step2.png for guidance.
Tip: If Alt+Click misses a segment, ensure the edge is part of a quad-based topology. - 5
Use Edge Loop for precision
If the loop selection isn’t exact, use Select > Edge Loop to refine the selection. This command ensures a precise loop around the feature.
Tip: Pair this with a small zoom to improve selection accuracy in dense topology. - 6
Add or remove loops
Shift+Alt+Click to add or remove adjacent loops from the current selection. This is useful for creating a chain of loops along a feature.
Tip: Keep a mental map of where loops begin and end to avoid over-editing. - 7
Mirror edits on symmetrical geometry
If your model is symmetrical, use Mirror modifier or identical edits on both sides to maintain consistency across the mesh.
Tip: Apply symmetry early to minimize rework later. - 8
Deselect or adjust as needed
To deselect, Alt+Click on a selected edge to toggle off. You can also press A to toggle all selections and then refine.
Tip: Regularly check for unintended edits after each major selection. - 9
Scale or extrude selected loops
With the loop selected, perform transformations like scale or extrude to add or adjust geometry while preserving topology.
Tip: Use proportional editing sparingly to avoid disturbing surrounding topology. - 10
Check topology after edits
Subdivide or smooth to preview how edits affect shading. Look for uneven spacing, poles, or shrinkage near joints.
Tip: A quick subdivision check can reveal topology issues early. - 11
Save and compare
Save a version of your blend file before large edits and compare against the original to verify improvements in topology and control.
Tip: Versioning helps you revert if a change doesn’t yield the intended result. - 12
Practice with a simple project
Apply edge loop selection to a basic model like a cup or bottle, then progress to more complex shapes as confidence grows.
Tip: Structured practice builds muscle memory for fast, reliable edits.
Frequently Asked Questions
What is edge loop selection in Blender?
Edge loop selection grabs a continuous series of connected edges around a mesh, letting you edit topology quickly. It's essential for clean deformation and efficient modeling.
Edge loop selection grabs a whole loop of edges at once, making topology edits faster and more consistent.
How do I select an edge loop quickly?
Hover over an edge in Edge Select mode and press Alt+Click to select the entire loop. You can also use Select > Edge Loop from the menu for precision.
Alt+Click on an edge to select its loop, or use the Edge Loop command from the menu.
How do I deselect an edge loop?
To deselect, Alt+Click the selected edge again to toggle the loop off, or press A to toggle selection and refine as needed.
Alt+Click on the edge again to deselect the loop, or use A to toggle selections.
Can I select multiple edge loops at once?
Yes. Hold Shift and Alt+Click on additional loops to add them to your current selection, or use the Linked selection options for connected regions.
You can add loops with Shift+Alt+Click or use Linked selection tools to grab connected loops.
What is the difference between edge loop and edge ring?
Edge loops run around the mesh following its contours, while edge rings cross the mesh in a perpendicular direction. They are used for different topology edits.
Loops go around the surface, rings go across it for different edits.
Which shortcut switches to Edge Select mode?
Press 2 in the 3D Viewport to switch to Edge Select mode, then use Alt+Click to grab loops.
Hit 2 to switch to Edge Select mode, then Alt+Click to select loops.
Are there tips for avoiding topology issues after edge loop edits?
Keep the mesh quad-dominated, check deformation after edits, and subdivide to preview smoothing early. Regular practice reduces topology problems.
Keep it quad-based, check deformation, and preview with subdivision to catch issues early.
Watch Video
What to Remember
- Master Alt+Click edge loop selection.
- Keep topology quad-dominant for clean results.
- Use menu options for precise loop selection when needed.
- Deselect and adjust loops to refine topology.
- Practice on simple shapes before tackling complex models.