How to Put Blender Together: Step-by-Step Guide
A practical, educational guide to assembling a kitchen blender safely and efficiently. Learn parts compatibility, tools, step-by-step assembly, safety tips, and maintenance to keep your blender performing at its best.

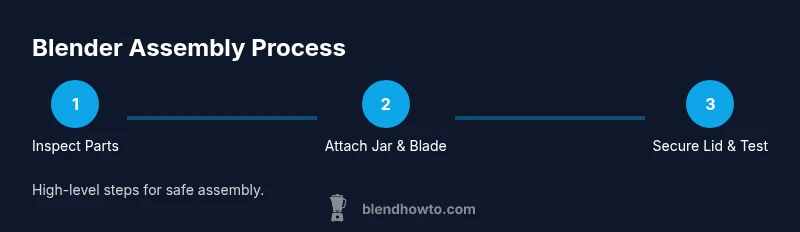
This guide shows how to put blender together from base, jar, blade assembly, lid, and cap. You’ll verify compatibility, inspect parts, clean components, and reassemble safely. You’ll also test performance and apply routine maintenance to keep your blender running smoothly. Whether repairing an older unit or assembling a new model, the process remains consistent: confirm parts, align connections, and test at low speed before full operation.
What you’ll need to know before you start
If you're wondering how to put blender together, this guide covers the whole process from identifying compatible parts to securing the jar and lid. According to BlendHowTo, the most reliable assemblies start with a clear understanding of each component and its role in the safety interlock. This means recognizing the base, jar, blade assembly, gasket, lid, and cap, and knowing how they fit together without forcing parts. By approaching assembly methodically, you reduce the risk of spills, leaks, or motor strain during operation.
Safety and sanitation first
Safety is non-negotiable when handling blades and electrical components. Always unplug the unit before disassembly, and wear cut-resistant gloves when handling sharp blades. Work on a clean, non-slip surface to prevent accidental slips. Clean all parts with mild soap and warm water, avoiding abrasive materials that could scratch the jar or blade edge. After cleaning, dry thoroughly to prevent moisture from entering electrical components.
Core components and compatibility checks
A blender typically consists of a base with a power connection, a jar that threads or locks to the base, a blade assembly that sits inside the jar, a gasket to seal, and a lid with a cap. Ensure your jar is rated for your base’s model and that the blade assembly seats evenly. BlendHowTo analysis, 2026, emphasizes confirming part compatibility and inspecting seals to prevent leaks and motor overload. If any component shows cracks, warping, or corrosion, replace it before reassembly.
Inspect parts for wear or damage
Before reassembling, inspect each component for wear: cracks in the jar, dull or bent blades, cracks in the gasket, and a frayed cord on the base. Even minor imperfections can affect performance or safety. Take photos of the orientation during disassembly to help with reassembly, and set aside any damaged parts for replacement rather than forcing a fit.
Assembly prerequisites and alignment
Clear any food residue from threads and alignment surfaces. Place the gasket in its seat if your model uses one, then position the blade assembly inside the jar. The blade should sit flush and rotate freely without wobble. Align the jar with the base’s locking mechanism, ensuring the interlock tabs engage securely before attempting to operate at any speed.
Common mistakes and how to avoid them
Common errors include cross-threading the jar, over-tightening lids, or leaving out the gasket. Avoid forcing components; if something doesn’t seat with light pressure, check orientation and compatibility again. Keep blades protected when handling and never operate with loose parts or a damaged seal. Regularly inspect seals and replace them if they show signs of wear.
Final testing and routine maintenance
After assembly, run a quick test on a low setting with a small amount of water to check for leaks and noise. If everything sounds normal and there are no leaks, gradually test at higher speeds. Clean the jar and blades immediately after use and dry completely before storage. Routine maintenance includes periodic gasket checks and blade replacement as needed.
Cleaning, storage, and care after assembly
Wipe the exterior of the base and cord with a damp cloth. Never immerse the base in water. Store blades separately in a protective sheath and keep the lid loosely attached during storage to prevent odor buildup. Regular maintenance checks help extend the life of your blender and keep it safe for daily use.
Quick post-assembly safety checklist
- Unplug the unit before any inspection or adjustment
- Confirm the jar seats securely to the base
- Check that blades are sharp and properly oriented
- Verify the interlock engages before testing at speed
Tools & Materials
- Base blender unit(Ensure the power cord and switch function; inspect for fraying.)
- Jar/caraffe(Check for cracks and ensure it fits your base model.)
- Blade assembly(Handle with care; blades are sharp. Inspect for chips or dullness.)
- Gasket/seal(Important for preventing leaks; replace if worn.)
- Lid and cap(Must fit securely to prevent spills during operation.)
- Soft cloth or sponge(For cleaning parts without scratching surfaces.)
- Dish soap(Mild detergent to clean components; avoid harsh chemicals.)
- Optional tools(Screwdriver or pliers may be needed for model-specific clamps.)
Steps
Estimated time: 30-40 minutes
- 1
Inspect prior to reassembly
Take a moment to examine each component for damage. Look for cracks, chips, or degraded gaskets. If in doubt, replace the damaged part rather than forcing a fit.
Tip: Use bright lighting to spot hairline cracks that could leak during use. - 2
Prepare the gasket and blade
Place the gasket in its seat and ensure the blade assembly is clean and dry. Align the blades so they sit flat within the jar and rotate smoothly without binding.
Tip: Dry blades thoroughly to prevent corrosion and maintain cutting efficiency. - 3
Attach the blade to the jar
Insert the blade assembly into the bottom of the jar with the sharp edge facing outward. Ensure it sits flush and can’t shift during rotation.
Tip: Hold the blade steady while seating to avoid misalignment. - 4
Seat the jar on the base
Mount the jar onto the base, ensuring any locking tabs or threading engage securely. Do not force; if it resists, re-check alignment.
Tip: Turn gently by hand to confirm proper engagement before powering on. - 5
Add the lid and cap
Place the lid on the jar and securely fasten the cap if your model uses a cap-latch feature. Confirm the lid is seated to prevent spills.
Tip: Never operate with the lid loose or partially closed. - 6
Initial safety check
Plug in the unit and perform a dry run at the lowest speed with no food. Listen for unusual noises or grinding.
Tip: If you hear grinding, power off immediately and recheck blade seating. - 7
Test with water
Run a small amount of water at a low speed to assess leaks and overall performance.
Tip: If leaks appear, re-seating components or replacing gasket may be necessary. - 8
Full-speed test
Gradually increase speed while observing for stability and leaks. Stop if anything feels off and inspect again.
Tip: Only test on a level surface away from edges. - 9
Final wipe-down and safety
Unplug, wipe surfaces, and store parts dry. Ensure the base remains clean and dry before next use.
Tip: Keep parts organized to simplify future reassembly.
Frequently Asked Questions
What tools do I need to assemble a blender?
Most assemblies only require basic tools and careful hand-tightening. You’ll primarily need a clean workspace, a damp cloth, and any model-specific screwdriver if the design uses screws. For many blenders, you can complete the task with your hands and a soft cloth.
You mostly need a clean workspace, a damp cloth, and any model-specific screwdriver if your blender has screws; many models just require careful hand-tightening.
How do I know if the blade is installed correctly?
Ensure the blade sits flush in the jar and can’t rotate loosely. The gasket should be seated in its groove, and the jar should seal properly against the base when threaded or locked.
Make sure the blade is seated flat with no wobble and the gasket sits in place before testing.
Can I assemble the blender without a gasket?
A gasket prevents leaks and helps maintain pressure during blending. Operating without a gasket risks leaks and potential damage.
Gaskets prevent leaks, so don’t skip it unless your model explicitly does not require one.
What safety checks should I perform after assembly?
Check for loose parts, secure seals, and proper lid alignment. Do a dry run at the lowest speed before introducing contents.
Make sure nothing is loose and run a quick test at low speed to confirm safety.
Why won't my blender start after reassembly?
Check power supply, ensure the jar is properly seated, and verify safety interlocks aren’t blocked by misaligned parts. Correct any misalignment and try again.
If it won’t start, verify power and that the jar is seated so the safety interlock engages.
How long does it take to put blender together?
Most reassemblies take roughly 20-40 minutes depending on model and part condition. Allow extra time for inspection and cleanup.
Usually about 20 to 40 minutes, depending on the model and how careful you are.
Watch Video
What to Remember
- Verify compatibility before reassembly
- Secure the blade and gasket firmly to prevent leaks
- Test at low speed before full operation
- Clean and dry parts after use to extend life
- Follow model-specific instructions if provided by manufacturer