How to Use Blender for Roblox: A Practical Guide
Learn a practical Blender-to-Roblox workflow, covering modeling, UVs, textures, export as FBX, and Roblox Studio import. Builds helpful asset pipelines for beginners and hobbyists seeking reliable Roblox-ready assets.

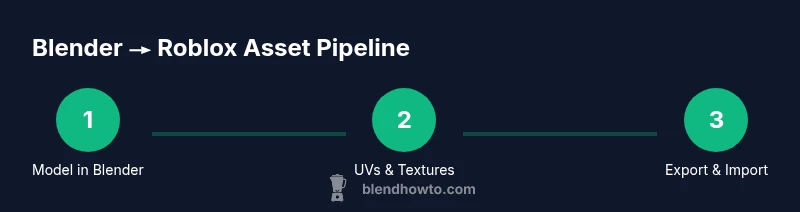
Learn how to use Blender for Roblox by building, unwrapping, and exporting clean FBX assets designed for Roblox Studio. This guide covers setup, scale, textures, and import steps, so you can move from concept to a Roblox scene with confidence. Follow a repeatable pipeline to minimize import issues and maximize asset quality.
Why Blender for Roblox: A Practical Intro
If you're building Roblox-ready assets, Blender can be your starting point. This guide on how to use blender for roblox explains a practical workflow that keeps models compatible with Roblox Studio while giving you creative freedom. By modeling in Blender, unwrapping UVs, and exporting clean FBX files, you can create game-ready props and characters. According to BlendHowTo, Blender's flexible tools and open export options make it a natural choice for hobbyists and pros alike. This article also includes tips and a simple checklist to keep your assets lightweight and easy to import. The aim is to empower you to move from concept to Roblox scene with confidence.
- Key idea: plan scale early, keep geometry clean, and test frequently in Roblox Studio.
- Throughout, you’ll see practical steps, examples, and checklists to improve your workflow.
Why this matters: when you map a Blender workflow to Roblox, you reduce surprises at import time and keep your assets usable in-game for longer.
Setting Up Blender for Roblox
To get started, install the latest stable Blender release and prepare a Roblox-focused workspace. Use metric units and apply a consistent scale so your Blender model translates cleanly into Roblox Studio. Name objects clearly, keep a single origin, and keep modifiers non-destructive until you’re ready to apply them. This setup reduces confusion later and makes it easier to export clean FBX files that Roblox can read. The BlendHowTo team recommends a tidy scene with clearly named parts and minimal hidden geometry for easier debugging during import.
- Ensure you enable essential add-ons for exporting, if needed, but disable anything that could alter geometry during export.
- Create a simple reference plane and a scale gauge so you can check size quickly between Blender and Roblox.
Tip: before modeling, save a baseline Blender file with your preferred unit settings so you can revert easily if needed.
Understanding Roblox's Scale and Export Formats
Roblox assets are imported via Roblox Studio using formats like FBX that preserve geometry, UVs, and basic materials. In this section you’ll learn how to choose the export format and how to prepare your model so Roblox Studio can import it with minimal adjustments. Focus on clean topology, correct up-axis orientation, and applying transforms in Blender before export. The goal is to keep scale consistent so your asset lands at a usable size once inside Roblox Studio.
- FBX is a common choice for Roblox imports because it preserves geometry and UVs well.
- Apply transforms (location, rotation, scale) before export to avoid unexpected changes in Roblox Studio.
Note: Always test a small, simple model first to verify the import pipeline before committing a large asset.
Modeling Best Practices for Roblox Imports
When modeling for Roblox, simpler is often better. Start with basic shapes to block out your asset, then combine pieces carefully to create the final mesh. Keep polygon counts reasonable, avoid non-manifold geometry, and maintain clean edge loops for predictable shading in Roblox. Use real-world proportions as a guide, but scale to Roblox Studio during testing. The aim is a robust model that imports cleanly and behaves predictably in-game.
- Break complex assets into modular parts to reuse in other scenes.
- Keep all geometry watertight where needed and avoid stray vertices.
Pro tip: apply a consistent origin so joints and pivots line up correctly after import.
Textures, UVs, and Materials: Roblox Compatibility
Texture work is crucial for Roblox visuals. In Blender, unwrap UVs cleanly, then bake or export textures in a widely supported format (usually PNG). Roblox uses diffuse textures primarily, so keep albedo textures simple and avoid overly heavy shaders. When exporting, map materials to basic colors and assign textures during import in Roblox Studio if needed. This approach keeps assets light and visually coherent in-game.
- Use square or near-square textures for predictable sampling.
- Keep texture maps under reasonable dimensions to prevent long load times.
Tip: test texture alignment in Blender by applying simple checker textures to verify UV correctness before export.
Exporting from Blender to Roblox Studio: Step-by-Step Overview
Exporting cleanly from Blender to Roblox Studio is a multi-step process. Start by validating your model’s scale and applying transforms, then select the parts you want to export. Export as FBX with appropriate axis settings and import into Roblox Studio. In Roblox, verify the scale, collision, and materials, and adjust as needed. A repeatable checklist helps you avoid missing steps and ensures consistency across assets.
- Select the exact meshes you want to export and keep a clean hierarchy.
- Use FBX, keep the axis orientation consistent, and double-check normals.
Pro tip: export a test file first and open it in Roblox Studio to catch issues early.
Importing and Adjusting in Roblox Studio: Tips
After importing, inspect scale, orientation, and pivot points. Roblox Studio can be sensitive to scale discrepancies, so adjust the model size to fit your scene. Check textures and UVs, reassign materials if needed, and set simple collision shapes to optimize performance. Keep a separate folder for imported assets to quickly re-import updated versions after tweaks.
- Use consistent collision models and avoid over-optimizing textures that Roblox cannot read.
- Verify lighting and ambient effects in Roblox Studio to ensure your asset looks right in-game.
Warning: large, high-poly imports can slow down scenes; stick to optimized meshes and textures.
Common Pitfalls and Troubleshooting: Real-World Scenarios
Even experienced creators encounter import hiccups. Common problems include scale drift between Blender and Roblox Studio, missing UVs on import, and mismatched textures. The fix usually involves re-checking export settings, applying transforms, and re-importing. By keeping a reusable export checklist, you’ll reduce downtime and improve consistency across assets. This section covers practical fixes and how to verify results in Roblox Studio.
- If scale is off, re-check Blender’s unit setup and re-export after applying transforms.
- If textures don’t show, confirm texture paths and ensure they’re exported alongside the FBX or re-imported.
Note: keep a log of settings you used for each asset to speed up troubleshooting later.
Bonus: Animation and Rigging Basics for Roblox
Blender can be used to create animations that you later reuse in Roblox, but the Roblox animation system requires careful consideration of rigging and compatibility. If your asset will animate, keep the rig simple and avoid complex constraints that Roblox Studio cannot reproduce. Export animations as part of the FBX if Roblox supports the workflow you’re using, and test imports frequently to ensure the animation plays as intended in Roblox Studio.
- Start with a simple rig and extend only if necessary.
- Validate animation timing and easing in Roblox Studio after import.
Pro tip: save separate Blender files for animation tests to isolate animation work from static asset work.
Tools & Materials
- Blender (latest stable release)(Ensure it’s the version you’ll use for production; keep it updated.)
- Roblox Studio(Used for importing assets and testing in-scene behavior.)
- Texture assets (PNG/JPG)(Prepare diffuse/albedo textures if your asset uses textures.)
- Reference images(Helpful for maintaining proportions and design accuracy.)
- Scale gauge or ruler(Helps verify model size consistency between Blender and Roblox.)
- Simple collision shapes(Optional but recommended for testing.)
Steps
Estimated time: Total time: 45-90 minutes for a simple prop; longer for detailed assets.
- 1
Prepare the Blender scene for Roblox
Set Blender units to metric, apply scale, and name objects clearly. Create a simple baseline geometry to test import later. This ensures a stable starting point for the whole pipeline.
Tip: Apply the scale to avoid surprises on export and after import. - 2
Block out the asset with clean topology
Use basic shapes to establish the form, then gradually add detail. Keep geometry modular so you can reuse parts in other assets and keep performance in mind.
Tip: Prefer low polygon counts and modular pieces to simplify future edits. - 3
UV unwrap and texture preparation
Unwrap UVs cleanly, lay out textures efficiently, and test texture alignment with a checker pattern. Save textures as PNG for Roblox compatibility and efficiency.
Tip: Check UV seams to minimize texture stretching in Roblox. - 4
Apply transforms and export as FBX
Apply location/rotation/scale, ensure normals are correct, and export as FBX with consistent axis orientation. Use a small, test file first to validate the pipeline.
Tip: Export only what you need to Roblox to keep file size down. - 5
Import into Roblox Studio
In Roblox Studio, import the FBX file, verify scale, and adjust position. Confirm textures load and materials map as expected, then test simple interactions.
Tip: If scale is off, tweak the asset size in Roblox and re-import as needed. - 6
Finalize and test in-scene
Place the asset in a test scene, check lighting, collision, and performance. Iterate on texture, rigging, or geometry based on how it looks and runs in-game.
Tip: Document issues you find to streamline future assets.
Frequently Asked Questions
Can I import OBJ files directly into Roblox Studio?
Roblox Studio supports common formats like FBX for complex assets. OBJ is not ideal for full-featured Roblox assets. Use FBX for reliable results and re-export if necessary.
Roblox generally works best with FBX for assets with textures and animations.
What is the recommended workflow to ensure proper scale?
Keep a consistent workflow by setting Blender to a metric unit system, applying transforms before export, and testing the import in Roblox Studio to adjust size as needed.
Set a consistent scale in Blender, then verify scale in Roblox Studio.
How can I preserve textures when exporting to Roblox?
Bake or export textures in a compatible format (such as PNG) and reassign them in Roblox Studio if needed. Ensure texture paths are correct and available with the FBX file.
Export textures along with the model and reapply them in Roblox Studio.
Are Blender animations transferable to Roblox?
Basic Blender animations can be exported with the model, but Roblox uses its own animation system. Use Blender to create reference timing and test imports to adapt in Roblox Studio.
Animations can be tested via FBX, but Roblox will handle animation in its own editor.
Do I need to rig models for Roblox humanoids?
If your asset is a character or humanoid, plan the rig with Roblox-compatible joints in mind. Importing rigged models requires adjusting in Roblox Studio to ensure compatibility.
Rig plans should align with Roblox humanoid standards for best results.
What common issues occur during import and how to fix them?
Scale drift, missing textures, and misaligned normals are typical. Re-check export settings, apply transforms, and re-import to correct these problems.
If problems appear, go step-by-step through export settings and re-import.
Watch Video
What to Remember
- Plan scale early and map Blender units to Roblox studs.
- Export to FBX with consistent axis and applied transforms.
- Keep models modular and poly-efficient for Roblox performance.
- Test imports frequently to catch issues early.