How to Put Blender Animations into Roblox Studio
Learn actionable steps to transfer Blender animations into Roblox Studio with safe workarounds, retargeting tips, and best practices for Roblox-friendly motion.

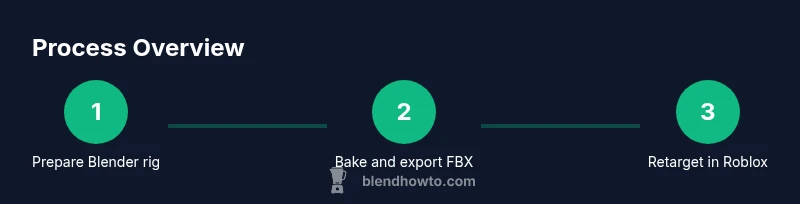
By the end of this guide you’ll be able to align Blender animations with Roblox Studio workflows. You’ll prepare a Blender animation, export an FBX reference, and retarget it inside Roblox using the Animation Editor. Note that Roblox does not fully import Blender animation curves directly, so you’ll recreate movements inside Roblox for a faithful result. You’ll need Blender, Roblox Studio, and a Humanoid rig compatible with Roblox.
Why Blender animations belong in Roblox Studio
Blender is a powerful platform for crafting smooth, expressive motion, but bringing those motions into Roblox Studio requires respect for Roblox's animation pipeline. According to BlendHowTo, creators who design in Blender and then translate to Roblox often save time and preserve motion fidelity when they treat the two tools as complementary rather than interchangeable. The goal is to translate timing, arcs, and spacing from Blender into Roblox-friendly equivalents, while avoiding common pitfalls like bone name mismatches or scale drift. When you learn how to put blender animations into roblox studio, you gain a practical workflow that minimizes retiming and bone-mapping headaches and speeds up iteration cycles in Roblox Studio.
Why the process matters for home creators
Home cooks of code and hobbyist 3D artists alike rely on Blender to prototype poses, movement curves, and rig structures because it offers a forgiving, visual environment. Roblox Studio, by contrast, emphasizes a real-time, game-ready execution path for avatars and NPCs. The two ecosystems share concepts—bones, joints, timelines—but they implement them differently. Blending these approaches means you can reuse your Blender work while conforming to Roblox’s Humanoid rig. In this guide, BlendHowTo’s analysis shows that a well-planned pipeline reduces rebuild time and improves consistency across projects.
The core idea behind the mapping process
The core idea is to create a faithful motion reference in Blender, export it in a Roblox-friendly format, and then recreate or retarget that motion inside Roblox Studio using the Animation Editor. This approach avoids grafting Blender’s complex curves directly into Roblox, which often results in distortions. Instead, you mirror timing and pose transitions in Roblox, adjusting for bone hierarchy and joint limits. With careful preparation, you’ll achieve smooth, Roblox-native animations that feel like they originated in Roblox Studio.
Quick note on scope and expectations
This guide focuses on practical workflows, not guaranteed one-click imports. The BlendHowTo team emphasizes that the best results come from a hybrid approach: design in Blender for quality, then retarget in Roblox for compatibility and performance. Expect some iteration—especially around scale, bone naming, and orientation—but with the steps outlined here you’ll reduce wasted cycles and keep your animation pipeline predictable.
Tools & Materials
- Blender software (latest release)(Used to create and bake animations; ensure it’s installed and up to date.)
- Roblox Studio(Required for importing references and retargeting animations with the Animation Editor.)
- Compatible Humanoid rig model(Use a Roblox-friendly rig; bone naming should align with Roblox skeleton conventions.)
- FBX export file(Export from Blender with baked animations; verify scale and axis alignment.)
- Optional: Blender-to-Roblox workflow plugin(May help automate parts of the workflow, but is not mandatory.)
Steps
Estimated time: 60-120 minutes
- 1
Prepare Blender rig for Roblox compatibility
Open your Blender project and verify that the rig follows Roblox-like hierarchies. Rename bones to Roblox conventions where needed, simplify constraints, and ensure there are no non-deforming bones that could complicate retargeting. This preparation reduces surprises later in Roblox Studio.
Tip: Lock camera and transform constraints for a clean export; avoid extra bones not needed for animation. - 2
Bake and clean up animations in Blender
Bake all action data into keyframes on the timeline, remove extra modifiers that could alter motion during export, and verify key poses align with expected Roblox poses. Ensure the action timeline covers the full movement range you intend to import.
Tip: Check that pivots and bone roll angles are consistent across frames to prevent jitter in Roblox. - 3
Export as FBX with animation baked
Export the selected armature and mesh as an FBX file with baked animation enabled. Confirm that axes are oriented consistently with Roblox (typically a standard forward/up configuration) to avoid mirrored or flipped motion on import.
Tip: Export a simple test file first to validate the pipeline before exporting full scenes. - 4
Import the FBX into Roblox Studio as a reference
In Roblox Studio, import the FBX file into the Asset Manager or a designated folder as a reference asset. Do not immediately overwrite the Roblox rig; use this as a motion guide for retargeting.
Tip: Keep the imported reference hidden during initial retargeting to avoid confusion with your working rig. - 5
Retarget the animation inside Roblox Studio
Open the Animation Editor and create a new Roblox animation asset. Map Blender joints to Roblox Humanoid bones, align key poses, and adjust timing to match the Blender reference. Use the reference as a guide to place Roblox keyframes precisely where Blender frames land.
Tip: Prioritize pose accuracy in the first few frames; later tweaks can refine timing without destabilizing the motion. - 6
Test playback and iterate
Play the scene in Roblox Studio and observe the animation on the target model. Look for jitter, foot sliding, or limb collisions. Iterate on pose timing, easing, and bone constraints until the motion feels natural in Roblox.
Tip: Use a consistent playback speed during testing to avoid misinterpreting timing changes. - 7
Polish and finalize the Roblox animation asset
Once the motion matches your Blender reference closely, polish tangents and easing curves within Roblox. Name the animation clearly, attach it to the correct AnimationController, and document any rig-specific notes for collaborators.
Tip: Create a versioned asset name to track iterations across future projects. - 8
Document workflow and backup assets
Record the steps you took, export settings, and asset relationships so teammates can reproduce the process. Back up the Blender file, the FBX export, and the Roblox animation asset in a shared repository.
Tip: Maintaining a small changelog dramatically reduces onboarding time for new project members. - 9
Optimize for game performance
Keep the animation rig lightweight and avoid excessive keyframes in Roblox for smoother runtime performance. Use animation compression when supported and test on similar hardware to your target audience.
Tip: Limit dynamic constraints and avoid complex IK chains that Roblox cannot compute efficiently during play.
Frequently Asked Questions
Can I import Blender animation files directly into Roblox Studio?
No. Roblox Studio does not support direct Blender animation imports. You should bake your Blender animation to FBX as a reference and recreate or retarget it inside Roblox Studio using the Animation Editor.
Roblox Studio can’t import Blender animations directly. Bake to FBX as a reference, then recreate or retarget in Roblox Studio's Animation Editor.
What is the best workflow to bring Blender animations into Roblox Studio?
Design the motion in Blender for quality, export a baked FBX as a reference, import into Roblox Studio, and retarget to the Roblox Humanoid rig in the Animation Editor. Iterate until timing and poses feel right in-game.
Create in Blender, export a baked FBX reference, retarget in Roblox Studio, then iterate until it looks right in-game.
Do I need a Roblox Humanoid rig to import animations from Blender?
Yes. A Roblox Humanoid rig is recommended for retargeting accuracy. Ensure bone names align with Roblox's skeleton to simplify mapping.
Yes. Use a Roblox Humanoid rig and map Blender bones to Roblox joints for best results.
Can I automate retargeting from Blender to Roblox?
Automation options exist via plugins or external tools, but most reliable retargeting still happens manually in Roblox Studio to ensure fidelity and game performance.
Automation options exist, but typically you retarget manually in Roblox Studio for accuracy.
How do I test animations in Roblox Studio after import?
Use Play mode and the Animation Editor to preview the animation on the target model. Check timing, looping, and interaction with game physics, then adjust as needed.
Play mode in Roblox Studio with the Animation Editor lets you preview and adjust the animation.
What if Blender's scale differs from Roblox's scale?
Adjust the scale during FBX export and confirm the imported motion matches Roblox's units. If necessary, re-scale bone positions in Roblox during retargeting.
If scale is off, adjust during FBX export and verify in Roblox during retargeting.
Watch Video
What to Remember
- Retarget, don’t import, Blender animations into Roblox Studio.
- Use FBX as a reference while recreating in Roblox Animation Editor.
- Prepare a Roblox-friendly rig and maintain consistent scale.
- Test in Play mode early and iterate based on observed motion.
- Document workflow for team consistency and future projects.