How to Blender in Roblox Studio: A Practical Blender-to-Roblox Workflow
Learn how to blender in roblox studio by modeling in Blender, exporting to FBX, and importing into Roblox Studio with correct scale, textures, and optimization for smooth gameplay.

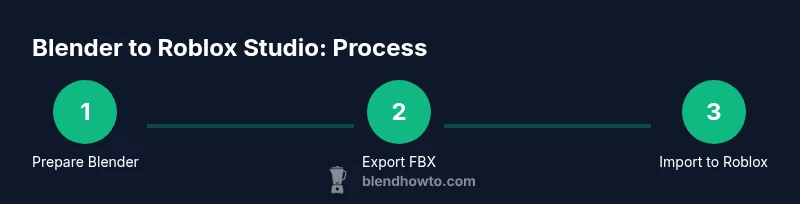
This guide teaches you how to blender in roblox studio by designing a model in Blender, exporting it as an FBX, and importing it into Roblox Studio with proper scale, materials, and performance in mind. You’ll learn setup steps, file formats, and how to adjust pivots and textures so assets look right in Roblox.
Why Blender for Roblox Studio?
For aspiring Roblox creators and Blender enthusiasts, using Blender as your primary modeling tool offers precision, a robust toolset, and clean UV workflows that translate well to Roblox Studio. According to BlendHowTo, a well-structured Blender-to-Roblox pipeline reduces surprises during import and helps you keep control over geometry, textures, and performance. In Roblox Studio you’ll import the Blender-made asset, then adjust scale, pivot, and materials to match the game’s needs. This section explains why Blender is a strong starting point and how it fits into a practical workflow for 2026.
In practice, you’ll leverage Blender’s non-destructive modeling, flexible UV mapping, and baking capabilities to create assets that load efficiently in Roblox while staying visually appealing. The goal is a smooth handoff from Blender to Roblox Studio, not guessing at export settings. By following a consistent process, you minimize surprises when you test assets in-game.
Preparing Blender for Roblox export
Before you start modeling for Roblox Studio, prep Blender for a clean handoff. Set the scene units to a consistent scale and apply transforms before exporting. In the Blender interface, switch to the metric unit system and enable a stable scale so that 1 Blender unit roughly corresponds to Roblox units you’ll use in Studio. This step reduces scale adjustments later.
Next, organize your project with a clear naming convention for meshes, bones, and textures. Apply a simple, clean topology suitable for low- to mid-poly assets, and keep the model’s origin aligned with its pivot. When you’re ready to export, choose FBX as the format and review the export options to avoid exporting non-mesh data (cameras, lights, and extra helpers) that Roblox doesn’t need. Keeping to a predictable export path saves time during import.
Modeling tips for Roblox compatibility
Roblox assets typically perform best with clean geometry and sensible UV layouts. Aim for a reasonable polygon count by using simple shapes, then combine shapes only when necessary. Use quads where possible, but be comfortable with tris for flat surfaces that need control points. Unwrap UVs carefully to maximize texture space, and avoid overlapping UV islands unless you’re intentionally mirroring textures. Name materials and textures clearly so you can map them in Roblox Studio. This section covers practical modeling strategies that reduce issues during import and improve in-game performance.
Exporting from Blender to Roblox Studio
Exporting from Blender to Roblox Studio cleanly requires correct export settings. Use FBX as the export format, apply transforms to reset scale, and bake textures if you plan to transfer details as textures. Disable cameras and lights in the export, and ensure your model’s axes align with Roblox conventions. When you export, place the file in a location you can easily locate during import. After exporting, quickly verify the FBX file size and integrity so you don’t waste time troubleshooting missing geometry at import.
Importing and setting up in Roblox Studio
In Roblox Studio, use the Asset Import workflow to bring in the FBX file. You’ll typically adjust the model’s scale to fit the Roblox workspace, then set the pivot so the asset aligns with the game’s coordinate system. Re-parent the asset under the correct hierarchy (e.g., Workspace or a dedicated Model container) and assign a basic material or texture. Roblox Studio often requires re-surfacing materials and ensuring textures align correctly with UVs from Blender. Test in-scene to confirm scale, collision, and performance.
This step is about validating the import and ensuring the asset is usable within a Roblox game, not just visually appealing. If the model looks off, revisit Blender for a scale or pivot adjustment before re-exporting.
Textures, materials, and UVs
Roblox uses a texture-driven workflow, so ensure your textures map cleanly to the model’s UVs. If you baked textures in Blender, import the textures into Roblox Studio and apply them to materials before attaching to the model. For simple assets, you can start with flat colors or decals and gradually add textures to enhance realism without overburdening performance. This section covers basic material setup, UV verification, and how to replace Blender textures with Roblox-compatible textures without losing alignment.
Optimization and performance considerations
Performance matters in Roblox games. Keep polygon counts reasonable, reduce overly dense meshes, and avoid complex shaders that Roblox cannot efficiently render on mobile devices. Use Level-of-Detail (LOD) where appropriate, and consider combining small mesh pieces into a single mesh to minimize draw calls. Texture atlases can optimize texture fetches, and baking can reduce real-time shading costs. Always test in a Roblox build to see how your asset behaves under typical gameplay conditions.
Real-world workflow example
Imagine you’re building a stylized sword for a Roblox game. In Blender, you model the blade and hilt with clean geometry, unwrap UVs, and bake a simple texture. You export the sword as FBX with transforms applied. In Roblox Studio, you import the FBX file, adjust scale so the blade fits the player’s hand, re-parent it, and apply the baked texture. You test at various distances, ensure proper collision, and optimize texture size to maintain frame rates. This practical loop demonstrates how Blender-to-Roblox can be executed repeatedly for multiple assets.
Next steps and resources
With the basics in place, expand your pipeline by exploring Blender’s advanced texturing and baking workflows, then repeat the process for different asset types. Regularly review Roblox’s asset guidelines and community best practices to stay current as Roblox Studio updates roll out in 2026. For reference, consult official documentation from Blender and Roblox as you refine your process. This ensures your workflow remains robust and scalable over time.
Tools & Materials
- Blender (latest version)(Install from blender.org; set scene units to metric and enable consistent scale)
- Roblox Studio(Installed and signed in; ready to import assets)
- A capable computer (moderate GPU)(Handles 3D modeling and FBX export smoothly)
- FBX export workflow(Blender to Roblox-friendly FBX export with Apply Transform)
- Reference textures or decals(Use for visual accuracy; can bake in Blender)
- Basic texture assets (optional)(If you plan to bake textures, bring texture references)
Steps
Estimated time: 4-6 hours
- 1
Prepare Blender for Roblox-scale workflow
Open Blender and set the unit system to metric. Align the scene scale so Blender units translate predictably to Roblox units. Apply an initial transform to reset scale and rotation, and organize naming for meshes and textures.
Tip: Always apply scale (Ctrl-A) before exporting to avoid scale mismatches in Roblox. - 2
Model or import base geometry
Create or import your base shape using simple primitives. Build the asset with clean topology and logical joins. Keep the model organized in layers and name components clearly.
Tip: Use simple geometry first; you can add detail later if needed. - 3
Clean topology and UVs
Ensure quads are used where possible and UV unwrap without overlaps unless intentionally mirroring textures. Validate UV islands fit within a reasonable texture sheet for Roblox.
Tip: Test UVs with a checker texture to reveal stretching. - 4
Apply materials or textures in Blender
Assign basic materials or bake textures if you plan to transfer detailed visuals. Keep textures compact and organized, using clear naming for materials and textures.
Tip: Texture baking reduces real-time shading cost in Roblox. - 5
Export as FBX with clean transforms
Export the model as FBX, applying transforms and ensuring non-mesh data is excluded. Keep the export path simple and consistent for quick access during import.
Tip: Check axis orientation to align with Roblox's coordinate system. - 6
Import FBX into Roblox Studio
In Roblox Studio, use the Asset Import workflow to bring in the FBX file. Verify that the geometry loads correctly and that textures map as expected.
Tip: If textures don’t appear, re-check the UVs in Blender and re-export. - 7
Position, scale, and pivot in Roblox
Adjust the asset’s scale to fit the game world, set the pivot origin, and re-parent under the appropriate Model container. Confirm collision and origin alignment.
Tip: Set the Primary Part for animated assets to simplify movement. - 8
Test in-game and optimize
Run a quick test in Roblox Studio to verify performance, collision, and texture integrity. Fine-tune texture sizes and polygon density as needed.
Tip: Aim for a balance between visual quality and performance. - 9
Optional: Animate or rig in Roblox
If your asset requires animation, use Roblox Studio’s animation tools or import animation data. Ensure compatibility with your rig and export settings.
Tip: Test animations at multiple frame rates to ensure smooth playback.
Frequently Asked Questions
What file formats does Roblox Studio support for imported models?
Roblox Studio primarily accepts FBX for 3D assets, sometimes OBJ for simple imports. Textures and decals can be applied after import. Always refer to Roblox's latest asset guidelines for any format changes.
Roblox Studio mainly uses FBX for 3D models, with textures added after import. Check Roblox guidelines for any updates.
Should I bake textures in Blender or Roblox?
Baking textures in Blender can reduce real-time shader load in Roblox, improving performance. You can transfer baked textures to Roblox as standard textures and apply them to materials there.
Baking in Blender often helps performance; then apply textures in Roblox Studio.
How do I scale models to Roblox units correctly?
Set Blender to a consistent unit system and apply transforms before export. In Roblox Studio, adjust the model scale to fit the game world and align the pivot with the desired origin.
Use Blender’s scale reset and adjust scale in Roblox to fit the scene.
Can I animate Blender rigs directly in Roblox Studio?
Roblox has its own animation system. If you export a rig from Blender, you’ll typically re-rig and animate in Roblox Studio or export compatible animation data for Roblox.
Roblox handles animation differently; you’ll usually animate within Roblox Studio.
What performance tips help Roblox assets load faster?
Keep polygon counts moderate, use texture atlases, and bake textures when possible. Test assets in-game to confirm they run smoothly on target devices.
Moderate geometry, textures baked when possible, and test in-game for performance.
Watch Video
What to Remember
- Blender-to-Roblox is a practical, scalable workflow.
- Proper scaling and transforms are critical for accurate in-game size.
- UVs and textures must be Roblox-friendly to prevent visual issues.
- Test iterations in Roblox Studio optimize performance and fidelity.