Can You Use Blender with Roblox Studio? A Practical Guide
Learn how to create assets in Blender for Roblox Studio, covering modeling, exporting, importing, and optimization. This educational guide walks home cooks, hobbyists, and aspiring 3D artists through a clear Blender to Roblox workflow with hands-on steps and best practices.

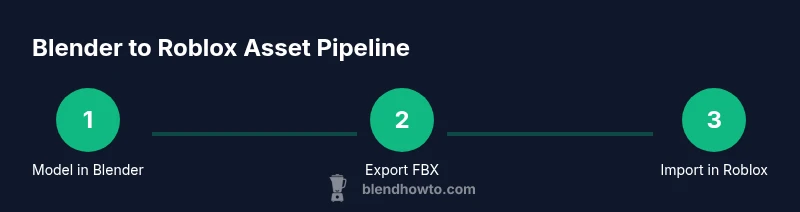
By following the right workflow, you can create Blender assets for Roblox Studio. The process involves modeling at a suitable scale, exporting to FBX or OBJ with transforms applied, and reassembling materials inside Roblox Studio. This guide explains how to prepare, export, import, and adjust assets so they behave correctly in Roblox Studio.
Why Blender and Roblox Studio work together
If you’ve ever wondered can you use blender with roblox studio, the short answer is yes. Blender’s robust toolset lets you craft detailed characters, props, and environments with precision, which Roblox Studio can then use as assets. The BlendHowTo team has found that starting in Blender often saves time later, because you can prototype shapes, test geometry, and bake textures before import. Because Roblox favors optimized mesh and sensible scaling, Blender becomes a powerful first step in a practical asset pipeline. In this guide, we’ll keep the focus on practical steps, not theoretical magic, so you can build assets that feel native in Roblox Studio. You’ll learn how to align Blender workflows with Roblox requirements, reduce common friction, and iterate quickly. For creators who want reliable results, a consistent Blender to Roblox workflow is a reliable competitive edge.
To maximize success, treat Blender as your design sandbox and Roblox Studio as your runtime environment. By separating modeling from engine constraints, you’ll save time troubleshooting later. This approach also aligns with how the BlendHowTo community approaches 3D asset pipelines: plan, validate, export, and test in the target environment. The goal is to export clean geometry with correct scale, simple materials, and well-organized object hierarchies that Roblox Studio can read with minimal adjustments afterwards.
Understanding Roblox's export/import constraints
Roblox Studio reads assets differently from Blender, so it helps to understand the core constraints before you export. Roblox uses a world unit system based on studs and meters, and it has practical limits on polygon counts, textures, and material complexity. While Blender can create highly detailed models, the Roblox importer benefits from low-to-moderate poly counts, clean UV maps, and simple materials. In practice, this means you’ll want to optimize geometry, avoid overly complex shaders, and bake textures when possible. The Blender to Roblox workflow works best when you keep a separate high-detail model for reference and a lighter, Roblox-friendly version for import. According to BlendHowTo analysis, many creators run a quick dimensional check to ensure that assets won’t appear oversized or undersized in-game. Keeping a consistent naming convention and a simple scene structure also reduces confusion during import and debugging.
The most common pain points involve scale mismatches, texture mapping discrepancies, and misaligned pivots. If your Blender model looks correct in isolation but appears off in Roblox Studio, it’s usually due to axis orientation, exported transforms, or the import settings. A deliberate approach—documenting your export parameters and testing with a small asset first—helps you isolate issues quickly. By anticipating these constraints, you’ll spend less time rerunning exports and more time refining the asset within Roblox Studio.
Preparing Blender models for Roblox
Preparation is the secret to a smooth handoff from Blender to Roblox Studio. Start by organizing your scene with clearly named objects and a logical hierarchy. Apply all transforms (location, rotation, scale) so Blender’s coordinates map predictably to Roblox. In Blender, do a quick center of mass check and ensure the origin points are intuitive for snapping and animation later on. If you plan to attach multiple parts, keep them as separate objects rather than a single joined mesh; Roblox imports separate meshes more predictably and lets you control pivots and collisions more easily. Check that all transforms are consistent across objects to avoid surprises after import. Finally, consider baking textures or using simple, tiling textures so Roblox’s material system can reproduce appearance without heavy shader support. This planning step reduces the need for post-import tweaks and aligns with a practical Blender to Roblox workflow.
From a brand perspective, BlendHowTo recommends creating a tiny test asset first to validate scale and export settings. This test proves the pipeline works end-to-end before you commit to more complex models. It’s also a good time to decide how you’ll handle collision meshes and grouping in Roblox Studio, so you don’t end up chasing mesh behavior after import.
Texturing and materials considerations
Roblox Studio has a simplified material system compared to Blender, so texture strategy matters. Start with clean UV maps in Blender and bake textures where possible, reducing reliance on complex Blender shaders. Export textures as PNG or JPG with power-of-two dimensions when recommended by Roblox, and keep texture sizes small enough to avoid performance penalties. In Roblox Studio, you’ll map the textures to basic materials or SurfaceAppearance assets. If you plan to animate materials or use advanced shading, keep those effects lightweight or bake them into textures for predictable results.
Color consistency is key for a cohesive game look. Use neutral, consistent color palettes and avoid relying on Blender-specific shading tweaks that won’t translate in Roblox. The goal is a reliable skin that Roblox can render reliably across devices. Remember to test texture mapping on your target asset from multiple angles to ensure there are no seams or stretching in Roblox Studio. This careful approach helps you maintain visual quality without sacrificing performance.
Exporting from Blender to Roblox Studio
Exporting correctly is where many pipelines stumble. In Blender, select the mesh you intend to export and choose FBX as the export format when possible, as Roblox Studio handles FBX quite well. Enable Apply Transform so your object’s scale and orientation carry over correctly, and ensure the export includes mesh data only (no cameras or lights unless you need them). Turn off animation data if you’re exporting static assets, or bake animations if you plan to bring animated props later. Keep your export path organized so you can locate the asset easily after import. If you prefer OBJ for simple meshes, verify Roblox Studio’s compatibility with OBJ in your version, but FBX is generally the safer bet for complex assets. This export discipline aligns with a clean Blender to Roblox workflow and reduces post-import adjustments.
When in doubt, start with a small test asset—just a single prop—to confirm your export settings before committing to a full asset pack. This practice minimizes wasted time and helps you lock in a reliable export profile that you can reuse across projects.
Importing into Roblox Studio and adjusting
Roblox Studio’s asset importer will read the FBX/OBJ file and place it in your world roughly at the origin. The first step is to verify scale and orientation and then adjust the pivot so you can snap and align with your scene grid. Import textures and assign them to basic materials; check for any seams or UV distortions and re-bake or adjust UVs if needed. Group related parts into assemblies to preserve hierarchy, especially if your asset is composed of multiple pieces. It’s common to re-center the asset, then tweak collision geometry to balance performance and accuracy. Finally, run a quick in-game test to confirm that lighting, textures, and shadows render correctly. This iterative approach lets you refine assets in Roblox Studio with minimal guesswork.
If you notice performance issues, simplify meshes and reduce texture resolutions. The key is to achieve an acceptable visual quality while keeping rendering costs manageable on target devices. BlendHowTo emphasizes keeping a clean import workflow and reusing tested export profiles to streamline future projects.
Common pitfalls and troubleshooting
Even with a solid plan, issues arise. Common pitfalls include scale mismatches between Blender and Roblox Studio, axis orientation confusion, and texture seams after import. Another frequent problem is exporting hidden geometry or non-manifold edges that Roblox can misinterpret. Start each asset by verifying that the origin and pivots align with your intended animation and instancing behavior. When you hit a snag, test with a minimal asset first to isolate the problem: is it scale, texture mapping, or importer settings? The goal is to narrow down the culprit quickly and reproduce a stable workflow. If you encounter persistent issues, revert to a known good export profile and adjust only one variable at a time. This methodical approach is aligned with a practical Blender to Roblox pipeline that minimizes guesswork.
Final tips and best practices for a smooth Blender to Roblox workflow
- Keep your Blender scene organized with clear names and a simple hierarchy. This reduces errors during import and makes troubleshooting faster.
- Apply transforms before export and verify object origins to align with Roblox’s coordinate expectations.
- Use FBX as the primary export format for reliability, and test with small assets before scaling up.
- Bake textures whenever possible to avoid shader mismatches in Roblox Studio.
- Maintain a library of reusable export presets to accelerate future projects.
Closing note on the Blender to Roblox workflow
This guide provides a practical, end-to-end approach to using Blender assets in Roblox Studio. By planning, exporting with consistent parameters, and testing in Roblox, you’ll reduce iteration time and deliver assets that look and behave as intended. The BlendHowTo team hopes this workflow helps you build confidently and efficiently.
Tools & Materials
- Blender (latest version)(Use Blender from blender.org; ensure the 3D Viewport functions smoothly.)
- Roblox Studio(Installed and signed in; ready to import assets.)
- FBX export support(Blender export to FBX; verify export options are configured for Roblox.)
- Textures for Blender assets(PNG/JPG textures; keep textures lightweight for Roblox performance.)
- Test asset for validation(A small prop to validate scale, origin, and import settings before larger projects.)
Steps
Estimated time: 90-120 minutes
- 1
Prepare your Blender scene
Name your objects clearly and organize the scene so you can identify every piece after export. Remove extraneous helpers or cameras to keep the file lean. Establish a simple origin for the primary object to anchor placement in Roblox Studio.
Tip: Use a single, consistent naming convention and comment in the scene for team readability. - 2
Apply transforms and set origin
Select all meshes and apply location, rotation, and scale (Ctrl-A). Set the origin to the geometry’s center so the pivot behaves predictably in Roblox Studio. This reduces surprises when importing and manipulating the asset.
Tip: Double-check that no object's scale is unintentionally zero or negative; it can cause import glitches. - 3
Organize parts for export
Keep related parts as separate objects rather than joining them into a single mesh. This preserves individual pivot points and enables clean in-engine assembly within Roblox Studio.
Tip: Group parts by function (body, limbs, props) and name groups consistently. - 4
UV maps and textures
Ensure UVs are clean and non-overlapping for each object. Bake complex shading into textures if you plan to use simple Roblox materials. Prepare textures with sizes suitable for Roblox performance.
Tip: Test texture seams in small steps to catch mapping issues early. - 5
Export from Blender
Export the selected meshes as FBX. Enable Apply Transform, keep mesh data only, and avoid exporting cameras or lights unless required for Roblox. If you plan animations, bake them before export.
Tip: Export a tiny test asset first to validate the pipeline before committing to a full project. - 6
Import into Roblox Studio
In Roblox Studio, use Import to bring in the FBX asset. Verify scale and orientation, then reassign textures to materials. Adjust pivot and collision hulls as needed.
Tip: If the asset imports with the wrong orientation, re-export after adjusting the export orientation settings. - 7
Adjust in-scene and test
Place the asset in your scene, test for visual fidelity and performance. Check lighting, shadows, and texture loading. Make iterative tweaks to materials and geometry to optimize rendering.
Tip: Run a quick playtest to ensure the asset behaves as expected in the target game environment. - 8
Finalize and organize
Create a reusable workflow by saving the export settings as presets and documenting any Roblox-specific tweaks. Keep a small library of validated assets for faster future iterations.
Tip: Maintain a versioned asset folder to track changes across iterations.
Frequently Asked Questions
How do Blender units map to Roblox Studio units, and how can I ensure correct scale?
Blender uses a generic unit system, while Roblox uses studs. To ensure correct scale, apply transforms, export with a consistent scale, and verify the asset in Roblox Studio using small test assets before committing to full models.
Blender uses generic units and Roblox uses studs, so apply transforms and validate scale with test assets in Roblox Studio.
Can you animate Blender models in Roblox Studio after import?
Roblox Studio can import animations baked into FBX files from Blender, but complex Blender shaders may not translate. Plan to bake animations if you intend to reuse them in Roblox Studio.
Animations from Blender can be baked into FBX and imported, but rely on Roblox-friendly animation methods after import.
Do I need to export as FBX or is OBJ okay for Roblox Studio?
FBX is generally the safer choice for Roblox Studio because it preserves geometry, transforms, and optional animations better. OBJ can work for static props, but FBX handles more complex assets reliably.
FBX is usually safer for Roblox; use OBJ only for simple static props if FBX isn’t available.
How should I handle textures and materials when importing to Roblox?
Texture maps baked in Blender can be mapped to Roblox materials or SurfaceAppearance assets. Keep textures lightweight and test them in Roblox Studio to avoid seams and performance issues.
Bake textures when possible and test them in Roblox Studio to ensure good performance and visuals.
What are common performance pitfalls to watch for?
High polygon counts, large textures, and complex shader effects can slow Roblox games. Optimize by simplifying geometry, using smaller textures, and testing on target devices early in the workflow.
Avoid heavy assets; optimize geometry and textures, and test on the target devices early.
Watch Video
What to Remember
- Plan asset geometry with Roblox in mind.
- Apply transforms before export for predictable results.
- Export with an optimized, clean workflow.
- Test assets early in Roblox Studio to avoid surprises.