Is It Okay to Blend Hot Food in a Blender? Safety Tips and Best Practices
Learn whether you can safely blend hot foods in a blender, with practical prep steps, safety tips, and equipment guidance from BlendHowTo. Get a clear, actionable guide for safe hot-blending.

Is it ok to blend hot food in a blender? Yes, with proper precautions. Start by venting steam and using a vented lid or blending in short bursts. Do not overfill, and let hot liquids sit briefly before blending in small batches. Blend slowly to minimize splatter, and always follow manufacturer safety guidance for your model.
Introduction to Safe Hot-Blending: What You Need to Know
According to BlendHowTo, blending hot foods in a blender is possible, but it requires careful planning, appropriate equipment, and deliberate technique. The phrase is not merely philosophical safety talk—hot blending involves steam, pressure, and rapid air movement that can turn a routine puree into a hazardous splash if you rush. In this section we’ll outline why heat changes the blending dynamics, how to assess your blender’s capabilities, and what basic habits will keep you and your kitchen safe while preserving flavor and texture. The goal is to empower home cooks and hobbyists to approach hot blending with confidence rather than fear, leveraging practical steps and clear rules of thumb.
How Heat Alters the Blending Process
Heat converts liquids into gases, and steam under pressure can push against a blender lid. The pressure buildup can force hot contents to escape in unpredictable ways if the lid is not vented or if you overfill the jar. This is why the core question is not simply “can I blend hot foods?” but “how can I blend hot foods safely and predictably?” Key factors include the blender’s motor power, the design of the lid (vented vs. solid), the size of the batch, and how long you blend continuously. Understanding these factors helps you avoid burns, splatters, and motor strain while achieving smooth textures.
Equipment Essentials for Safe Hot-Blending
A safe hot-blending setup starts with the right tools. You’ll want a blender with a heat-resistant jar or pitcher, ideally with a vented lid or a built-in steam vent. Use a pitcher that is rated to handle hot liquids, and consider starting with shorter blending intervals to avoid overheating the motor. A heat-resistant glove or mitt and a damp towel for quick lid adjustment add extra layers of safety. If you blend directly in a pot, choose a blender designed for hot liquids or use an immersion blender with a heat-safe container. The goal is to manage heat, steam, and splatter while maintaining control over the texture.
Prepping Hot Ingredients and Cooling Strategy
Before blending, cut ingredients into uniform pieces and remove any skin or seeds that could clog the blender or cause uneven results. Allow boiled or freshly heated liquids to cool slightly—typically 1–2 minutes for most soups and sauces—so the steam isn’t overwhelming when you start blending. Add ingredients gradually rather than dumping everything in at once, which helps prevent sudden pressure spikes. Keep a thermometer handy to verify that hot components aren’t scalding, and adjust your approach based on the viscosity you want.
Safe Blending Techniques: Venting, Batch Size, and Pace
When is it safe to blend? Use the vented lid to release steam while blending. Start with small batches to test consistency, then increase if the blender stays cool and the texture remains smooth. Pulse blending can help control heat generation and reduce splatter, while continuous blending is best reserved for cooler mixtures or batches that have had time to rest slightly. If the blend begins to bubble through the vent, pause, remove the lid, and allow air to escape before resuming.
Cleaning, Maintenance, and Odor Control After Hot Blending
Cleaning after blending hot foods should be thorough but careful. Rinse the jar with warm water, then wash with a mild detergent. Avoid abrasive scrubbers that can scratch the heat-resistant surface. If odors linger, a baking soda paste or a splash of white vinegar during cleaning can help neutralize smells. Regularly inspect the blade, seals, and lid for wear, and replace any cracked or warped parts promptly to maintain safety and performance.
When to Avoid Hot Blending and Alternatives to Consider
If your blender’s manual warns against blending hot liquids, or if the jar is cracked, avoid hot blending entirely and switch to an immersion blender or a dedicated hot-premix blender only. For very hot sauces or broths, consider cooling the mixture slightly and blending in batches, then reheating gently after blending. In some cases, using a food processor with caution or a hand blender in a controlled pot environment offers a safer alternative for hot ingredients. BlendHowTo recommends prioritizing safety over speed in these situations.
Authoritative Sources and Further Reading
For safety guidelines and blender usage best practices, consult official resources such as FDA and extension programs. These sources provide general kitchen safety principles that apply to hot-blending scenarios, including handling hot liquids, preventing splatter, and maintaining equipment. While the specifics may vary by model, the underlying principles—venting steam, respecting heat, and using appropriate vessels—remain consistent across reputable sources.
Practical Takeaways and Safe Habits to Adopt
When in doubt, pause and reassess your setup. Use small batches, vented lids, and gradual blending to preserve texture while minimizing risk. Regularly inspect your blender for wear and replace damaged parts. Above all, prioritize safety, take your time, and follow the manufacturer’s guidelines for your specific model. In the end, the goal is to enjoy smooth, delicious results without compromising anyone’s safety in the kitchen.
Tools & Materials
- Blender with heat-rated jar(Prefer a jar designed for hot liquids; ensure it has a vented lid or steam vent)
- Ventilated lid or vented lid adapter(Critical to release steam during blending to prevent pressure buildup)
- Heat-resistant gloves or oven mitts(Use when handling hot containers or lids to prevent burns)
- Thermometer (candy/deep-fry style)(Check temperatures of hot ingredients before blending to avoid overheating the blender)
- Heat-safe pitcher or container(When cooling hot ingredients before transferring to the blender)
- Dish towels or silicone mat(For quick lid adjustments and to protect surfaces)
Steps
Estimated time: 15-25 minutes
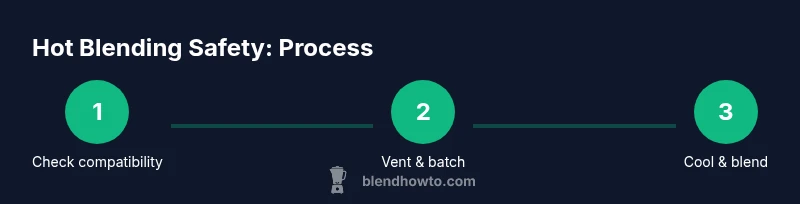
- 1
Check blender compatibility with hot blending
Review your blender’s manual to confirm it is rated for hot liquids and check the jar for any cracks or warping. If your model lacks a steam vent, plan to blend in smaller batches or use a different vessel. This step reduces the risk of leaks and injuries when you begin blending hot ingredients.
Tip: If in doubt, contact the manufacturer or test with a small amount of hot liquid in a controlled, empty-blender test to observe how the lid seals. - 2
Prepare ingredients and equipment
Cut ingredients into uniform pieces for even blending; remove seeds or skins that may clog the blade. Position the heat-safe pitcher and have a vented lid ready. Place towels nearby to catch any splatter and keep children and pets away during the process.
Tip: Dry the lid seal and grip area to prevent slipping when the lid is removed during venting. - 3
Cool hot liquids briefly before blending
Let freshly heated liquids sit for 1–2 minutes. Blending extremely hot liquids immediately can cause rapid steam release and splatter. This short rest period helps you judge viscosity and reduces the chance of scorching the blender motor.
Tip: If the liquid is splashing at all, pause, vent, and adjust the batch size before continuing. - 4
Blend in small batches with vented lid
Fill the blender jar only a third to halfway with hot ingredients, then pulse or blend in short bursts. Use the vented lid to release steam gradually. Stop and allow any built-up pressure to dissipate before continuing.
Tip: Start on a low setting and increase speed gradually to maintain control. - 5
Use pulsing to control texture and heat
Pulse blending helps you manage heat generation and prevents overheating the blender motor. Short bursts reduce the chance of a sudden pressure build-up and keep the texture consistent.
Tip: Between pulses, check temperature with a thermometer if you’re blending very hot soups or sauces. - 6
Resume blending and monitor texture
Continue in small batches until you achieve the desired smoothness. If the mix becomes too hot or begins to foam, pause, vent, and allow it to settle briefly before resuming.
Tip: Avoid running the motor continuously for long periods on very hot mixtures. - 7
Cool, clean, and store safely
After blending, allow the mixture and jar to cool before washing. Rinse with warm water, then wash with mild soap. Dry thoroughly to prevent corrosion or mold, and store with the vented lid removed to prevent moisture buildup.
Tip: Never store hot liquids in a sealed glass jar; they can crack from thermal stress. - 8
Evaluate safety and plan future batches
Review what worked and what didn’t for your model. If you notice persistent leakage, unusual noise, or overheating, discontinue hot-blending attempts and consult the manufacturer.
Tip: Document batch sizes and timings for future reference and optimization.
Frequently Asked Questions
Can blending hot liquids cause the blender to explode or leak?
Blending hot liquids can pose a risk of splatter or leaks if the lid is sealed or the batch is too large. Using a vented lid and blending in small batches minimizes this risk. Always follow your model’s safety guidelines.
Yes, the main risk is splatter and leaks from pressure if you seal the blender or overload it. Use a vented lid and blend in small batches to stay safe.
Should I let hot ingredients cool before blending at all?
A brief cool-down of 1–2 minutes helps manage steam and prevents aggressive splatter. This small pause reduces pressure buildup while preserving texture.
A short cooling period helps control steam and keeps blending safe.
What blender features are best for hot blending?
A heat-rated jar, a vented lid, and a high-quality motor with overload protection make hot blending safer and more predictable. Check the manufacturer’s instructions for your specific model.
Look for a blender with a heat-rated jar and a vented lid for hot blending safety.
Can I blend hot soup directly in a pot using a blender?
Some people blend hot soups in the pot using an immersion blender or by transferring small amounts to a heat-safe blender jar. Avoid pouring boiling soup into a cold blender jar all at once.
Yes, you can blend in a pot with an immersion blender or use a heat-safe jar for small batches.
How should I clean a blender after blending hot liquids?
Rinse with warm water, wash with mild soap, and dry completely. If odors linger, use a baking soda solution or white vinegar during cleaning.
Rinse, wash, and dry thoroughly to prevent lingering smells and residue.
Is it safer to use an immersion blender for hot foods?
Immersion blenders are often safer for hot liquids since you blend directly in the pot. Countertop blenders with vented lids can also work well if used with caution.
An immersion blender can be safer for hot soups, especially when you want to blend in the pot.
Watch Video
What to Remember
- Blend safely with vented lids and small batches
- Always cool hot liquids briefly before blending
- Inspect equipment and replace damaged parts promptly
- Use pulsing and gradual speed to control heat
- Clean thoroughly after hot blending to prevent odors and residue