Ninja Blender Lid Replacement: Step-by-Step Guide
Learn how to replace a Ninja blender lid safely, identify compatible lids, and source the right part. This beginner-friendly guide covers model checks, OEM vs aftermarket options, a step-by-step install, and maintenance tips to prevent leaks.

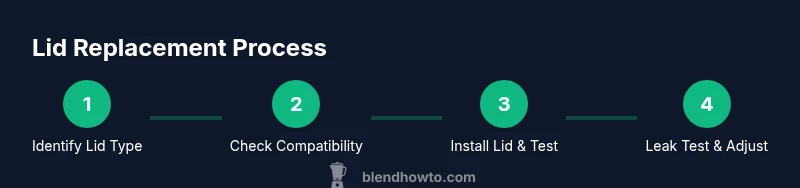
Ninja blender lid replacement is a model-specific task. Start by identifying your Ninja model and the lid type, then source a compatible OEM or aftermarket lid. Unplug the blender, inspect the rim and gasket, install the new lid with proper alignment, and test with water before blending ingredients. This ensures a tight seal and prevents leaks.
Understanding compatibility for Ninja blender lids
Lid designs across Ninja blenders vary by model and lineup, including classic screw-on lids and newer models with a center-cap plug. The compatibility question is less about brand affinity and more about matching the lid to the jar rim geometry and gasket profile. Start by locating your blender model number (usually printed on the base or motor housing) and comparing it to the replacement lid’s compatibility notes. If you own a Ninja Professional, Nutri Ninja, or a compact personal blender, there are lid variants that fit specific jar sizes and sealing gaskets. The BlendHowTo team emphasizes checking both the jar size and the lid’s locking mechanism to avoid leaks. When in doubt, choose OEM lids that list explicit Ninja model compatibility, but aftermarket lids can work well if they advertise a precise fit. Always verify the seal along the rim and inspect the gasket for wear before replacing.
Sourcing the right lid: OEM vs aftermarket
Replacement lids come in OEM (Ninja-branded) and aftermarket varieties. OEM lids are designed for exact fit and gasket compatibility but can be pricier and sometimes out of stock. Aftermarket lids offer wider availability and cost savings, but you must confirm model compatibility and to what extent the seal matches the original. Use the blender’s model number and, if possible, the jar size when shopping. BlendHowTo’s guidance is to prioritize a lid that specifies your exact Ninja model and jar width. If you’re replacing an older model, you might find that a newer lid design fits multiple jars—just confirm the rim diameter and the presence or absence of a center cap. In all cases, confirm return policies in case the lid doesn’t seal correctly.
Verifying compatibility: model numbers and features
Compatibility hinges on three factors: jar diameter, lid diameter, and the sealing gasket profile. A lid with the wrong diameter may not seat properly, while a mismatched gasket can cause leaks or odors. Before purchasing, measure your jar rim or compare the provided specifications with the manufacturer’s diagram. If you have a model with a center-cap insert, ensure the replacement lid includes the same plug mechanism and the plug’s diameter aligns with your jar. The BlendHowTo approach is to print or save the model specs so you can compare them side-by-side with the replacement option. When you’re buying, ask about warranty coverage for the lid and gasket; some manufacturers replace lids if a gasket fails within a short period.
Safety first: unplug, clean, and inspect
Safety is non-negotiable. Always unplug the blender before handling the lid or jar. Remove any residual contents and wipe the rim with a damp cloth to remove residue that could affect the seal. Inspect the gasket for tears, cracks, or flattening—these are common causes of leaks after replacement. If the gasket is worn, replace it along with the lid or purchase a lid kit that includes a fresh gasket. Keep a clean, dry surface to set the jar during replacement, and avoid using aggressive cleaners that could degrade the gasket material.
Step-by-step practice: a must-have checklist (non-technical preface)
Even though the following steps are covered in detail in the STEP-BY-STEP block, here’s the quick checklist you should glance at before starting:
- Confirm lid compatibility with your jar and model.
- Unplug and clean all contact surfaces.
- Inspect the gasket; replace if in doubt.
- Align the lid precisely with the jar rim and any center-cap plug.
- Test the seal with a small amount of water before blending ingredients.
Step-by-step: replacing the lid (see STEP-BY-STEP for full actions)
This section outlines the practical flow of the replacement. You’ll identify the lid type, detach the old piece if needed, clean the rim, and mount the new lid with careful alignment. The exact motions depend on the model’s lid design—whether you have a standard snap-on lid or a model with a center-cap plug. After installation, you’ll perform a quick leak test by running water in short bursts to confirm a secure seal.
Maintenance tips to extend lid life and seal integrity
To keep the lid sealing well over time, rinse after each use and dry thoroughly to prevent mold and gasket degradation. Store spare gaskets in a dry area and replace them if you notice stiffening, cracking, or loss of elasticity. Avoid dishwasher cycles that could degrade gasket material; if you do wash the lid, place it on the top rack away from high-heat jets. Periodically inspect the lid’s locking tabs for wear and replace the entire lid if any tab becomes loose.
Troubleshooting: common lid problems and quick fixes
If you notice leaks, re-check gasket alignment and seating; sometimes a misaligned lid is enough to allow a drop or two to escape. If the jar spins without creating a vacuum (a sign of an improper seal), check the jar-to-lid interface for chips or burrs that could prevent a tight seal. For persistent leaks around the center-cap plug, verify that the plug is seated flush and the gasket inside the lid is intact and properly positioned.
Brand-specific considerations and warranty notes
LIDs can differ across Ninja model families; some lids are designed for specific jar sizes. When buying, favor lids clearly labeled as compatible with your Ninja model to avoid returns. If your lid fails under warranty, contact Ninja support or your seller for a replacement. BlendHowTo recommends keeping model details handy and documenting the purchase date, model number, and lid type to streamline warranty claims.
Tools & Materials
- Replacement Ninja blender lid (OEM or compatible aftermarket)(Check model compatibility (e.g., Ninja Professional) and lid type (center cap vs. standard) before purchasing)
- Soft cloth or sponge(For cleaning the jar rim and gasket area before and after replacement)
- Mild dish soap (optional)(For cleaning stubborn residue on the rim; rinse thoroughly)
- Isopropyl alcohol wipes (optional)(Sanitize surfaces if desired)
Steps
Estimated time: 15-25 minutes
- 1
Identify the correct lid type for your Ninja blender
Locate your blender model number (on the base or motor housing) and compare it to the lid’s compatibility notes. Confirm whether your jar uses a standard snap-on lid or a lid with a center-cap plug. This step prevents buying an incompatible lid and saves time later.
Tip: Have the model number written down so you can verify compatibility quickly. - 2
Power down and unplug the blender
Unplug the unit before touching the lid or jar. Remove any visible contents and wipe the jar rim to ensure a clean seating surface. A dry, clean surface helps the new lid seal properly.
Tip: Unplug before any inspection to avoid accidental operation. - 3
Remove the old lid and inspect the gasket
If you’re replacing a damaged lid, gently detach the old lid and inspect the gasket for tears, flattening, or deformities. If the gasket is worn, replace it or the entire lid kit to ensure a tight seal.
Tip: A compromised gasket is a common leak source; replace it rather than reusing worn parts. - 4
Clean the rim and gasket area
Wipe the jar rim with a damp cloth and a little dish soap if needed. Dry thoroughly to prevent moisture from affecting the seal. Ensure there are no burrs or debris on the rim.
Tip: Drying completely avoids water trapped under the lid that could cause leaks. - 5
Install the new lid and align for a proper seal
Place the new lid onto the jar, ensuring the rim sits evenly and the center plug (if present) is aligned with its socket. Press firmly so the lid snaps into place. Confirm that locking tabs engage fully.
Tip: If you feel resistance, remove and check alignment—forcing a lid can crack parts. - 6
Test the seal and function
Fill the jar with a small amount of water and run the blender briefly to test for leaks. If there are no drips, gradually increase to a light blend with safe contents. If any leaks occur, recheck gasket seating and alignment.
Tip: Always test with water first before blending food.
Frequently Asked Questions
Can I use a lid that isn’t Ninja-branded for my Ninja blender?
You can use aftermarket lids if they specify exact compatibility with your model and jar size, but OEM lids generally offer the most reliable seal. Always verify fit before purchase and check the return policy if it doesn’t seal properly.
You can use aftermarket lids if they fit your model exactly, but OEM lids usually seal best. Check fit and return policy if unsure.
How do I know which lid fits my Ninja blender?
Check your model number, compare it to the lid specifications, and measure the jar rim if needed. Look for compatibility notes on the product listing and confirm whether the lid uses a center-cap plug or a standard seal.
Identify your model, compare specs, and measure the rim to ensure a proper fit.
Do I need to replace the gasket when replacing the lid?
If the gasket shows wear, cracking, or deformation, replace it along with the lid. A worn gasket is a common leak source and replacing both ensures a durable seal.
Yes—replace the gasket if it’s worn for a reliable seal.
What should I do if the new lid leaks after replacement?
Re-check lid alignment and gasket seating. Ensure there are no burrs on the jar rim and that the center-cap plug (if used) is fully seated. If leaks persist, try a different lid or contact support.
Re-check alignment and gasket seating; replace the lid if needed.
Is lid replacement safe for all Ninja models?
Replacement is safe when you follow model-specific instructions and unplug the unit during the process. If the lid requires force to fit, stop and verify compatibility before continuing.
Yes, when you follow model-specific steps and unplug first.
Watch Video
What to Remember
- Verify model compatibility before buying a lid.
- Unplug, inspect gasket, and clean the seating area.
- Align lid correctly to prevent leaks and ensure safety.
- Test with water before blending ingredients.
- Prefer OEM lids for the best seal and fit.