Blender 2D to 3D: A Practical Step-by-Step Guide
Master Blender 2D to 3D workflows: learn tracing, extruding, and texturing 2D sketches into polished 3D models with Grease Pencil, curves, and clean topology.

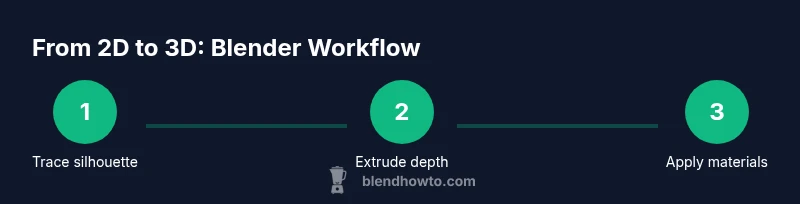
By the end of this guide you will turn 2D sketches into fully formed 3D models in Blender. You’ll learn to trace or outline your image with Grease Pencil, convert strokes to geometry, extrude depth, and apply materials and lighting for a convincing final render. No prior art experience needed, just patience and a Blender-ready reference.
Why Blender 2D to 3D matters
Blender enables artists to convert 2D ideas into 3D assets, a crucial skill for game art, animation, and product visuals. According to BlendHowTo, most home creators begin with a simple 2D reference and iterate into shading, depth, and form rather than jumping straight to complex modeling. The ability to translate line art, silhouettes, and hand-drawn textures into 3D space saves time during concepting and improves consistency across frames and renders. In practice, a robust 2D-to-3D workflow reduces back-and-forth, keeps design intent intact, and allows you to experiment with lighting and materials earlier in the process. This guide focuses on approachable techniques that work in Blender 3.x, using Grease Pencil for tracing, curve conversion for clean geometry, and standard modifiers to optimize topology. Whether you’re designing a character silhouette, a vehicle profile, or a logo-inspired object, a solid foundation in 2D-to-3D workflows unlocks faster iterations and more expressive results.
Core approaches to convert 2D to 3D in Blender
Blender offers several paths to move from 2D to 3D, and the right choice depends on your material, time, and desired final look. The most common approaches are: Grease Pencil for line work and sketch-based modeling; extruding 2D outlines or image traces into 3D shapes; converting accurate 2D curves into mesh geometry; and using image planes as reference to sculpt or model over. In practice, many artists combine methods: start with Grease Pencil to capture silhouette, convert to a mesh for topology, and then rework details with sculpt or mesh tools. BlendHowTo analysis shows that starting with a clear 2D plan improves reliability and reduces topology surprises later. Remember to keep references tight, use orthographic views, and maintain a consistent scale between 2D references and 3D space. Finally, plan for reuse: parametric elements like curves can be revisited for small edits without rebuilding from scratch.
Grease Pencil for 2D-to-3D workflows
Grease Pencil excels for tracing and sketching directly inside Blender. Start with a clean 2D reference image, set up orthographic views, and sketch over the silhouette. Convert strokes to fill regions if you need solid faces, then use modifiers to thicken lines or create extruded 3D ribbons. The technique shines for quick concepting and for creating clean, editable curves that feed later topology work. A smart practice is to keep Grease Pencil strokes on a separate layer, so you can hide or reveal them as you refine the 3D form. This keeps your workflow flexible and reduces clutter in the 3D viewport.
Tracing and extrusion workflow
A reliable 2D-to-3D pipeline starts with tracing the essential contours. Import a high-contrast reference image, lock the view to orthographic, and trace with Bezier curves or Grease Pencil strokes. Once traced, convert the 2D outline into a 3D mesh by extruding along the Z axis and adjusting depth to match your reference. Use multiple profiles for front, side, and back views to ensure dimensional accuracy. After extrusion, apply thickness and clean up extra geometry with the modifier stack. This approach gives you a sturdy base you can sculpt, retopologize, or remesh as needed.
Building 3D from clean 2D outlines
When you have clean 2D outlines, the next step is building a robust topology. Start from a low-poly base and use extrusion and edge loops to build form rather than sculpting every detail directly. Maintain quads where possible to ease UV mapping and shading, and use mirror modifiers for symmetry on characters or vehicles. If your 2D outlines are complex, consider converting curves to meshes in stages and retopologizing each section. Keep evaluation views in wireframe to spot topology issues early, and test via simple lighting to confirm depth and silhouette align with the original 2D reference.
Materials, lighting, and shading for 2D-to-3D results
With topology set, move to shading and lighting to sell the 3D illusion. Use neutral base materials for most objects, then layer textures for detail—painted textures for logos, hand-drawn textures for surfaces, or UV-driven textures for complex patterns. Lighting should emphasize depth: a three-point setup with a key light, fill, and rim can help separate the subject from the background. For painterly or cartoon styles, edge highlights and toon shading can preserve the 2D feel. Keep shadows soft enough to avoid washing out the silhouette, and render passes that emphasize outlines (Freestyle or sharp edge modifiers) to preserve the 2D-to-3D connection.
Optimizing topology and performance
Efficient topology matters when moving from 2D to 3D. Start with a clean quad mesh and minimize triangle count in hidden areas. Use modifiers such as Subdivision Surface sparingly, and consider retopology in high-detail regions to maintain performance during animation or real-time previews. Baking textures and normals can help with performance in engines like Unity or Unreal, while keeping a high-level mesh in Blender for editing. Regularly test in a viewport shading mode that mirrors your final render to catch issues early, and maintain a consistent scale to avoid distortion in textures.
Common challenges and how to fix
Common issues include depth mismatches between orthographic views, inconsistent outlines across views, and topology spirals around curved edges. Fix depth gaps by adding partial extrusions in problematic regions and aligning with the reference silhouette. If outlines diverge between front and side views, adjust the curve control points and use precision snapping. For 2D-to-3D rigs, ensure that the base mesh remains clean and that edge loops follow natural surface flow to avoid deformation later. The key is iterative refinement: repeatedly compare with references and test renders to curb drift early.
Quick-start project: 20-minute prototyping
Open Blender, load a simple 2D silhouette as a reference, and start a Grease Pencil sketch over it. Convert your sketch into a 3D mesh with shallow extrusions, then refine the form by adding edge loops and adjusting vertices. Apply a basic material and a directional light to see depth and silhouette. This mini-project demonstrates the essential loop: sketch, convert, extrude, refine, and render. Use it as a mental template for more complex designs.
Tools & Materials
- Blender software (latest stable release)(Install with default preferences; enable add-ons if needed)
- Graphics tablet (optional but recommended)(Helps with precise Grease Pencil input)
- High-contrast 2D reference images(Front, side (and back if available) views)
- Computer with adequate GPU/CPU(For smooth viewport and renders)
- Keyboard and mouse or pen tablet(Efficient shortcuts speed up the workflow)
- Image editing app (optional)(To adjust references before import)
- External storage or cloud drive(Backups of reference assets and projects)
- Optional: reference sheet with orthographic views(Helps accuracy during tracing)
Steps
Estimated time: 45-90 minutes
- 1
Prepare references and project
Import high-contrast 2D references and set up orthographic views (front, side, back). Create a new scene with clean units and a named collection for organization.
Tip: Label each reference by view and keep a consistent scale across views. - 2
Add Grease Pencil layer for tracing
Create a Grease Pencil object and place it in front of the reference image. Start tracing the silhouette with a sharp brush, using multiple layers for rough sketch and final lines.
Tip: Lock the view and enable snapping to image plane to maintain accuracy. - 3
Convert strokes to curves or mesh
Convert the traced outlines to curves or a mesh backbone. Ensure the geometry follows the silhouette cleanly before extrusion.
Tip: Keep strokes on a separate layer to allow easy edits without disturbing the base mesh. - 4
Extrude to create depth
Extrude the 2D outlines along the Z axis to create a basic 3D form. Adjust depth to align with your reference silhouette.
Tip: Use a mild extrusion first; preview from multiple angles to catch depth inconsistencies. - 5
Refine topology and symmetry
Add edge loops in key regions and apply a mirror modifier for symmetrical parts. Retopologize where necessary to keep quads and good edge flow.
Tip: Switch to wireframe view to spot overlapping faces or stray vertices. - 6
Apply materials and lighting
Assign base materials, set up a simple lighting rig, and test renders. Add subtle textures or toon shading to preserve the 2D feel if desired.
Tip: Render in cycles or Eevee with a small amount of ambient light to define depth. - 7
Iterate and finalize
Review against your references, refine shapes, and adjust camera angles. Save variations as different project versions for experimentation.
Tip: Keep a changelog of edits to track what changed between iterations.
Frequently Asked Questions
What is the best approach to convert 2D to 3D in Blender?
There isn’t a single best method; most artists start with Grease Pencil for tracing, then convert to mesh and extrude to form depth. From there, topology, materials, and lighting are refined. The choice depends on your project needs and the desired final look.
Most artists start with Grease Pencil for tracing, then convert to mesh and extrude to form depth. Refine topology, materials, and lighting as you progress.
Should I use Grease Pencil or build directly from curves for 2D-to-3D?
Grease Pencil is ideal for initial tracing and quick iteration. Converting to curves or meshes is better when you need clean topology for texturing or animation. A hybrid approach is common: trace with Grease Pencil, then convert for solid geometry.
Grease Pencil for tracing, convert to curves or mesh for solid topology. A hybrid approach works well.
How long does a basic 2D-to-3D prototype take?
A basic prototype can be created in under an hour, depending on complexity. A quick 20-minute exercise can establish a workable silhouette, with additional time for refinement and texturing.
A quick prototype can be done in under an hour; more time may be needed for refinement.
Can I reuse 2D-to-3D assets in animation or game engines?
Yes. Build a clean low-poly base, apply proper UV maps and textures, then export in a compatible format (OBJ, FBX). Baking normals and using simplified materials helps performance in engines like Unity or Unreal.
Build a clean base, UV-map, and export in standard formats for engines like Unity or Unreal.
What are common mistakes when converting 2D to 3D?
Common mistakes include inconsistent scale, poor edge flow around curved areas, and over-reliance on extrusion depth. Regularly compare with references and test renders to catch these early.
Watch scale, edge flow, and avoid over-extruding; compare with references often.
Watch Video
What to Remember
- Plan references before modeling to avoid drift.
- Grease Pencil is ideal for fast trace-based workflows.
- Convert traces to mesh early for stable topology.
- Texture and light to emphasize depth and silhouette.
- Iterate with simple renders to validate progress.